May 13, 2010

rechargeable batteries


having a baby monitor finally got me on the path to re-chargeable batteries. i KNOW. what took me so long? honestly it was the initial cost and then all the bad reviews of rechargeables that i read oh so long ago. but battery technology has changed by leaps and bounds - even in the last couple of years.

i broke down and bought an energizer recharger to charge batteries for the baby monitor. i was in line at walgreens - realized the three AAA's in it were about to die soon and i WAS NOT going to just buy more cheap batteries to keep throwing them away [ahem i mean recycle them. luckily where i live it's easy - you just put them in a plastic bag on top of your garbage can and the city recycles them. you can use this site to find a recycling spot for your batteries in the states].

i bought the sort of lame energizer re-charger that i spied amongst all the normal akaline batteries. i say sort of lame because it DOES work - i always have charged AAA batteries when i need them [1.5 weeks is about how long they last with how i use the monitor daily]. the lame part is that plugged in the charger has constant green lights. not green when they are finished charging, or green for a little bit, but green all the time. i leave the charger in the kitchen and since i need the batteries so often i have to admit i pretty much always leave it plugged in [because if i didn't i would forget to charge the batteries. i know this for a fact].

i tell myself that it is functioning as a night light - but i do feel guilty about the vampire drain and wish it shut off when the batteries were charged. but that's too complicated a task for my less than $10 charger. you get what you pay for... but i am happy that i have spared almost year and a half's worth of AAA batteries every 1.5 weeks. [that's 156 batteries if my math is right].


it's definitely time, though, to invest in a whole SET of batteries and a charger. the energizer will do AA's too, but i do have things around the house that need C's and sometimes even D's.... [flashlights, portable radio, the all important bubble making machine that my daughter loves]. i know that we'll probably have toys in our future that will need batteries too.

in my quest for better rechargeables i read this article . and am thus really contemplating the eneloop batteries pictured above. you can find a set of 8 AA's, 2 AAA's, 4 C's and 4 D's for under $40 with shipping. here's a list on amazon . that pays for itself after what only 8 packs of $5 batteries. not bad i think.

apparently this new generation of rechargeables holds their charge longer [even away from the charger] and the charger is smart and won't over charge the batteries. two problems i read over and over in complaints about older NiMH rechargeables. my only complaint is that there isn't a 9Volt option. we have a remote that uses a 9Volt and so i'll have to find an alternative for that.

if you want to read all about different kinds of batteries, how they work, and how long they last - i found this very technical [and yet readable] article.

anyone out there have any great rechargeable experience that they want to share??? i'm all ears. i think i'm going to make my final purchase decision by the end of the month. if anyone cares i'll try and post a post script to this post with my choice[s] and how i feel about them.

May 6, 2010

Mother's Day/ Gulf Oil Spill

This Sunday, May 9th, is Mother's Day in the United States and I would like to give a shout out to all the awesome & amazing mothers out there. There is nothing as challenging and as rewarding as being a mom.
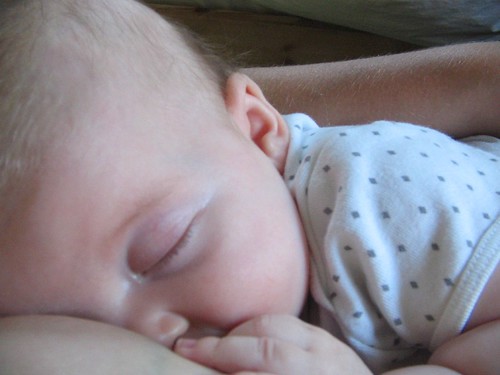
As children we love and take care of our mothers. As a mothers we take care and protect our children at all costs; we give them life & food [see above]. I believe that one of the best ways to take care of our children, and our children's children, is by taking care of the Earth, and it, in turn, will take care of us. Hence the name Mother Earth.
And here I was going to create a list of all the eco-friendly ways to honor our mothers, but in light of the recent catastrophic oil spill I would like to share some suggestions I have found of ways to help.

Please do what you can to minimize the damage to Mother Earth and make her a part of your mother's day celebration.
Cheers and Happy Mother's Day!

May 3, 2010

Brown matter

Did you know that most of the greenhouse gas emissions from landfill is the result of decomposing organic materials, which could easily be reduced by composting garden materials and food scraps? Apparently, about 50% of the waste in the average Australian garbage bin could be diverted from landfill simply by composting or worm farming. I found this out via the International Composting Awareness Week (Australia) website. This week (May 2nd to 8th 2010) is International Composting Awareness Week, and there are events here, there and everywhere (in Australia at least) to help spread awareness of the benefits of composting, and how to do it. This annual week event started in Canada in 1995. I found it quite hard to track down information on events there or in the USA (run by the US Composting Council) although I did find lots of composting links all over the Sates in this pdf.

Our household has been worm farming (or vermicomposting) for a few years now, and although I had noticed a distinct reduction in the amount of stuff that goes into our garbage bin, and appreciated the benefits it provides our back yard veggie patch, I hadn't realised that we were also doing our bit for greenhouse gas minimisation. Every little bit counts. If you don't have your own worm farm yet, take a read of Catherine's information packed post about it from earlier this year, or have a think about setting up a Bokashi compost system inside your home.

Now that our garden has taken shape and we have a small lawn to mow, and more plants to prune, I've realised that our worm farm can't cope with all of our decomposable waste. I've been telling myself for the last 18 months that we don't have space for a compost heap, but in the interests of reducing our waste further, and improving our garden's productivity, we're reconsidering some of the corners of the garden where things don't grow so well, and looking at whether we can set one up. There's a great article on "Building Compost Bays" article in the May/June 2010 issue of Organic Gardener magazine, although with rats present in our neighbourhood I think we might need to opt for something a little more compact.

April 15, 2010

baby epicure

tastybanana
scarfing down a dessert of bananas

There's nothing as much fun for someone who likes to cook as an appreciative eater. The Little Pea is a loud, lip-smacking, spoon-waving, groaning and mmm'ing appreciative eater - I've never cooked for someone so enthusiastic about their three squares a day. She makes it easy to be adventurous in the kitchen.

I've really enjoyed making baby food for her, and thought I'd share a little of the fun with you all. First, a couple of books that we love:

Simply Natural Baby Food, by Cathe Olson
Feeding Baby Green, by Dr. Alan Greene (love love love Dr. Greene!)

The first book is a great little cookbook for babies and toddlers. We were pleased to realize that you can feed a little baby just about anything (natural), as long as you prepare it properly for her. This book taught us how to cook all sorts of veggies and grains to make them safe and appealing for babies who are just starting solids, and well into toddlerhood.

Dr. Greene's book is one of those big advice books written by a pediatrician, but he is very down-to-earth (and all about saving the earth), and we were inspired by his adventurous approach to feeding little ones.

Since babies can't have salt, and since we don't tend to like our vegetables smooshy, the little one isn't eating much of our table food yet. But boy, is she eating diversely. We found that it's fun, easy and cheap to steam up a big pot of vegetables, puree them (when she was tiny) or cube them (so that she can practice feeding herself) and then use ice cube trays to freeze them in individual portion sizes. That makes it really easy to give her a very well-rounded meal full of interesting foods, with very little work.

I have to say that making your own baby food is also far cheaper than buying it at the store, and you get a lot more variety too (not to mention the ability to serve everything organic). We found that depending on the particular ingredients, home-made baby food is anywhere from one-third to one-tenth of the price of store-bought. And of course there's the environmental benefit of less consumption, packaging, transport, production energy, etc.

My partner was particularly inspired by Dr. Greene's book to try to feed our little one something from all 21 plant families before she turned one. The ones in italics are plant families she hasn't tried yet:

1. Mushrooms
2. Amaranths - spinach, chard, beets, quinoa
3. Umbrellifers - carrot, fennel
4. Cruciferous vegetables - broccoli, cauliflower
5. Bromeliads
6. Composites - lettuce (swiped from the garden beds)
7. Bindweeds - sweet potato - the all-time favorite!
8. Gourds - butternut squash
9. Heath plants
10. Legumes - peas and all sorts of beans
11. Lilies - onion
12. Woody trees - banana
13. Sesames
14. True grasses - oats, brown rice
15. Rosy plants - apple, peach, pear, plum
16. Citrus - lemon
17. Nightshades - peppers
18. Grapes
19. Laurels - avocado (best lunch on-the-go)
20. Myrtles
21. Loosestrifes

Hm, seven plant families to go. Perhaps we'll be having mushrooms, pineapple and tahini for lunch tomorrow. Yum!

April 9, 2010

Dig in!

pitchfork

if you are in the LA area and are in any way connected to a school (or community) garden come on down! it is sure to be worth your while...

April 8, 2010

Calling All Amateur Gardeners

Hello Sew Green readers! I'm Jennifer and I usually blog about vegetarian food over at It Ain't Meat, Babe. This is my first post for Sew Green so I decided to focus on my current non-cooking obsession: my garden. Enjoy!


My friend Shawn has been a gardener as long as I've known him. He comes from a family that planted, no joke, one hundred tomato plants every summer. And even when we were both in our early twenties, when all my other friends were more interested in booze and rock 'n roll, Shawn and his partner Katie were thinking about, talking about, and growing their own food.

For the past decade I've had sporadic container gardens. When my living situation allowed for it, I'd have some basil, lettuce, and tomato plants on the back deck. I always wanted to grow as much of my own food as possible, being very aware of the positive effects it would have on both the environment and my health. I liked those little container gardens just fine, but I dreamed of something bigger. Then I moved into a home with a vast yard and my lovely partner built a fence to keep the dogs out of the sunniest part of it. I finally had my chance. Last year was my first year as a full fledged, in-the-ground, gardener. I was terrified.

As anyone who has ever started a garden knows, it can be completely overwhelming. I didn’t know what to grow where, let alone which specific variety of organic tomato to order from which fancy seed catalogue. So, I played it safe and bought plants from a local nursery, not trying anything from seed. I found the thought of seeding my own plants wildly intimidating. With the plants from the nursery, I reasoned, all I had to do was keep them alive. Someone else had the daunting task of growing them from seed.

side yard with laundry

Truthfully, the selection of vegetable plants at the local nurseries and markets wasn't that great. And the food I grew was nice, but not as amazing as the heirloom vegetables I got at the neighbourhood farmer's market. It was enough to make me want to conquer my fears of seed starting as I moved into my second year of small-scale urban farming. I started reading up on how to seed my own plants.

One of the problems that a novice gardener faces is how to navigate a whole internet’s worth of contradictory gardening advice. Sites discussing seed starting were no exception. You need grow lights! You don't need grown lights! Start your seeds in paper towels! Just shove your seeds in the ground! Seed them in toilet paper rolls! Seed them in the largest pots possible! It was enough to make me put my head down on the table and weep.

Which is when I turned to Shawn. I figured with the years of gardening experience he had under his belt, he'd probably give me reasonable advice on the delicate art of seed starting.

He did. He told me one thing in particular that has been echoing in my head since I read it in the text of his advice-filled e-mail. The most important piece of advice anyone has given me since I began my gardening adventures.

He said, "Plants grow through f@#*ing cement."

In other words, relax. Plants know what they're doing.

Besides that priceless piece of advice, Shawn told me that for seed starting, a south facing window was going to be my best friend. Check! The window in our kitchen faces south and has a nice wide sill. He told me to get whatever potting soil mix I liked, then add my own compost (which, for our vegetarian household, is rich and plentiful), fill up some trays, cover them with one of those clear plastic domes, add water, and wait.

I nervously hovered over my seedlings for a few days, wondering if anything at all would pop out of all that soil. Then I forgot to check one day and by the time I remembered, about a dozen skinny green seedlings were poking their way up out of the dirt towards the light.


And that's where we are right now in this long and lovely gardening process. I removed the dome as soon as I saw green (also Shawn's suggestion) and I've been using a spray bottle full of water to gently dampen the trays of seedlings every day (again, Shawn). This weekend I planted another tray, this one full of basil seeds. I can't wait to see them start to poke up out of the soil. Finally, I'm confident that I can do this whole seed starting thing. I may be an amateur, but at least the plants know what they're doing.

-Jennifer

April 1, 2010

Green commuting


Here in the Northeastern region of the U.S., spring has officially arrived! We're supposed to see temperatures near 80(F) this weekend, highly unusual for this time of the year. In addition to getting my garden started, I'll be out on my bike. As you can read in my bio, cycling is a big part of my life.

There are lots of good reasons to bike: it's good for your health, connects you to your surrounding community, reduces the amount of your budget for transportation, and reduces impact on the environment. I first wrote about this at RocBike in 2007, but since this is my first post for sew green, I thought it would be a good idea to re-visit the green reasons for bike commuting.

According to The Consumer’s Guide to Effective Environmental Choices from the Union of Concerned Scientists, the 3 priority areas for consumers in reducing environmental impact are: transportation, food, and household operations. These are the 3 areas in which individual consumers can have the most impact, with transportation being numero uno.

The 5 specific recommended actions to reduce your transportation impact are:

1. Choose a place to live that reduces the need to drive.

2. Think twice before purchasing another car.

3. Choose a fuel-efficient, low-polluting car.

4. Set concrete goals for reducing your travel.

5. Whenever practical, walk, BICYCLE, or take public transportation.

The Earth Policy Institute reports that since 1970, bicycle production has outpaced automobile production, with bicycle production having quadrupled while car production has doubled. The report is optimistic about the potential of bicycling for reducing traffic congestion and pollution.

If you're an aspiring bike commuter, here are a few resources to help you get started:

--Bike Commute Tips blog by Paul Dorn.
--Ten Bike Commuting Myths Dispelled
--and there's always RocBike, which is especially relevant to those of us in wintry climes, but also expresses the sheer joy of bike commuting.

Finally, if you're concerned about safety, check out my post about how I overcame my own fear, after a near-miss accident involving my daughter.

I admire people who are completely car-free, and aspire to be one some day. But I haven’t quite figured out how to make that happen. However, I have been able to figure out how to live less than 5 miles from my place of work/study/yoga practice/spiritual community. I bike, walk, or bus whenever feasible, but since I do have access to a car, I have some guidelines about when I'm "allowed" to drive, which include circumstances such as extremely inclement weather, work-related reasons to drive, illness, and carrying very heavy loads.

What about you, our readers? How do you "green" your commute? Any other bike commuters out there? I'd love to hear about your experiences in the comments, as well as any suggestions for future transportation-related posts you'd like to see here at sew green.

March 25, 2010

Worm Keeping for Beginners


A year and a half ago, my partner and I went to a workshop on vermicomposting. We came home with a bin, worms, and heads full of knowledge. We were prepared. We were excited. We were in for months of fruit fly invasions, swampy smells seeping up from our basement, and various other surprises. Like slugs. And slimy mould.

But we survived and so did the worms. Those little critter are so prolific that last month I gave away 7 litres of them to good homes. I also gave lots of advice. Here are the basics for starting your own worm compost bin.

Reasons to Vermicompost
  • It can be done anywhere as the worms don't take up much space.
  • Valuable resources are kept out of the landfill and it helps reduce greenhouse gases.
  • Your garden will love you!
  • Worms are quiet, low maintenance and actually quite interesting.
  • Worms work fast, so you'll have compost in no time.


Feeding Your Worms
Red Wrigglers will eat most kitchen waste. Any fruit or vegetable waste that you generate during food preparation can be used, such a s carrots, lettuce, cabbage, celery, apples, banana peels, and tea leaves and bags. Citrus peels, coffee grounds and tomatoes can be added, but only in moderation, as they will acidify the bedding. Adding dried crushed eggshells will help to control acidity, and will also provide the worms with valuable nutrition. The worms are even interested in very small amounts of such leftovers as spaghetti, grain cereal, bread and pancakes.


NOTE: Avoid feeding your worms meat, fish, bones, dairy products and oily foods. These foods will cause odours and attract unwanted insects. Garlic, salt, vinegar and spicy leftovers should not be added, nor should large quantities of onions. These foods can hurt the worms.


Climate and Temperature
Red Wrigglers prefer temperatures between 15 – 25°C. Lower than 10°C or higher than 30°C can result in death. I've been told that red wrigglers can be added to your outdoor compost bin, but I haven't tried this yet. They will apparently move to the areas of the bin that aren't too hot, though in some climates, I think the temperature would be too much for them. They will not survive the winter in cold climates, but their eggs should, and they will hatch baby worms the next spring.


Bedding
It is necessary to provide a bedding for the worms to live in, and to bury food waste in. Suitable bedding materials are shredded newspaper and cardboard, shredded fall leaves, chopped up straw and other dead plants, seaweed, sawdust, compost and aged manure. I usually use either shredded newspaper or chopped up cardboard egg cartons, since we have both around the house. I don't use glossy magazine or flyer paper, though I'm not sure if that is really a no-no, or if it just seems more toxic to me.


Harvesting
Divide and Harvest: Shift all the old bedding, castings and worms in the bin to one side. Add fresh bedding to the other side. Bury fresh scraps in the new bedding for a few weeks, and keep the new bedding covered. Leave the old bedding uncovered. Check after a week or two; the worms will have migrated to the fresh bedding. Harvest the compost then fill the empty side with fresh bedding. This only works well if you do it regularly. If you get too much compost in the bin, the next method works better.


Dump and Hand Sort: Place a large sheet of plastic on the floor or on a table. Dump the entire contents of the bin onto the sheet. Shape the compost into cone-shaped mounds. Shine a bright light above the mounds; this will drive the worms toward the bottom interior of each mound. Wait 5-10 minutes then gently scrape off the layers of compost until all you have left is worms. (You may see tiny, lemon-shaped cocoons; these contain baby worms, so be sure to add them to the new bin.)


Troubleshooting
Smells: When the lid is on, a well-maintained bin is odorless; when opened, it should have little smell - if any, the smell is earthy. Worms require gaseous oxygen. Oxygen can be provided by airholes in the bin, occasional stirring of bin contents, and removal of some bin contents if they become too deep or too wet. If decomposition becomes anaerobic from excess feedstock added to the bin in wet conditions; or layers of food waste have become too deep, the bin will begin to smell like ammonia.


Moisture: If bin is too wet, the smelly, excess waste water must be removed and the bin returned to a normal moisture level. To do this, first reduce addition of food scraps with a high moisture content and second, add fresh, dry bedding such as shredded newspaper to your bin, mixing it in well. If the bin is too dry (not a common problem), then lightly moisten the bedding before adding it. To control both moisture levels and fruit flies, I freeze everything first, then thaw it, drain off the moisture, and then add it to the bin. We also have our bin set up on and angle, and drain the compost tea from the one corner using a turkey baster. If you are just setting up a bin, then get two containers. Drill holes in the bottom of one, and then set it into the other. Make sure it is a tight fit, or you will have fruit flies.


Pests:  Fruit flies breed in the bins if fruit and vegetable waste is not thoroughly covered with bedding. This problem can be avoided by thoroughly covering the waste by at least 2 inches of bedding. Maintaining the correct pH (close to netural) and water content of the bin (just enough water so that the compost is like a squeezed out sponge) can help avoid these pests as well. Slugs can also be a problem if outdoor leaves or grass clippings are added to the bin. Slugs found in the bin can be picked out and disposed of. Do this regularly until no slugs appear. To avoid slugs, do not use outdoor materials.


Worms escaping:  Worms generally stay in the bin, but may try to leave the bin when first introduced, or often after a rainstorm when outside humidity is high. Maintaining adequate conditions in the worm bin and putting a light over the bin when first introducing worms should eliminate this problem.


Preventing die-off: Worms will regulate their own population according to the conditions of their environment. These conditions include space, moisture, pH, temperature, bedding material, and amount of food, among others. A typical household worm bin might start out with one pound of worms (approximately 1,000 adults), which will soon multiply to 2,000–3,000 if conditions are good. Conversely, if one or more of the above conditions are unacceptable, the worms may “crawl” (leave the bin) or die off. Maintaining adequate moisture and harvesting the compost before the bin gets too full are the most important things to do to prevent die-off.

March 18, 2010

Spring Greening


March. I love this month. It's filled with birthdays, the first warm sunshine of the year, birdsong all day long, and fresh green shoots. The 20th is the Spring (or Vernal) Equinox this year, the official beginning of spring in the northern hemisphere. At last! This is a month of change, and a perfect time to make and break some habits.

In light of this, (and because this is my first post and I want you to get to know me better!) I thought I'd let you into my mind a little today. Being a maker and trying to be green don't really go hand in hand - after all, the things I make are luxuries. Frivolous. Unnecessary. So I try to use the greenest materials I can and create the greenest product I can, but where do I begin? There's so much conflicting information -- have you heard, for example, that bamboo fabrics are not all that green? That's not to say all bamboo products are bad, it just has to be used in the right way to be earth friendly.

It's so important to question the 'evidence' we're presented with, and to keep researching - this time six months ago I'd have been happy to tell you that bamboo fabric is a perfectly acceptable eco-product!

So I thought I would share with you the process I go through when picking my materials. It's simply a list of questions that I try to answer to help me determine "green" from "green-wash". (I'm sure this will be nothing new to many of you, but a refresher never hurts, does it? :) This can be applied to any product. It's not comprehensive, or in any kind of order. And these definitely aren't rules. This is merely a guide to keep me thinking, questioning and making better decisions. I hope it can do the same for you!

Who made it?
More of an ethical issue than an environmental one, but it's important to consider, particuarly as so many companies use cheap foreign labour for their products. Often they don't know enough about their own manufacturers, who could be employing children, providing unsafe work environments, and underpaying their workers. Fair trade is great - it means that the "little people" behind the product are given a living wage (i.e. enough to provide food and shelter for their family), given a safe working environment and helps make sure the vulnerable aren't being exploited.

Where was it made?
The country of origin can help you answer the previous question, but there are other things to consider. Some countries can legally produce items with substances which are illegal (for good reason) in your country. (Remember those big toy recalls a couple of years ago?) That doesn't make these manufacturers evil, as essentially they're just doing what they're told! Then you need to consider air miles -- how far has this product had to travel to get into your hands? Transport uses fuel, which causes pollution, which causes all kinds of hell for Mother Nature. This can have a huge environmental impact. The more local, the better.

Hemp & organic cotton bag using fair trade materials

What is it made from?
Sustainability is key. True sustainability means the product fits within nature's cycle - no harm is done to the environment when it is made, used or disposed of. Most 'sustainable' products fit into a grey area, where they fit some of the criteria but not all. Classic examples of sustainable materials include hemp and bamboo - they grow fast and organically (without use of pesticides), and are versatile and durable. Often, though, that's the extent of it. Substances used in processing these materials sometimes means that they can't safely biodegrade - but they can still be better than many alternatives!

When will it reach the end of its life?
We all know that disposal is a big issue. But to an extent, as consumers, we can control how much we send to landfill or throw in the recycling bin. Avoid anything over-packaged (i.e. anything that has more packaging than necessary to get it into your hands undamaged). Buy things to last. Save up your pennies and buy the best: quality over quantity. Then look after what you've got! Your jeans have a hole in the knee? Patch it. Broke your favourite mug? Mend it. Be inspired by the Japanese art of Kintsugi, find the beauty in old things and treasure them!

How do you use and care for it?
Most of a products environmental impact lies in how it is treated by the consumer. Clothes are a particularly good example. How often you wash your clothes, at what setting and using which detergent are all factors that determine the size of an individual item's environmental impact. Try to choose products which don't need too much of this kind of care.

Why do you want it?
This is probably the most important question! If you can talk yourself out of an unnecessary purchase, you're doing good for the environment. Ask yourself if you need it, if you'll really use it, how and where you will store it, could you buy a second hand version instead, what else could you spend the money on? Think thrifty. Learn to value old over new, you'll be surprised how satisfying it can be. But most importantly: value what you already have. Don't replace anything with a 'greener' option if all you're doing is creating more waste!

So, what are your tips for sussing out green from greenwash?

P.S. apologies for the terrible title pun ;)

March 11, 2010

Shopping baggage


Late last year I read about a study that made me start to think a lot more about our use of shopping bags. We’ve been using the ubiquitous (in Australia, at any rate) green polypropylene shopping bags for our grocery shopping for years now, but the Woolworths Shopping Bag study, by RMIT’s Centre for Design, made me start thinking about all the bags we consume when we buy or receive goods.  The study looked at the whole life cycle environmental cost of a number of different types of retail shopping bags (paper and several different plastics), taking into account the production of the raw materials and manufacturing of bags from those raw materials, transport, use and ultimate disposal of the bags.

The study concluded that reusable bags had lower impacts than single use bags, but these benefits were highly sensitive to the number of times a bag was re-used. Not a surprising discovery, but more surprising was the fact that despite having the lowest impact on litter, and being made of renewable resources, paper bags had the highest environmental impact due to the energy embodied in their production. You can read more about the study and conclusions here and here. Since reading that, I’ve been carefully hoarding any bags (especially paper) we receive for re-use, and giving a bit more thought to the kind of bags we do use, or perhaps could use.

The shopping bags we use are polypropylene, which is recyclable when they reach the end of their useful life. In theory that is. In practice, I was surprised to learn here that because the thread used to make them isn’t recyclable they have to be unpicked by hand, they need to be shipped from Australia to China, where labor is cheaper, to make recycling economically viable. This is a great example of the fact that even though something may be recyclable, the process of recycling (if and when it is disposed of in a way that enables recycling) is not without environmental cost (and may well have some ethical issues too).

Perhaps I’m a tad cynical, but I do feel that recyclability is increasingly becoming an easy green-washing feature for advertisers, with a whole heap of ifs and maybes being swept under the carpet, out of the consumer’s sight. I guess it’s up to each one of us to consider why we choose the purchases we choose, and to be satisfied in our own minds that they are worthy justifications based on the best information we could access.


But back to bags- there are certainly some opportunities in the shopping bag arena for some environmentally beneficial creativity. First up, if you are lacking reusable shopping bags, make yourself some shopping totes that suit your needs- perhaps something that folds up nice and compact, a big roomy bag, a retro crochet bag (link to .pdf), or whichever size and shape you might need, perhaps re-purposing materials you have on hand (ideally natural materials such as cotton that will decompose at the end of their useful life). Second up, make sure you have them on hand when you go shopping, and use and re-use them for as long as possible.


Our household already has a useful stash of shopping bags, and are in the routine of using them, but I realized we could do with some reusable produce bags. Although we re-use them a lot of the time, I found that we were always coming home with a few more plastic produce bags every time we bought our fruit and veg. Inspired by some handmade mesh produce bags I saw on flickr, and this tutorial from Wisdom of the Moon, I hit our local second hand shops and found a sheer mesh curtain to re-purpose. One evening with my overlocker (aka serger) later I had a set of 10 mesh bags.

I sized them to minimize wastage from the materials I had, and to keep them similar to the plastic produce bags I’m used to, using some cotton yarn for drawstrings. I’ve been trialling them for a couple of weeks now and am really pleased. Responses from cashiers has varied, from the ditzy supermarket checkout chick who wondered if I wanted her to take the produce out to weigh it (Umm, no- that’s fine, they weigh next to nothing), to the ladies at our regular market vendor who remarked how nice they were (Oh thank you!). The only drawback is that we are now dependant on plastic containers to keep our veggies fresh in the fridge. At least they're re-usable, but I do wonder if there is a bag I could make for this purpose... Any suggestions?

March 4, 2010

Meatless Monday

While I have flirted with vegetarianism all my life I admit I enjoy eating meat. In university, I worked my way through Linda McCartney's Home Cooking, but by graduate school, and after being diagnosed with anemia, I started to eat meat again. I hoped with a more thoughtful approach.

Where does this come from? Did it live a "good life" before coming to my plate. I am trying to instill these same ideas in my girls. I am also working to reduce the meat we do eat. We try to mix it up. Fish, poultry and red meat are not strangers at our table. I am fully aware of the horrors of factory farming. I want to eat more meatless meals and slide a little away from our routine. My goal this year has been two meatless meals added to our weekly repertoire.

My catalyst is three-fold, really: compassion for living things; impact on our health; and the impact meat consumption has on the environment.

In my quest for ideas, I learned of Meatless Monday:
Meatless Monday, along with Wheatless Wednesday, were initiated as a World War I effort by the U.S. Food Administration to encourage Americans to "do their part" in aiding the war effort by reducing the consumption of key food staples. In 2003 the effort was recreated by the Johns Hopkins Bloomberg School of Public Health’s Center for a Livable Future to help Americans adapt to a healthier lifestyle. With an endorsement in 2009 by Sir Paul McCartney - and in turn Gwenyth Paltrow at GOOP - a movement is being built. (Check out the Meatless Monday website for lots of great ideas.) We have added to that "Soup Saturday" (a vegetarian soup) - which I can see morphing into "Salad Saturday" come summer (hopefully inspired by our own garden).

My family - mostly my husband and youngest daughter have made a few groans - but no real complaints. My challenge is two in the house with soy allergies - that makes it tough - and keeping it varied. Lots of lentils in the cupboard!

red lentil soup

So, what vegetarian fare scores high on your table?

February 28, 2010

end junk mail + usda letter by this wednesday


two actions for you

1. if you want to stop getting credit card offers (for 5 years or forever!), check this out from the FTC. there's also a lot of info about stopping other kinds of junk mail here, but i don't know who sponsors this info. seems good though.

2. the usda is accepting public comment about GM alfalfa until this wednesday. here is the USDA email page. here is some wording from credo:

I am writing in regard to Docket APHIS-2007-0044, and I demand that the USDA reject Monsanto's application to market genetically engineered alfalfa. The USDA may not believe it matters if GE alfalfa contaminates organic and other non-GE crops, but I certainly do.

Consumers must be able to avoid genetically engineered products. Farmers must be free of the threat of contamination and the USDA must not put organic farmers' livelihoods at risk. The USDA admits that approval of GE alfalfa will make transgenic contamination inevitable. This is unacceptable.

Therefore, I urge you to reject Monsanto's application to sell genetically engineered alfalfa.

here is more info from credo on the matter. (you can also send your email through the credo site, but then you get added to email lists.)

February 25, 2010

spring napkins


in the few warm days we had last week, i started daydreaming about outdoor fika and picnics, complete with china and cloth napkins.

for the ridiculously longest time, i've been meaning to use cloth napkins at home. i'm usually just cooking for myself, and i often don't use any napkins, so i've put off buying/making napkins.

a couple of times i have almost bought these beautiful hand printed napkins from linea carta. my friend jen has these cute ones from wonder thunder. but i figured i should use some of the fabric i already have. from my stash i sewed these napkins for my parents for christmas. it's fun to give something useful that will also hopefully lead to less paper towel usage.

finally this weekend i made these pinkies for myself. the floral side is cut from a thrifted pillowcase. the other side(s) from left-over quilting fabric. i like to mix floral and geometric patterns.


although i have made quite a few quilts, i am a terrible sewer. i don't know the names of stitches, and i pretty much only sew (somewhat) straight lines with the default stitch. (occasionally i'll go crazy and zigzag). my point is that you don't need to be a seamstress to make these.

1. cut two squares (or rectangles) of fabric.
2. pin the sides that you want to eventually be on the outside against each other (right side facing in).
3. sew a line around the edges of all four sides (about a quarter inch in from edge), leaving a space at the end of one line so that you can turn the square inside out.
4. turn it inside out.
5. iron it. (i often skip this step, because as you can see, i'm not a perfectionist when it comes to sewing.)
6. sew four more straight lines around the edges (tucking in the open parts—no hand sewing required!).
voila.


i am sure there are more elegant ways to make napkins, but this is a pretty easy option.


did you see stephanie of 3191's simple, yet classy indigo napkins?

cheers and happy fika-ing with cloth napkins!

ps. check out how seattle rocks with their big urban gardening plans!


February 18, 2010

brown bagging / bento


one of the things i've been thinking about lately is how to pack food economically and safely and in a more environmentally friendly way. it's no secret that packing a lunch is a great way to make sure you know what you are eating and to save money. with my little girl it's also becoming increasingly important to have snacks available at all times ! [nothing like being able to pull out a healthy cracker when she signs eat in line at the drugstore].

i'm trying to avoid using plastic bags of any kind - even ones like evolve - ziplock's "environmentally friendly" bags. i do use recycled content kitchen trash bags - which i feel guilty enough about.

anyway - above is a wrap-n-mat which you can use to wrap a sandwich or snack.


granted, you could make one of these yourself [i was thinking maybe oilcloth would be a good thing to try it out of - double sided] - but i spied these in a store and couldn't resist the ease of purchasing them. i do like how they disclose that some of their product is made in china, and that they have versions that are made in the USA. they also use a plastic for the lining that is BPA, lead, and phthalate free. [more info here ]

they work really well - keep leaky peanut butter and jelly from getting on anything else and are easy to clean up. they also double as a place mat - which can come in handy. if i end up actually trying to make any i'll try and post a tutorial.


i also really like boon's snackballs. they are stylish, hold a lot for their size, and double as a distraction toy with the little if need be.

my husband and i are also just a little bit into japanese bento boxes. we've collected quite a few and my husband actually uses them quite often to take leftovers to work. i wonder if i'll be able to make great bentos for my daughter when she goes to school [i have a few years to practice]. if you just want to be inspired by bentos - try just bento . or if you want all the gear - lunch in a box has a great online store list .

anyone out there have any great brown bagging tips?? [minus the brown bag of course]

February 11, 2010

Eco-VDay

Valentine's Day giving typically consists of cards, chocolate, roses, & jewelry. While nice, those items can have a pretty serious environmental impact when done en masse. Here are some environmentally friendly and socially conscious alternate suggestions to make your Vday non- corporate and meaningful.

Cards:

"The U.S. Greeting Card Association estimates that approximately one billion valentines are sent each year worldwide, making the day the second largest card-sending holiday of the year, behind Christmas." [source ] That's an enormous amount of paper used, and subsequent trash created. So instead of sending a card, plant a tree. Tree Greetings has an ecard that plants a tree per sale [link has sound]. Arbor Day also plants a tree for cards, even though it does offer a paper card.

Or go to your local nursery and pick up a tree to plant.
On my parent’s first anniversary, my dad gave my mom a baby tree to plant in the yard; when they moved, 25 years later, it was the tallest tree in the neighbourhood. That tree represented their relationship and growing love. How's that for a love metaphor? Advice on how to plant a tree can be found at Tree People.

100% post-consumer waste paper is also an option if you want to send a card, but a lot of that paper is bleached using chlorine. So look for cards labeled PCW [post-consumer waste] and PCF [processed chlorine free].

Chocolate:

Unfortunately for chocolate lovers, according to Tree Hugger, "most chocolate sold in the U.S. comes from cocoa farms where farmers work in unsafe conditions, receive below poverty wages, many of them children under 14 years old who are forced to work and denied education". Typically, any factory that does not respect workers, does not respect the environment. Make sure any chocolate you buy is certified fair trade. Global Exchange has several fair trade boxes here and I have heard wonderful things about Equal Exchanges chocolate, but I am not a huge chocolate lover so I don't have any personal recommendations, so please leave yours in the comments.

Roses:

Flowers are tough- I love cut flowers and I love a good flower arrangement. Unfortunately flowers have 50-1,000 [In California!] times the pesticide use allowed in food. The Environmental Working Group reports "There are no regulations in the U.S. governing the use of pesticides on cut flowers, and therefore, importers are not required to monitor pesticide levels." Since flowers are not food [to humans], they are completely unregulated; flowers are expected to be "pretty" and bug-free making the use of pesticides rampant. Not a very rosy situation. What makes it worse is that "Studies show that women -- who represent 70 percent of all rose workers - - have more health problems since many sort the flowers without wearing masks or latex gloves. Children under 18, who make up more than a fifth of the workforce, display signs of neurological damage at 22 percent above average." From Organic Consumers. And that pesticide flows right into groundwater and air- spreading through ecological systems before it gets passed on to the consumer.

Solution? Buy organic flowers. I found a few venders here, here and here. You can also go to your local nursery and pick up seeds to plant your own organic flowers that can be enjoyed all year.
Or you can you join a CSA and enjoy edible plants all year long. That is a delicious & healthy gift that keeps on giving.

Jewelry:

Diamonds are extremely controversial. From Amnesty International: "Some diamonds have helped fund devastating civil wars in Africa, destroying the lives of millions. Conflict diamonds are those sold in order to fund armed conflict and civil war. ...Wars that have cost an estimated 3.7 million lives." Right now there is no safe way to guarantee that a new diamond is not a conflict diamond. Here are some alternative suggestions:
Vintage jewelry- Vintage pieces are gorgeous and have a history [hopefully unlike the conflict diamond]. If you can keep it in the family even better. Not only green & sentimental- but the vintage styles are classic and gorgeous. Try your local thrift or antique store to find the perfect piece.

Etsy has tons of handmade jewelry- and a lot that use recycled materials. I started searching and got lost in a web of awesomeness. Again, leave any specific recommendations in the comments. To do:

Now that gifts are covered, here are some suggestions for you and you loved one [inlcudes pets & children] to do:

Donate your bras. Instead of buying new lingerie clean out your bra drawer and send them off to be donated and repurpurposed with The Bosom Buddy Program. I have always been wary of donated bras to thrift stores since I feel that they will get tossed and not sold. With this program you are sure that your ill-fitting, or nursing bras will go to someone in need.

Give Blood. You can save a life by donating blood. Make this an annual v-day tradition, and replenish with some fair-trade chocolate afterwards.

Find a local V-Day theater performance. The proceeds from your ticket supports local anti-domestic violence organization. "V-Day is a global movement to stop violence against women and girls. Through V-Day campaigns, local volunteers and college students produce annual benefit performances of The Vagina Monologues, A Memory, A Monologue, A Rant and A Prayer, and screenings of V-Day's documentary Until The Violence Stops, to raise awareness and funds for anti-violence groups within their own communities." Visit the website for performances in your area, or start your own.

And finally, volunteer or donate money that would have been spent on flowers or gifts. Domestic violence is the opposite of love and this is a perfect time to volunteer at a local shelter or donate. From the American Bar Association, "Approximately 1.3 million women and 835,000 men are physically assaulted by an intimate partner annually in the United States." The National Domestic Violence Hotline offers a Valentine's Card for a donation; you can always donate and skip the card. Find a local shelter in your area and see if they need volunteers. You can also volunteer for a local V-Day performance [see above].

So that was an exhaustive list but I hope you are inspired to make this Valentine's day more green & sustainable.


*Images of hearts cut from my daughter's drawings.

February 8, 2010

make a sock monster draft-blocker

{cross posted from f.pea}

Many days on end of cold, wet, icy weather have led to short bursts of creativity around here with the materials we have on hand.

dyrrwurm

Dyrrwurm is now guarding our back door, keeping out the nasty, cold draft that was coming in under our vintage 1952 door (which really ought to be replaced with a more insulated model). He was made from two pairs of identical socks that HWWLLB gave me recently for the purposes of sock monster making. Before his reincarnation as two pairs of men's socks, Dyrrwurm lived at the back door of the land of the giants, in the far, far north, where his hobbies included writing epic poetry, collecting pictures of his idol, the Earth Serpent, keeping out the cold draft, and doing pedicures for his dragon friends.

You can make your own door dragon - it's quite easy, even for sloppy, inexpert sewers like me. This project was done in two bursts - it took me one naptime, and one visit from the Little Pea's favorite Auntie to complete. You will need:

- 2 pairs of heavy socks in a dragoney color
- matching thread
- sewing machine
- a few pins
- polyester fiberfill or some other stuffing (rags are fine too)
- something heavy for inside - I used sand, but you could use dry beans, rice or pebbles
- four or five repurposed plastic bags to hold the heavy stuff

My door dragon is only three socks long, since my door is narrow. But for a standard-width door, you will need to make the dragon four socks long.

door monster tutorial 2

Cut the toes off all the socks except one - this will be the head. Sew the socks together cuff-to-toe, right sides together. Try to keep them lined up so that all the heels are basically running in one line down the dragon's back. Turn right-side out and admire your long, wiggly new friend.

door monster tutorial 7

Starting at the head end, put a small amount of stuffing inside each heel, flatten and pin down. Then sew the heel shut to make a fin. You can add some decorative stitching as I did to make it more fin-like. Repeat for each heel.

door monster tutorial 1

Use one of your cut-off toes to make front flippers if you like. Lay the toe flat and cut it in half up the middle. Turn inside-out and sew it into a triangle, leaving an open gap for stuffing. Turn the flipper right-side-out and stuff with a small amount of stuffing. Smoosh flat and sew shut. Add some decorative stitching to flatten the flipper and make it fancier.


Turn the dragon inside-out again. Cut a hole on each side of the foremost sock. Stick the flipper through so that the flipper is now "inside" the dragon and the sewn-shut edge is facing towards you. Sew the flipper into place. Once you have the flippers in place, turn right-side-out again.

door monster tutorial 8

Stuff the head firmly with stuffing, but leave the body un-stuffed. Isn't he cute?

Get out your heavy stuff - sand, dry beans or rice, pebbles, whatever you have on hand - and put a bit inside four plastic bags (repurposed bread bags worked nicely for me). Tie them each tightly. Pull one into your dragon, all the way up to the head, and secure in place (you can sew it or be lazy like me and use a safety pin). Use your stuffing to lightly stuff and shape the dragon around that heavy bit. Repeat with each bag of heavy stuff until your dragon is fully stuffed (and heavy). Leave the heavy stuff out of the very end of the tail if you can. Now your dragon will lay heavily in place on the floor.

door monster tutorial 5

Stuff the tail end very lightly with stuffing. Sew the tail shut across the final sock cuff. Add some fancy stitching to make the tail flatter and more tail-like. Embroider on a face if you like. Enjoy the new absence of a draft under your back door!

door monster tutorial 4
honey, you need a pedicure!