Showing posts with label DIY. Show all posts

December 9, 2010

Gifts for your favorite bike commuter


Here in the U.S., over-commercialized gift-giving season is in full swing! I thought I would share some unique gifts for the bicyclist in your life (even if that's YOU!). (None of these organizations/individuals even know that I am writing about them, and I have not received-somewhat regretfully-any payment from them for my comments.)

You could always start with the not-so-subtle hint on the Christmas stocking pictured above, made by etsy seller PursuitsofHappiness.

Once you get that bicycle, perhaps you'd like to add a bicycle cargo trailer. (Another not-so-subtle hint: I really want one of these!). They're on sale over at the Bike Shop Hub. I've ordered other items from Bike Shop Hub and always received prompt and efficient service.

If you're more of the DIY type, head over to Planet Green for some plans to make your own trailer.

This fall, I treated myself to an Ortlieb bicycle briefcase, fully pictured and reviewed at Ecovelo. I pretty much agree with their review, with the one caveat that the bike rack hardware can get a little uncomfortable when one is carrying the briefcase across a college campus.

You could also follow in the footsteps of Jody at that which rolls and make your own panniers out of kitty litter buckets. I love the concept, but I would look even funnier carrying that across a college campus.


(picture from Cyclelicious.)

Along with constant reminders to shop or else our economy will go to hell in a handbasket, this time of year brings cold, snow, and ice to many regions in the U.S. Yes, Virginia, you can bike in the winter. My compadres over at RocBike have lots of tips. In addition to the link provided above, type "winter biking" into the search engine there and you will get lots more tips and tales.

One item that many RocBikers have found useful in this time of shortened daylight is the DownLow Glow. (I wouldn't mind one of these in my stocking either.) You will definitely be visible in midwinter darkness with these mounted on your bike.

For the first time this year, I have studded tires for my bike. Now, I haven't actually had the time to put them on the bike, even though we have about a foot and a half of snow on the ground, but this weekend it will happen! I was sold on studded tires by Adam Durand and Jack Bradigan Spula, also of RocBike fame.

I purchased mine, but apparently you can make your own. Who knew?

One more winter bike necessity that would make a great gift are fenders. They keep that stuff on the road from ending up on your back.

For more DIY ideas, try the bicycle repair stand at Instructables. Or, head over to Cyclelicious for a whole bunch of ideas, including a sew-your-own bicycle cap, shoe covers from old conference bags (I for one have way too many of those), and a bicycle Ipod charger.

Happy whatever-you-celebrate! (Me, I mostly celebrate the end of the academic semester!)

December 3, 2010

Happy Hanukkah!

Happy Hanukkah to those that celebrate! And happy December to those that don't!

I create a little craft tutorial on my blog for a Jewish star garland using origami stars. I used found origami paper, but I think these would be awesome to make from old magazines or newspapers destined for the recycling bin. You can view the image in more detail on flickr .


Cheers!

August 13, 2010

Make yourself un-stinky!


I have been reading about handmade deodorant for a few years now, but was always a bit skeptical. Each recipe seemed to involve melting stuff, or buying bulk ingredients to use in small amounts- not super practical. I have been off the traditional antiperspirant & deodorant for a long time since it is full of scary stuff like aluminum, phthalates & fragrance [See Secret Wide Solid's rating at Skin Deep] which is liked to neurological problems, cancer and reproductive toxicity. And there is an excessive amount of plastic used for each tube. Instead I used Trader Joe's deodorant which was pretty safe, eco friendly, and cheap. I saw no reason to make things more complicated for myself.


But here's the catch: I loved the Trader Joe's deodorant, and Toms of Maine, and other non-toxic deodorants I have used BUT they don't really work that well. I feel bad saying it, but they quit by the end of the day. I just assumed that was the nature of using non-toxic deodorants and have lived with it for far too long. Until now.

I came across this recipe, from this website and I had all the ingredients in my kitchen already. Plus there was no heating involved. But what really caught my attention was the rave reviews. And I am here to add to those reviews.

Let me say it loud and clear: THIS STUFF WORKS FOR ME. And it works all day, and in to the next. In fact, since I switched, I have not had one single moment of smelliness. Total awesomeness. 

UPDATE: There is an instructional video and FAQ from the og website here: http://www.passionatehomemaking.com/2013/01/homemade-all-natural-deodorant.html


Homemade Amazing Deodorant:
Adapted from Passionate Homemaking

The original recipe calls for either corn starch or arrowroot powder, but since I had both, I used both. Some folks complained about irritation in the comments due to the amount of baking soda- and found that using less helped. I have had no problem with the amount of baking soda so I will continue with these proportions. Also the coconut oil can go from solid to liquid depending on the storage temperature. Mine stays at a perfect semi-solid in my bathroom, and melts to an oil when I rub between my fingers.

5-6 tablespoons coconut oil
1/8 cup arrowroot powder
1/8 cup cornstarch
1/4 cup baking soda
Several drops of bergamot oil [optional]

Mix the powders together in a jar and slowly add the coconut oil until you have a "pomade" consistency and powders are mostly dissolved. Add a few drops of oil until it has a lovely hint of scent.


To use, scoop out a pea sized amount and rub between your fingers to melt and create a smooth texture. Apply under your arms and rub any left into your hands as a moisturizer.

Since the coconut oil changes rapidly from a solid to a liquid I would not recommend trying to use a traditional deodorant "stick" but rather to scoop from the jar.

If you are at all hesitant about making your own, this is the recipe that will win you over! Non toxic, plastic free, sustainable, and extremely effective. Total win-win.

Cheers!

EDIT:
I would like to answer some questions from the  comments.  Please note that I am not a deodorant expert in anyway.  I found this recipe on the internet and have been using it for 3+ years.  I am just sharing & reviewing my experience with the recipe.  Click the links above for the original recipe and read through the comments for more information.

Does the coconut oil cause oily stains on your clothes? 
I haven't had any problems with staining.  Test it out on an old shirt and let it dry first if you are nervous.

Just for clarification, this is just a deodorant, not an antiperspirant, right?
Yes, this is more of a deodorant than an antiperspirant BUT I have noticed considerably less sweating? It might be the corn starch or baking soda? Or just my body since I haven't used antiperspirant in 10 years and don't notice sweating that much anymore.

I am allergic to coconut so I was wondering what could be substituted for coconut oil?
For oil substitute? I don't know. Something shelf stable? Coconut oil is stable, anti-fugal and anti-bacterial which is why it works. Other homemade deodorant recipes use Shea butter- you might want to find a different recipe. 

I really want to try this but I can't find arrowroot anywhere. Was wandering if maybe tapioca starch or anything else could be substituted?
You can find arrowroot in the spice section of the grocery stores.  See jar pictured above.  Other stores may have it in the baking section.  Not sure about tapioca- but you can sub with corn starch.  

We don`t want her using all that chemical on her. Has anyone used this for kids?
I have not tried this on a kid. I would test a small patch first for irritation. The baking soda can be harsh. 

AND, I have one. I absolutely cannot stand Coconut. I even gag with the smell. I wish I wasn't like that, but I am.  What can I substitute? Someone, Please help. :)
For oil substitute? I don't know. Something shelf stable? Coconut oil is stable, anti-fugal and anti-bacterial which is why it works. Some refined coconut oils do not smell like coconut- those might be your best bet. Other homemade deodorant recipes use Shea butter- you might want to find a different recipe. 

You know your body best and can figure out what works for you. 

UPDATE: There is an instructional video and FAQ from the og website here: http://www.passionatehomemaking.com/2013/01/homemade-all-natural-deodorant.html

March 11, 2010

Shopping baggage


Late last year I read about a study that made me start to think a lot more about our use of shopping bags. We’ve been using the ubiquitous (in Australia, at any rate) green polypropylene shopping bags for our grocery shopping for years now, but the Woolworths Shopping Bag study, by RMIT’s Centre for Design, made me start thinking about all the bags we consume when we buy or receive goods.  The study looked at the whole life cycle environmental cost of a number of different types of retail shopping bags (paper and several different plastics), taking into account the production of the raw materials and manufacturing of bags from those raw materials, transport, use and ultimate disposal of the bags.

The study concluded that reusable bags had lower impacts than single use bags, but these benefits were highly sensitive to the number of times a bag was re-used. Not a surprising discovery, but more surprising was the fact that despite having the lowest impact on litter, and being made of renewable resources, paper bags had the highest environmental impact due to the energy embodied in their production. You can read more about the study and conclusions here and here. Since reading that, I’ve been carefully hoarding any bags (especially paper) we receive for re-use, and giving a bit more thought to the kind of bags we do use, or perhaps could use.

The shopping bags we use are polypropylene, which is recyclable when they reach the end of their useful life. In theory that is. In practice, I was surprised to learn here that because the thread used to make them isn’t recyclable they have to be unpicked by hand, they need to be shipped from Australia to China, where labor is cheaper, to make recycling economically viable. This is a great example of the fact that even though something may be recyclable, the process of recycling (if and when it is disposed of in a way that enables recycling) is not without environmental cost (and may well have some ethical issues too).

Perhaps I’m a tad cynical, but I do feel that recyclability is increasingly becoming an easy green-washing feature for advertisers, with a whole heap of ifs and maybes being swept under the carpet, out of the consumer’s sight. I guess it’s up to each one of us to consider why we choose the purchases we choose, and to be satisfied in our own minds that they are worthy justifications based on the best information we could access.


But back to bags- there are certainly some opportunities in the shopping bag arena for some environmentally beneficial creativity. First up, if you are lacking reusable shopping bags, make yourself some shopping totes that suit your needs- perhaps something that folds up nice and compact, a big roomy bag, a retro crochet bag (link to .pdf), or whichever size and shape you might need, perhaps re-purposing materials you have on hand (ideally natural materials such as cotton that will decompose at the end of their useful life). Second up, make sure you have them on hand when you go shopping, and use and re-use them for as long as possible.


Our household already has a useful stash of shopping bags, and are in the routine of using them, but I realized we could do with some reusable produce bags. Although we re-use them a lot of the time, I found that we were always coming home with a few more plastic produce bags every time we bought our fruit and veg. Inspired by some handmade mesh produce bags I saw on flickr, and this tutorial from Wisdom of the Moon, I hit our local second hand shops and found a sheer mesh curtain to re-purpose. One evening with my overlocker (aka serger) later I had a set of 10 mesh bags.

I sized them to minimize wastage from the materials I had, and to keep them similar to the plastic produce bags I’m used to, using some cotton yarn for drawstrings. I’ve been trialling them for a couple of weeks now and am really pleased. Responses from cashiers has varied, from the ditzy supermarket checkout chick who wondered if I wanted her to take the produce out to weigh it (Umm, no- that’s fine, they weigh next to nothing), to the ladies at our regular market vendor who remarked how nice they were (Oh thank you!). The only drawback is that we are now dependant on plastic containers to keep our veggies fresh in the fridge. At least they're re-usable, but I do wonder if there is a bag I could make for this purpose... Any suggestions?

February 25, 2010

spring napkins


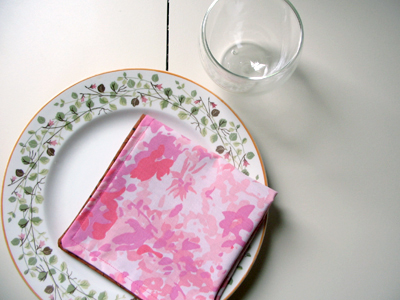
in the few warm days we had last week, i started daydreaming about outdoor fika and picnics, complete with china and cloth napkins.

for the ridiculously longest time, i've been meaning to use cloth napkins at home. i'm usually just cooking for myself, and i often don't use any napkins, so i've put off buying/making napkins.

a couple of times i have almost bought these beautiful hand printed napkins from linea carta. my friend jen has these cute ones from wonder thunder. but i figured i should use some of the fabric i already have. from my stash i sewed these napkins for my parents for christmas. it's fun to give something useful that will also hopefully lead to less paper towel usage.

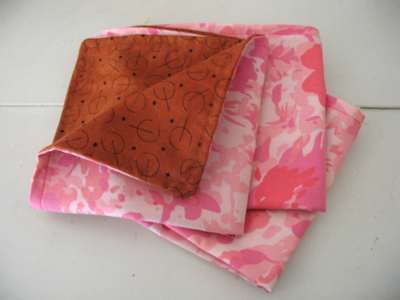
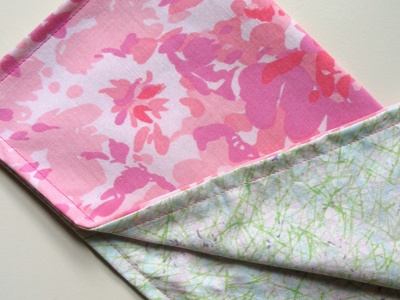
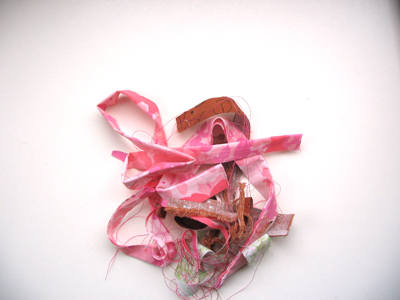
finally this weekend i made these pinkies for myself. the floral side is cut from a thrifted pillowcase. the other side(s) from left-over quilting fabric. i like to mix floral and geometric patterns.


although i have made quite a few quilts, i am a terrible sewer. i don't know the names of stitches, and i pretty much only sew (somewhat) straight lines with the default stitch. (occasionally i'll go crazy and zigzag). my point is that you don't need to be a seamstress to make these.

1. cut two squares (or rectangles) of fabric.
2. pin the sides that you want to eventually be on the outside against each other (right side facing in).
3. sew a line around the edges of all four sides (about a quarter inch in from edge), leaving a space at the end of one line so that you can turn the square inside out.
4. turn it inside out.
5. iron it. (i often skip this step, because as you can see, i'm not a perfectionist when it comes to sewing.)
6. sew four more straight lines around the edges (tucking in the open parts—no hand sewing required!).
voila.


i am sure there are more elegant ways to make napkins, but this is a pretty easy option.


did you see stephanie of 3191's simple, yet classy indigo napkins?

cheers and happy fika-ing with cloth napkins!

ps. check out how seattle rocks with their big urban gardening plans!


February 8, 2010

make a sock monster draft-blocker

{cross posted from f.pea}

Many days on end of cold, wet, icy weather have led to short bursts of creativity around here with the materials we have on hand.

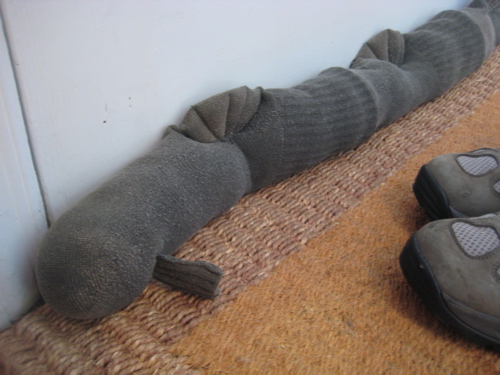
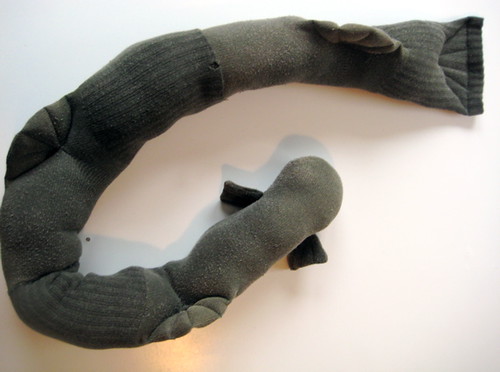
dyrrwurm

Dyrrwurm is now guarding our back door, keeping out the nasty, cold draft that was coming in under our vintage 1952 door (which really ought to be replaced with a more insulated model). He was made from two pairs of identical socks that HWWLLB gave me recently for the purposes of sock monster making. Before his reincarnation as two pairs of men's socks, Dyrrwurm lived at the back door of the land of the giants, in the far, far north, where his hobbies included writing epic poetry, collecting pictures of his idol, the Earth Serpent, keeping out the cold draft, and doing pedicures for his dragon friends.

You can make your own door dragon - it's quite easy, even for sloppy, inexpert sewers like me. This project was done in two bursts - it took me one naptime, and one visit from the Little Pea's favorite Auntie to complete. You will need:

- 2 pairs of heavy socks in a dragoney color
- matching thread
- sewing machine
- a few pins
- polyester fiberfill or some other stuffing (rags are fine too)
- something heavy for inside - I used sand, but you could use dry beans, rice or pebbles
- four or five repurposed plastic bags to hold the heavy stuff

My door dragon is only three socks long, since my door is narrow. But for a standard-width door, you will need to make the dragon four socks long.

door monster tutorial 2

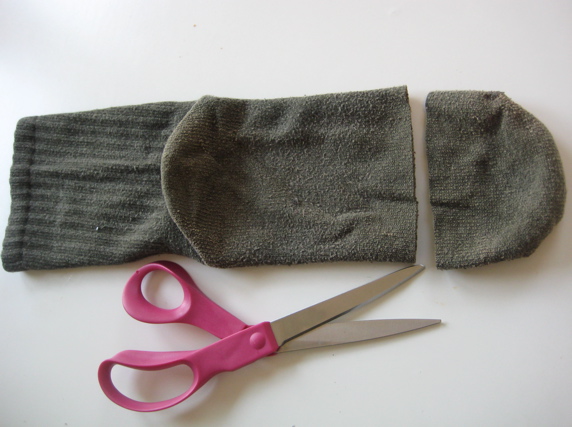
Cut the toes off all the socks except one - this will be the head. Sew the socks together cuff-to-toe, right sides together. Try to keep them lined up so that all the heels are basically running in one line down the dragon's back. Turn right-side out and admire your long, wiggly new friend.

door monster tutorial 7

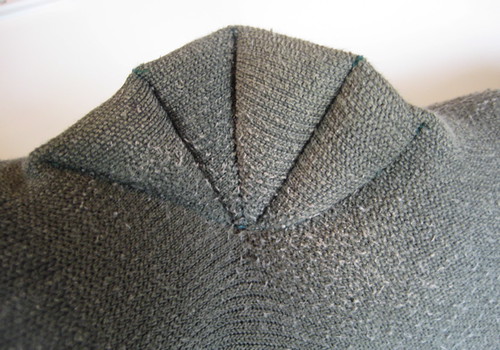
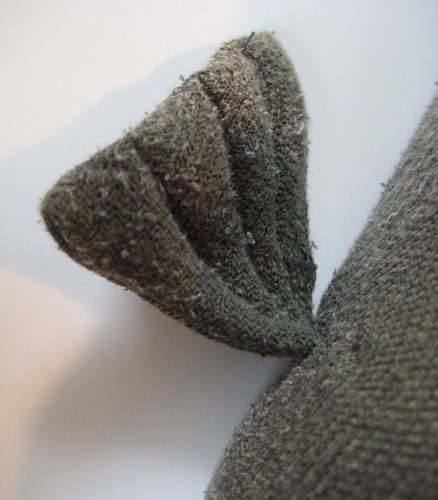
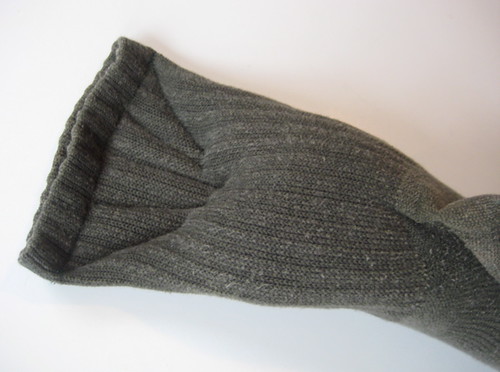
Starting at the head end, put a small amount of stuffing inside each heel, flatten and pin down. Then sew the heel shut to make a fin. You can add some decorative stitching as I did to make it more fin-like. Repeat for each heel.

door monster tutorial 1

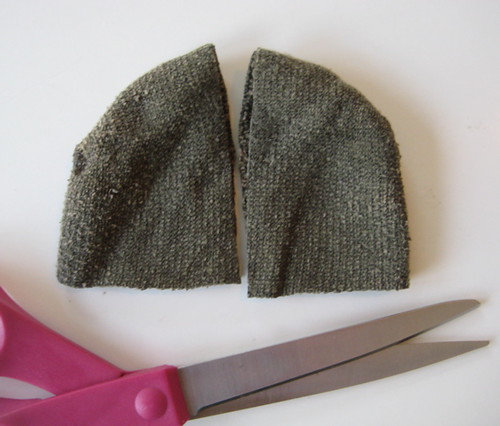
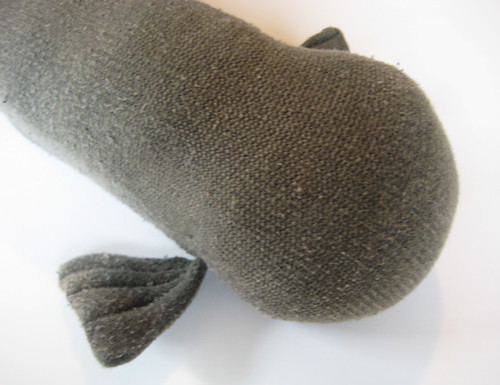
Use one of your cut-off toes to make front flippers if you like. Lay the toe flat and cut it in half up the middle. Turn inside-out and sew it into a triangle, leaving an open gap for stuffing. Turn the flipper right-side-out and stuff with a small amount of stuffing. Smoosh flat and sew shut. Add some decorative stitching to flatten the flipper and make it fancier.


Turn the dragon inside-out again. Cut a hole on each side of the foremost sock. Stick the flipper through so that the flipper is now "inside" the dragon and the sewn-shut edge is facing towards you. Sew the flipper into place. Once you have the flippers in place, turn right-side-out again.

door monster tutorial 8

Stuff the head firmly with stuffing, but leave the body un-stuffed. Isn't he cute?

Get out your heavy stuff - sand, dry beans or rice, pebbles, whatever you have on hand - and put a bit inside four plastic bags (repurposed bread bags worked nicely for me). Tie them each tightly. Pull one into your dragon, all the way up to the head, and secure in place (you can sew it or be lazy like me and use a safety pin). Use your stuffing to lightly stuff and shape the dragon around that heavy bit. Repeat with each bag of heavy stuff until your dragon is fully stuffed (and heavy). Leave the heavy stuff out of the very end of the tail if you can. Now your dragon will lay heavily in place on the floor.

door monster tutorial 5

Stuff the tail end very lightly with stuffing. Sew the tail shut across the final sock cuff. Add some fancy stitching to make the tail flatter and more tail-like. Embroider on a face if you like. Enjoy the new absence of a draft under your back door!

door monster tutorial 4
honey, you need a pedicure!

February 3, 2010

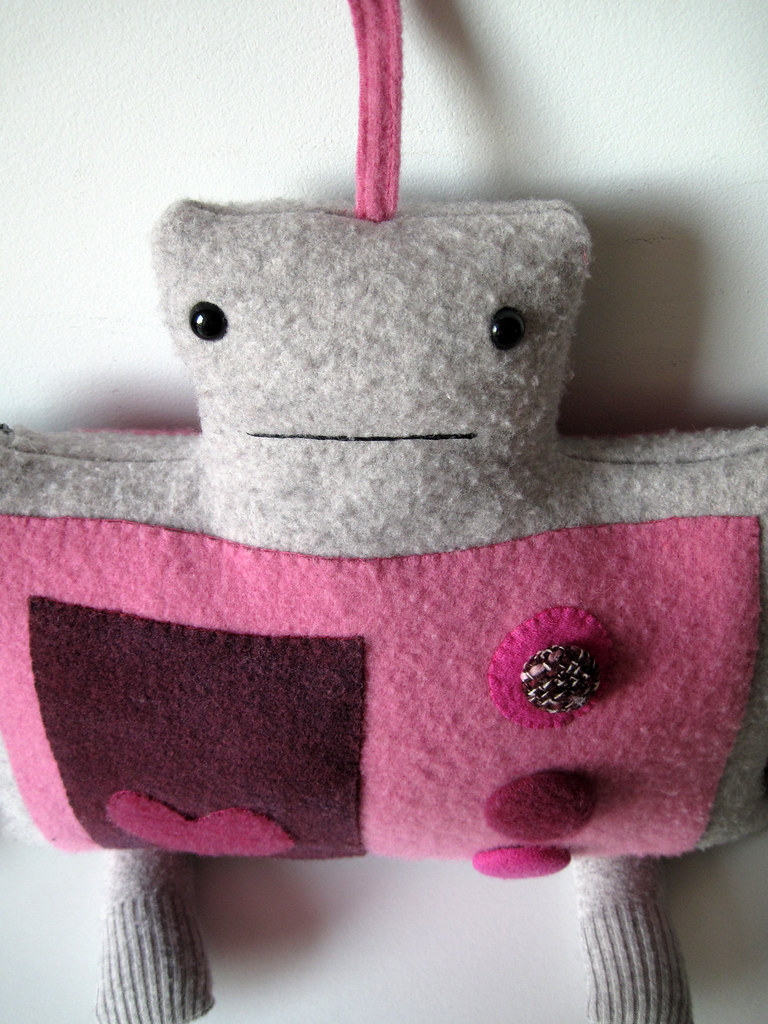
d.i.y. valentine's robot

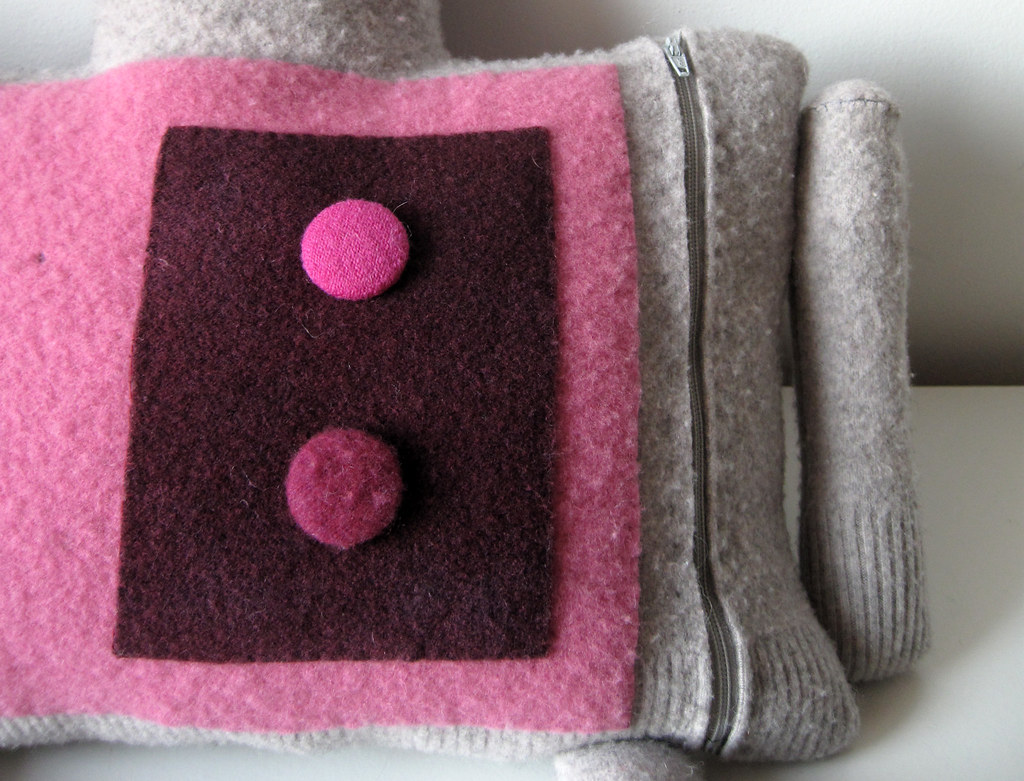
robot_fromabove
wont you be mine?

i never cared
much
for
valentines day.
just another one
of those holidays
to
convince you
that you
need
to buy
something
for
someone.

those long lines
at the drugstore
of men buying
last minute
stuffed animals
and candy
on valentines day
depress me.
but then again
how sweet
is it to
get
a handmade card
or
homemade edibles
from a
friend
unexpectedly...

bears
and bunnies
are nice
but robots
are so much better,
don't you think?

robot_wooden1

wouldn't it
be nice
to make
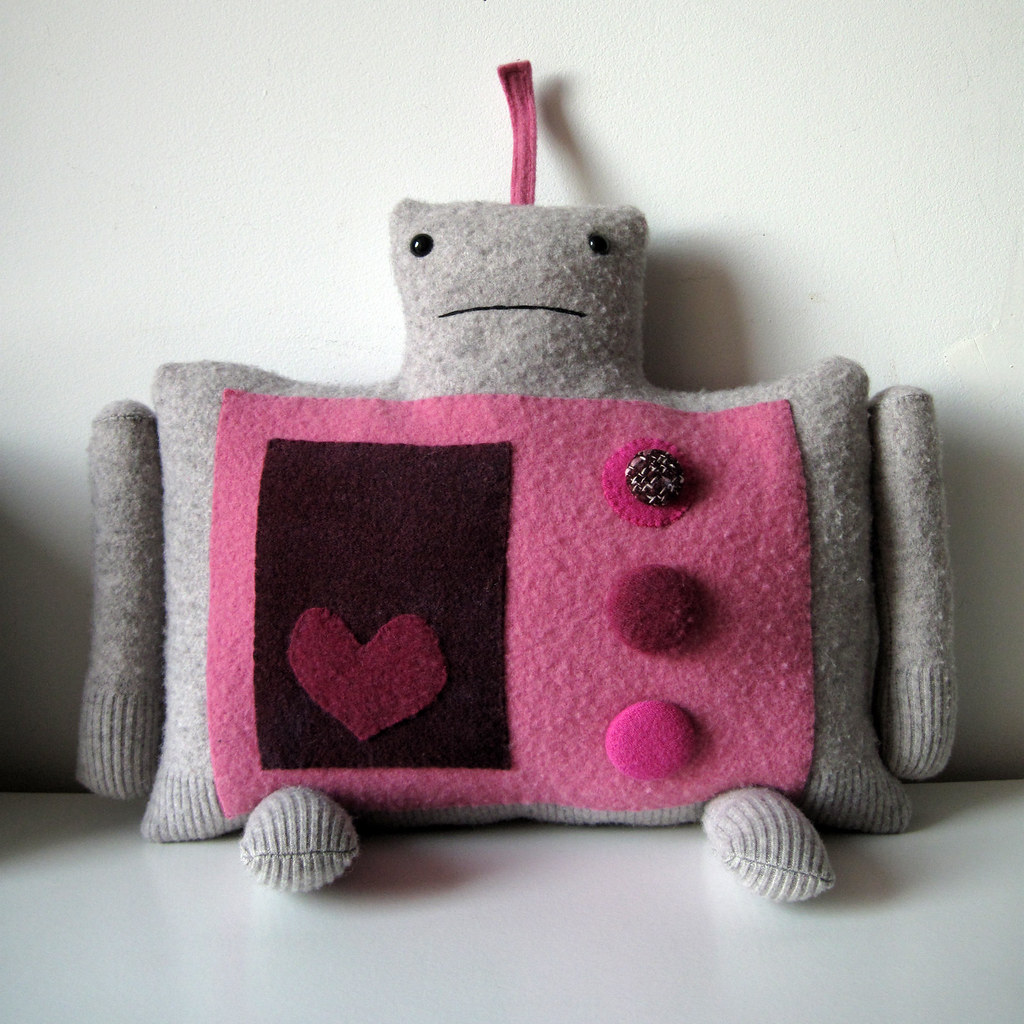
a robot pillow
for someone you love?

this robot
is made completely
out of felted
sweaters.
thin cashmere
sweaters
work the best
but any old sweater
will do...
it's a good time
of year to
get rid of
that favorite sweater
with moth holes
or that doesn't fit
right.
or hit your
local thrift store
and get a couple.
my advice is
to get men's sweaters-
they always are cheaper
and bigger.
bigger means
more felt- woohoo!
remember that
the sweater has
to be 100% wool or
cashmere, or
other
animal fiber.

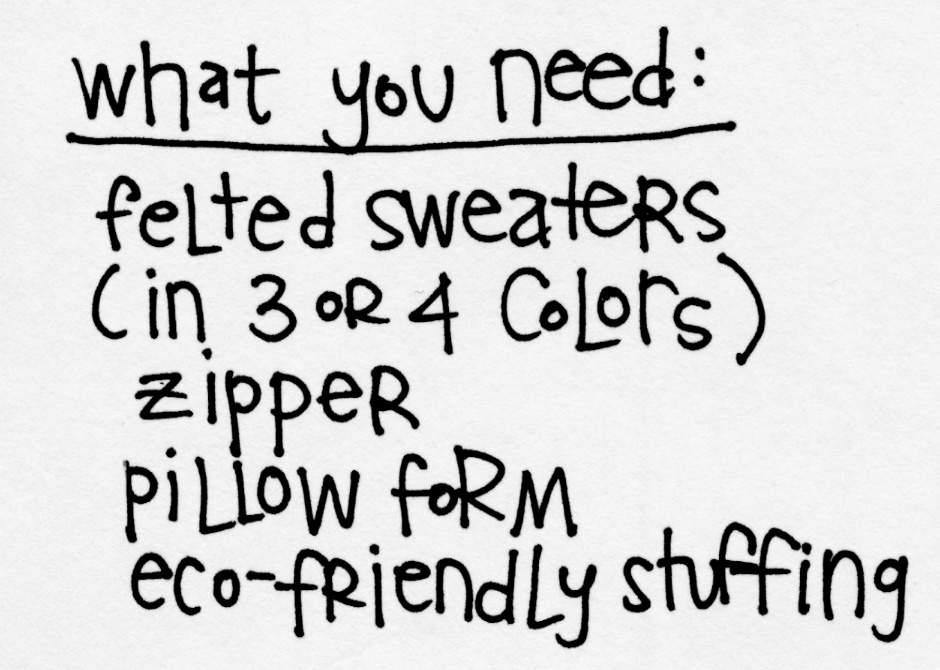
DIYRobot_whatyouneed

so here we go!

DIYrobot1

first,
put on this song
to get you in the robot mood.

then,
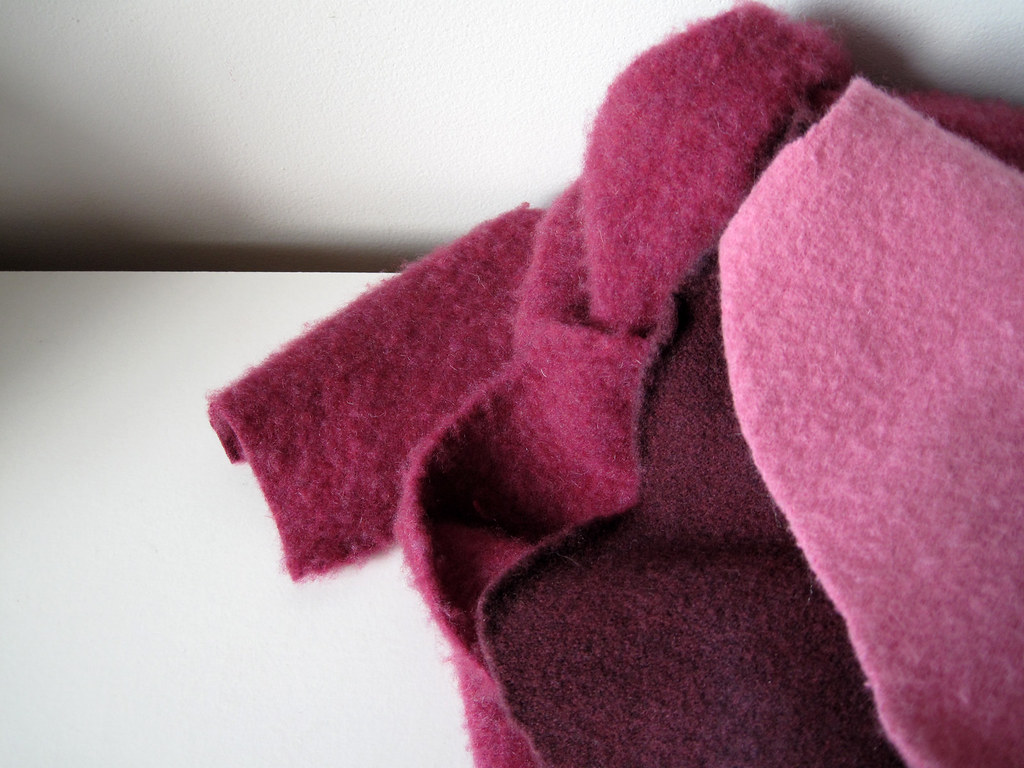
felt all your sweaters
(read instructions here).

robot_felt

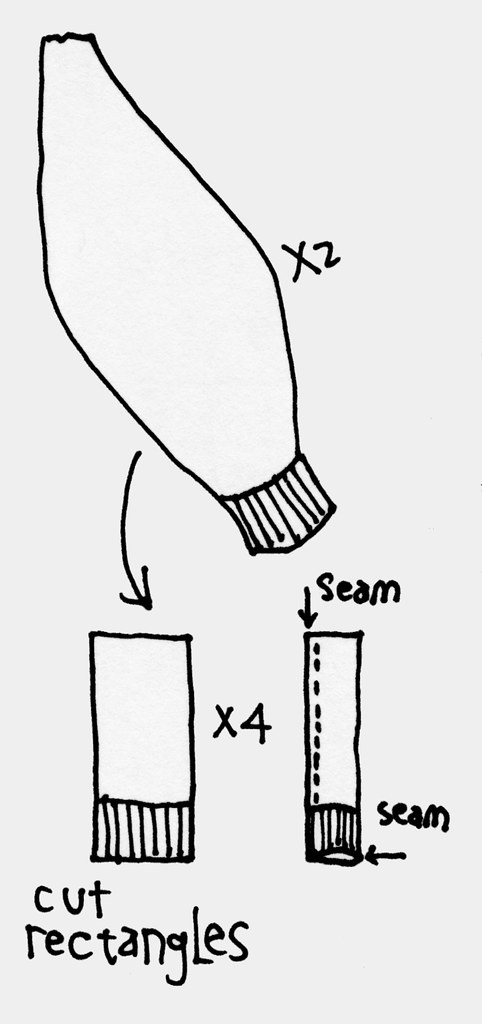
make sure to cut
the arms & legs
out of
the sleeves:
DIYRobot_sleeve

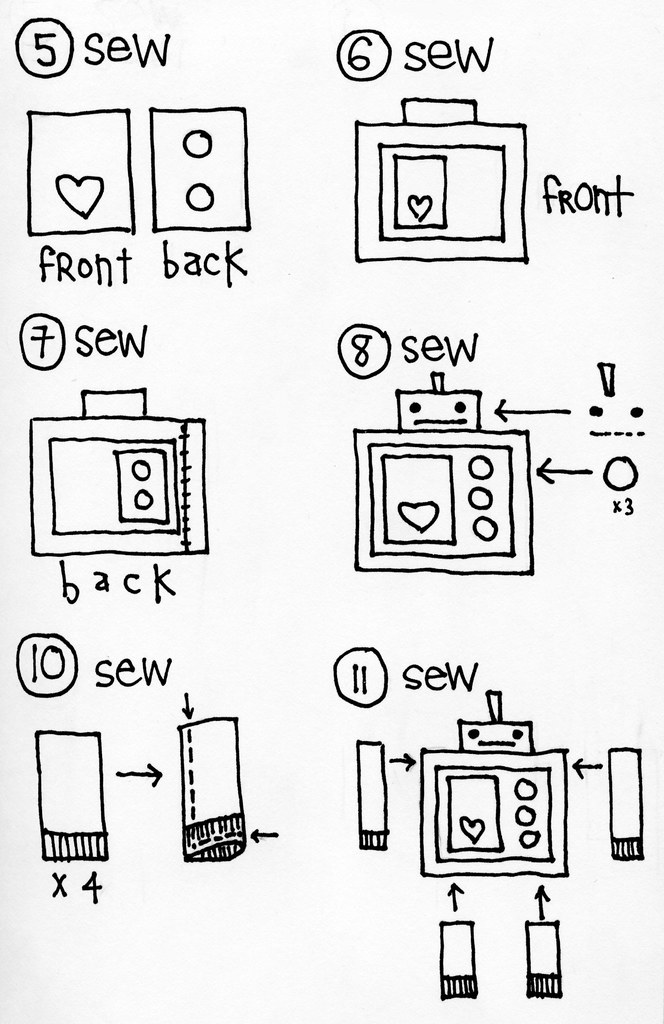
now you are
ready for these
easy steps:

DIYRobot_1-4

remember,
you can use
a machine
or sew by hand.
i did mine
by hand using
mostly
blanket stitch.

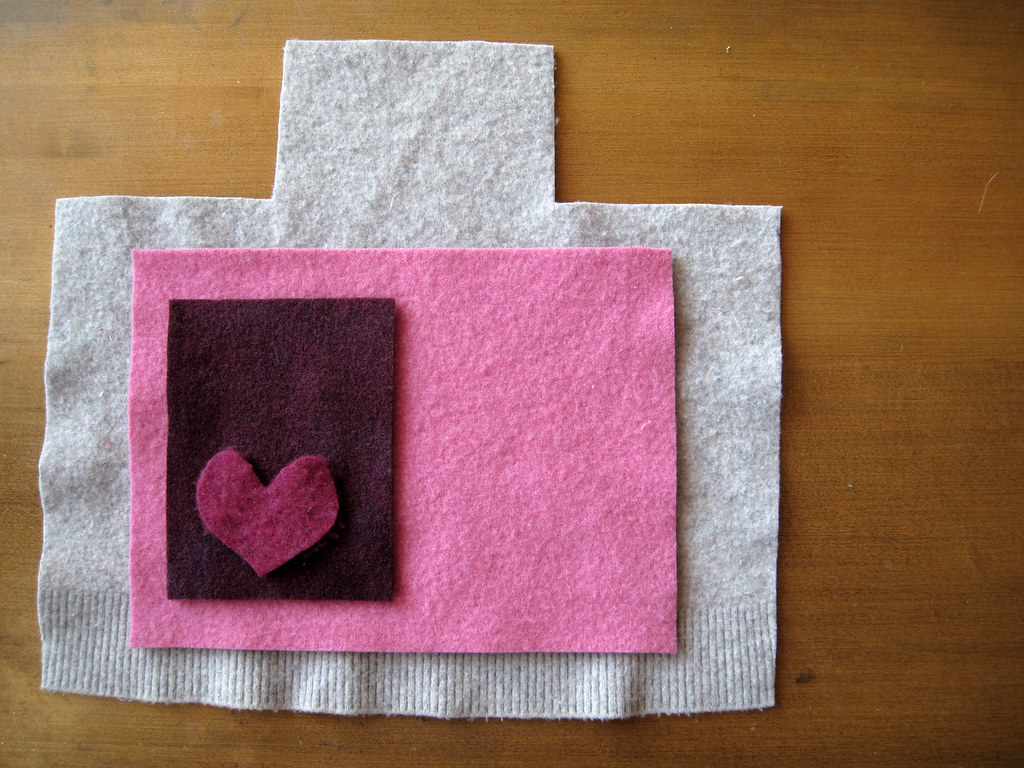
robot_layout_front
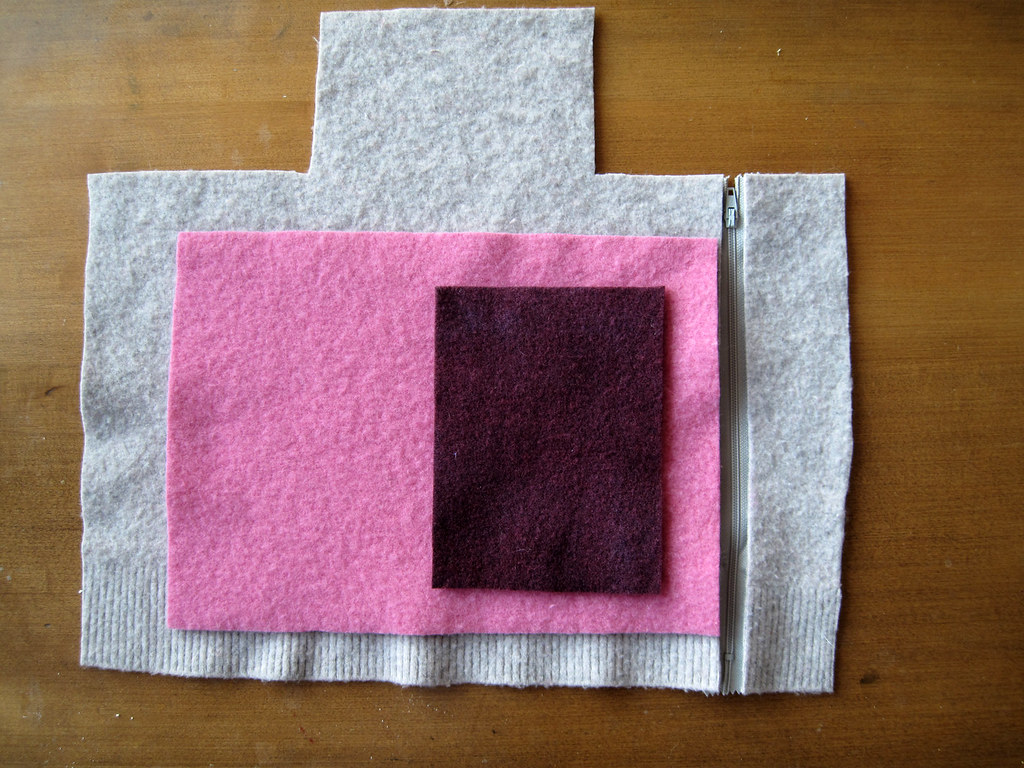
robot_layout_back
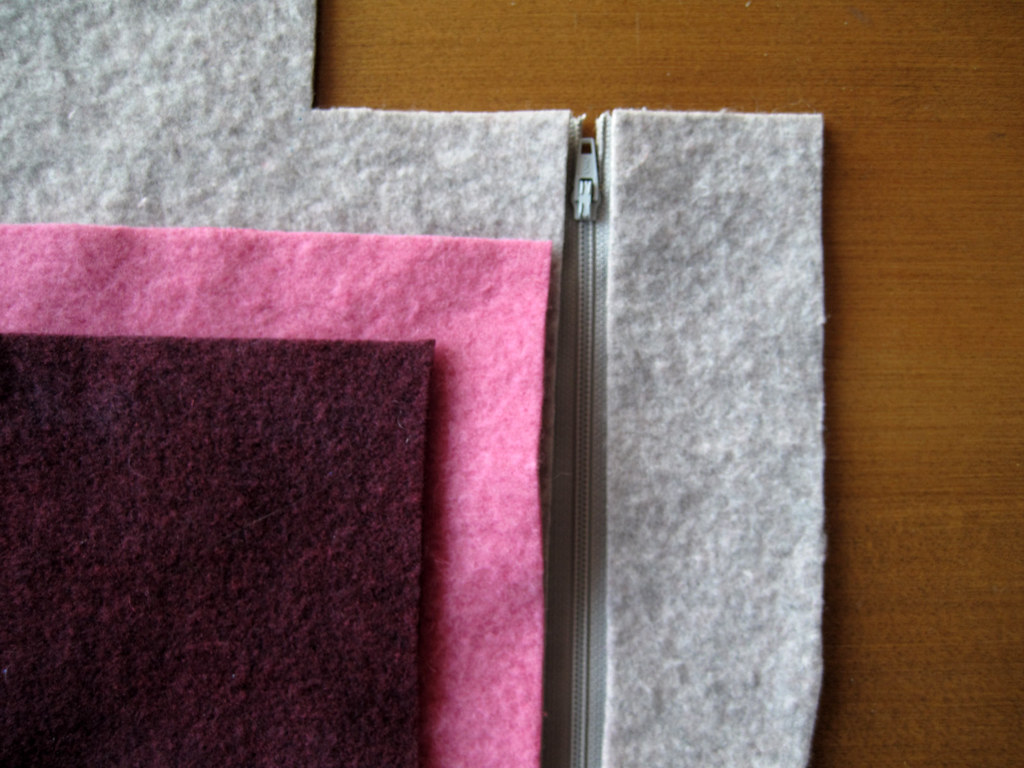
robot_layout_zipper

DIYRobot_5-11

stuffing/pillow:
arms & legs:
stuff after
sewing bottom
and sides.
then seam top and attach.
body:
after i was
all done
sewing,
i stuffed
the bejesus
out of his head
and then put
the pillow in.
you can resize
the pillow
to fit the body
(i had to).
or just make
a robot-shaped
pillow insert.

here's
what the back
looks like:

robot_back

decorate:
decorate your
robot
any way you'd
like...
use real buttons
i used a small
fabric button maker.
i got at
the sewing store
for $3.
you can make
your own fabric
buttons
using
this guide.

i got
some ideas
from
jes hutch's knitted robots.

Robot_couch

let me know
if you
have any
questions!

robots:  thrifted wooden

try not
to fall
in love
with your
new robot.

i did.

it's breaking
my heart
to mail
him off
to his
new
sweetheart
.

robot_square

xo

{cross-posted
on my blog}

October 29, 2009

Gift for Good

Holiday shopping. I know, right- but the holidays are less than 2 months away. Less than 2 months. Here is my round-up of socially conscious gifting suggestions:

Donations: I put this first, because the absolute best gift you can give is to your community. Nonprofit organizations have been hit hard by the recession- many states have cut nonprofit services from their budgets and organizations are scrambling to make ends meet. Organizations have also seen their endowments suddenly shrink drastically, and large corporate donations dry up. Domestic Violence shelters are closing all over California and one local museum has recently shut its doors. Many small organizations are one payroll away from closing. We depend so much on these organizations; they are the backbone of American society and losing them is devastating.
What I love about giving donations as gifts, is that you can make it extremely personal to the recipient by donating to a cause which has touched their lives. From breast cancer, to domestic violence, to youth sports, to girl scouts, and so on. Does your recipient love animals? Give to a local shelter. Do they get angry about trash on the beach? Etc. This also goes both ways- find an organization you care about and ask that in lieu of gifts, you want donations. Send your holiday cards out early and specify, or send a mass email. You can avoid the unfortunate trinket and make a real difference. It is also a huge relief for people who might stress over finding the perfect gift, plus they can give one gift donation as a family gift* and feel good about themselves in the process.
Many charities will send out holiday cards announcing the gift to the recipient [less work for you!]- check the website or call for more information. A great place to source out different charities is on Guidestar. Though I would recommend going directly to the organization’s website to donate. Also, most donations are 100% tax deductable for the purchaser.

Memberships*: Museums, zoos, botanical gardens, aquariums, public radio, etc. These are donations with benefits. Not only can you donate to the organization, but the recipient can benefit for the entire year. Many membership driven organizations have holiday specials with gift-boxes that come with the membership. Double check that the organization is a 501(c)(3) [licensed nonprofit through the federal government] to ensure that your member fees go back to the organization. You can do this through Guidestar or call directly and ask. Again, most memberships are 75-100% tax deductable.

Gifts with a purpose: Many organizations have great online shops with merchandise that supports the cause. A lot of these stores carry more than just promotional totebags- Unicef has a great store as does the National Organization for Women. Heifer allows you to purchase an animal for a family in need, who will provide long term sustenance, and sustainability. They will also send a card to whom the gift is in honor of. If you are in the UK, Oxfam has a wonderful store. Find a cause you care about, and search their website for the “Shop” button.
I am extremely wary of any shopping sites that donate a percentage of your purchase to a cause of your choice, along with “Shop [insert colour here]” promotions since these often only donate a percentage of a penny on the dollar and have low to zero accountability. These tend to be marketing tools, rather that organizational support- see Think Before You Pink for more information on "pink-washing". You are better off making a direct donation.

Museum Shops**: Not only will you be supporting art in your community, but you can find great gifts by local artists, fair trade goods, collectable books, and eclectic knick knacks. They also have the best card selections. 100% of the proceeds of each sale goes back to the museum. [full disclosure- I run a museum store].

Locally owned businesses**: Small businesses can do 50-75% of their sales during the 4th quarter. If they have slow sales during the holidays, it can be financially disastrous to someone who has dedicated themselves to their store. By shopping at local businesses, you not only support the store, but the community benefits. “For every $100 spent in locally owned independent stores, $68 returns to the community…in a national chain store, only $43 stays here” Visit 3/50 Project for more information on why you should support local businesses.

Gifts of service: Can you babysit? Can you make an amazing dinner? Carwash? Massage? Closet organization? Remodeling? House painting? Etc. Do you have time or a skill you can offer? For my baby shower, my best friend’s mom, who is a lactation consultant, gave me a free session. It was something I didn’t know I needed [it’s just breastfeeding- how hard can it be? Yeah right.], and made such a huge difference when it came to nursing my child. My daughter & I got a perfect latch immediately, and she had regained her birth weight less than 5 days after birth. I contribute my ease in nursing almost completely to that consultation. Of any gift, that had the biggest impact.
Print up a coupon or certificate and you might change someone’s life, or at least give them a much needed break.

Buying Handmade: Shop etsy. Or a favourite BigCartel shop. Or Supermarket. And in DaWanda in Europe. In November & early December there are usually a ton of craft shows & trunk shows. If you like a local artist, sign up for their mailing list to see any upcoming events. If you live near a Renegrade Craft Fair, go! And if you are in LA, shop at Unique LA. You directly support the artist who loves doing what they do and you show, with your dollars, how important art and crafts are to you.

DIY: Made with love by you. What can be better? With so much commercialization and cheap production, a hand knitted hat carries that much more meaning. Do what you know, or learn a new skill. Whipup.net has fantastic roundups of online tutorials. Work from your stash, or reuse materials to make your items as green as possible. If you plan to make your gifts, start now [2 months- remember!]. If you run out of steam, gift a card with a sample [piece of yarn, drawing of final project, etc.] and an IOU.

So this holiday season please gift with love and with responsibility to your community, the planet, and your wallet.

Please share other gift ideas or stories in the comments!

*These make great whole family gifts too. Read more ideas on family gifts over at Ohdeedoh.

**When buying from a locally owned or museum shop, you have the luxury of dealing with a knowledgeable sales staff [most likely the owner!] and are able to ask: Who made this item? Where was it made? How was it made? Who profits from the sale? Most sales staff are extremely proud of the items they sell and will gladly answer these questions- allowing you, the consumer, to make a socially conscious purchase. Also, do be afraid to ask for any sort of documentation on your purchase so you can pass that information on to the gift recipient!
All images are stock photos of the museum store.

September 10, 2009

seedling pots for an urban garden

fall/winter garden

we recently did some renovation in our backyard. we've always been weekend gardeners planting tomatoes and peppers and other veggies in planters every summer. this is the year, though, that my husband decided to get more serious about our gardening patch. he's now decided that he wants to try doing some farming all year round.

we definitely live in an urban environment - our neighborhood is mixed use with warehouses a stones throw away. we used to joke that hummingbirds and butterflies would make a pitstop in our yard flying from more vegetated areas.

[side note - is seems like we're not the only ones thinking urban gardening. i'm sure you already have heard - but check out the white house's new veggie patch.]

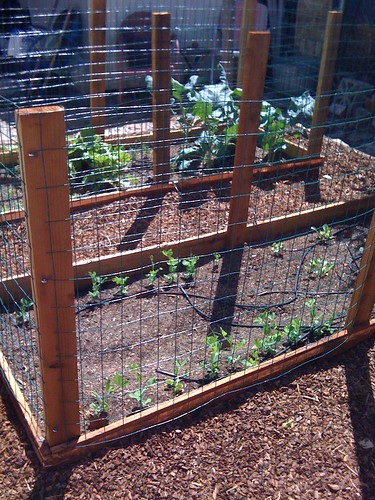
we try to have our backyard reflect our tastes and needs. so my husband built these fenced in vegetable areas. we have dogs and cats and so we wanted to be able to protect the plants from animal [and kid] invasions. he also set up a drip system that runs on a timer so that we can be as economical as possible with our water usage.

tomatoes in a bathtub


in the spirit of re-using we put our tomatoes and anaheim peppers in an old clawfoot tub that we rescued from a neighbor's remodel.


Newspaper pots
Originally uploaded by Clementine's Shoes


the other day i was looking at Clementine's shoes' blog and she had posted some newspaper origami pots she had made for seedlings.


Newspaper pots
Originally uploaded by Clementine's Shoes


what a great idea i thought. if we are going to try and have carrots and onions and broccoli and fava beans and lettuce going throughout the winter starting from seed we'll have to start plants continually. i was trying to think of an easy, eco-friendly way to do this lo and behold ! here it is. we get the Sunday Times - why not turn it into our start pots?? She links to it in her post, but here are the blow by blow directions . i have saved a bunch of the plastic started pots you get from garden stores, but those eventually fall apart - and i personally hate the "bio-degradeable" brown started pots you can get. they always seem to crack and break and never seem to fully degrade. newspaper is the ticket!

when i emailed Clementine's Shoes to ask her if i could re-post her pictures she mentioned that she also knew that people used toilet paper rolls as starter pots too.
indeed they do .

happy gardening. i can't wait to taste our beets!

September 7, 2009

summer souvenirs

sea ranch: rock 2

as summer
melts into autumn,
it's time for change.
i start putting away
my tank tops and sandals
and thinking of
corduroys and cardigans.
there's always something
a little sad about
summer ending.
like the last few days
of vacation before
you head home and back to work
(even though many of us
work right through summer).
perhaps it is a reminant of
our school days
years ago.

i remember
as september
would near
i would collect
rocks,
sand dollars,
and
sea urchin shells
at the water's edge.
my souvenirs
for another
summer gone by.
to hold those
relics in my hand
as the weather
cooled and
dusk came
fast
and
earlier
each evening.

sea ranch: my collections

as autumn nears
i like
to rearrange
and redecorate
my apartment.
put away flower vases.
arrange acorns
and
rocks
on the windowsill

or
in piles
in the garden.


searanch: collection

there are many
creative
and beautiful ways
that artists
(and you too)
can use rocks
as decoration
in your own home.

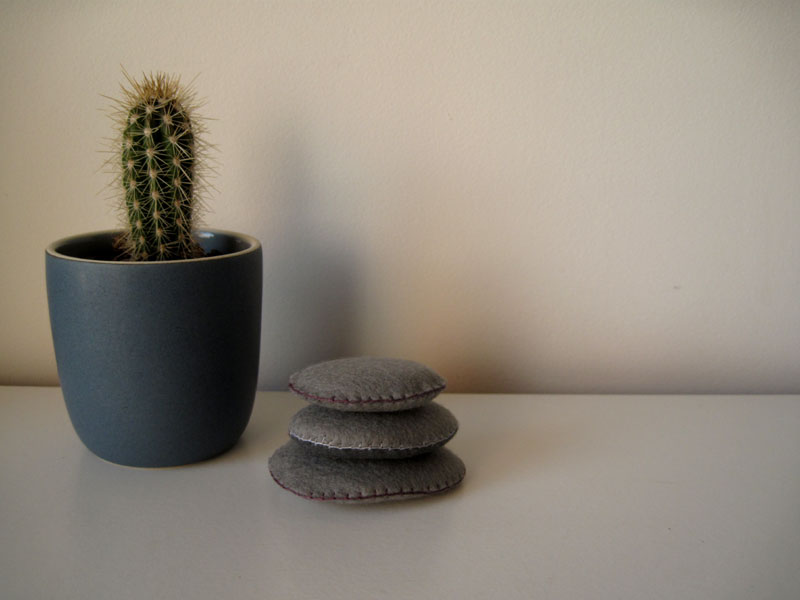
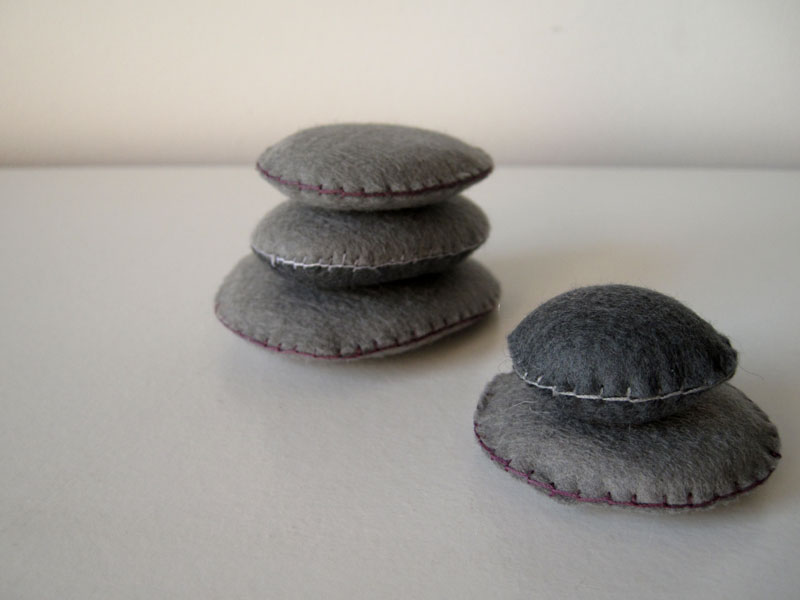
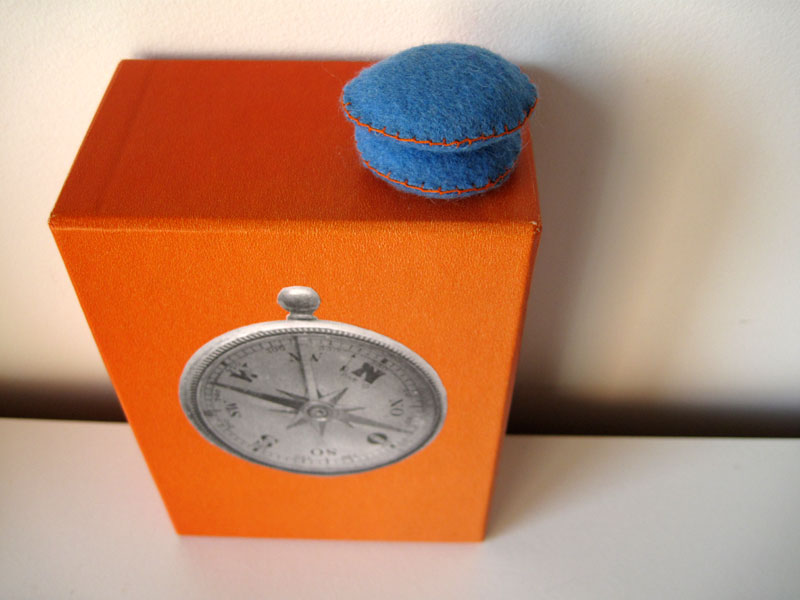
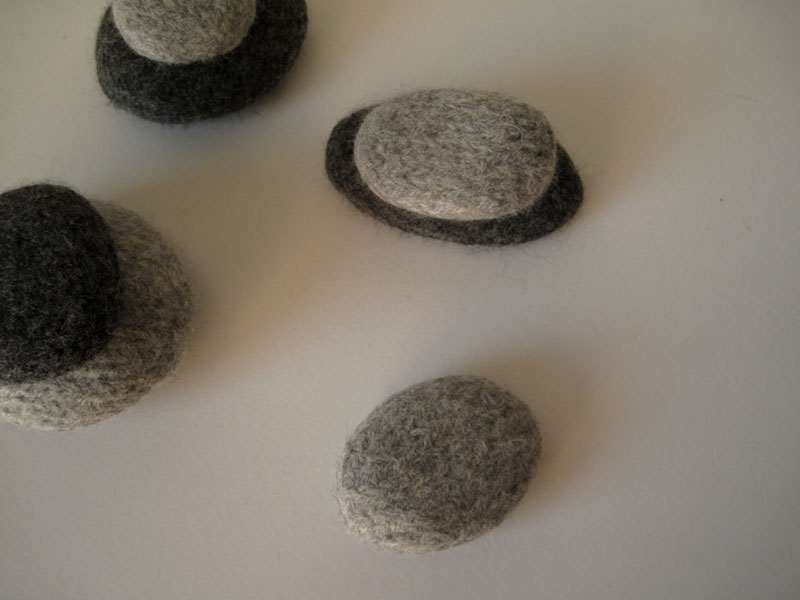
rocks with felt covers

Beautiful art rocks to buy:
* woven rocks by white forest pottery
* porcelain pebbles by Manos/Karin Eriksson
* pet rocks by stephanie congdon barnes.

rocks with felt covers

rocks with felt covers

Make your own felted rocks:
* Craftzine: How to make felted rocks
* DIY felted rock on DesignSponge
* Martha Stewart: felted rock paperweight
* see some here.

you can also
sew,
knit,
or crochet
your own covers.

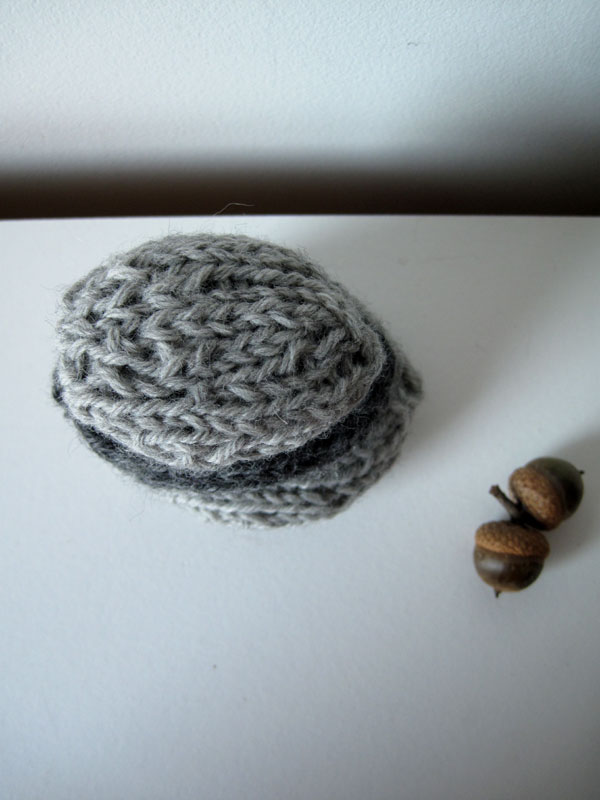
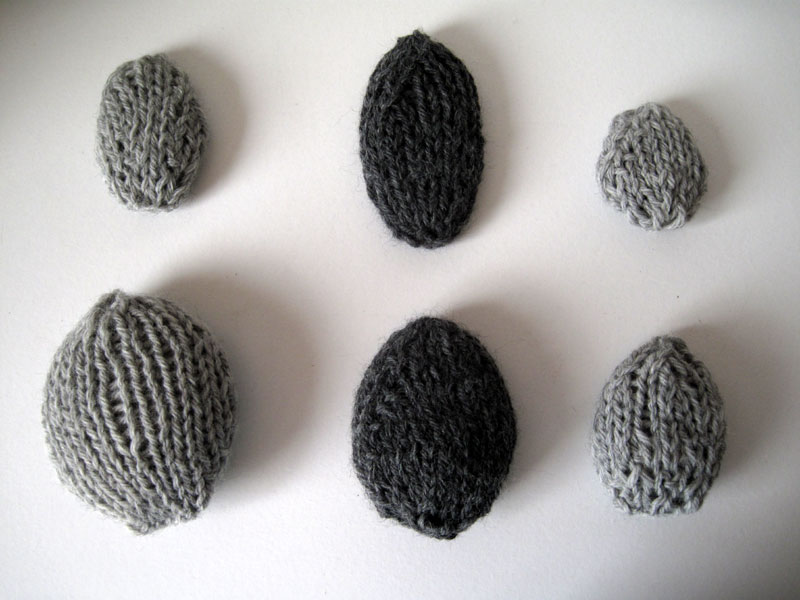
i knitted covers
by knitting in the round
with simple
increases
and decreases...
knitted rocks

i covered
all sizes of rocks.
knitted rocks

then i put them
in the washing machine
in a delicates laundry bag
and washed them a few times
while doing my
weekly laundry.
knitted and felted rocks

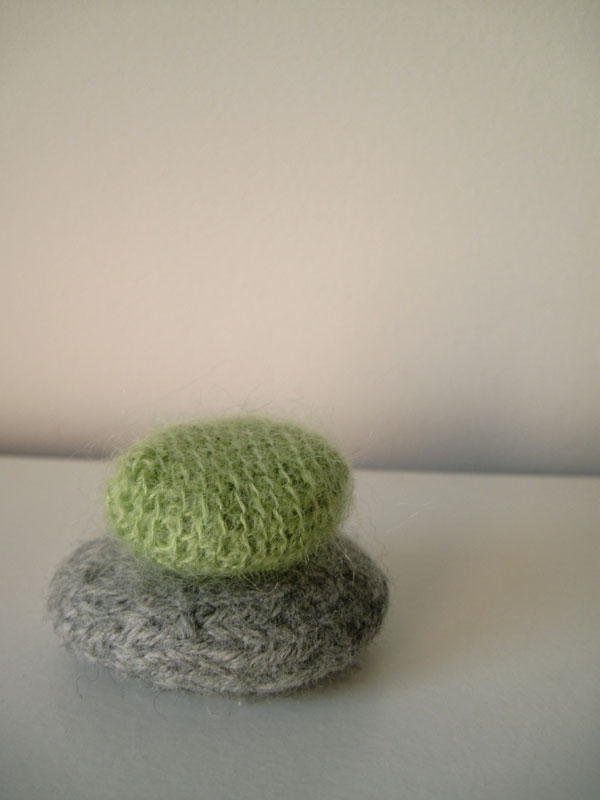
you can mix
felted
and unfelted
rocks.
felted and crochet rocks

for more
inspiration,
check out
one of my favorite
blogs:
everyone needs
a rock
.

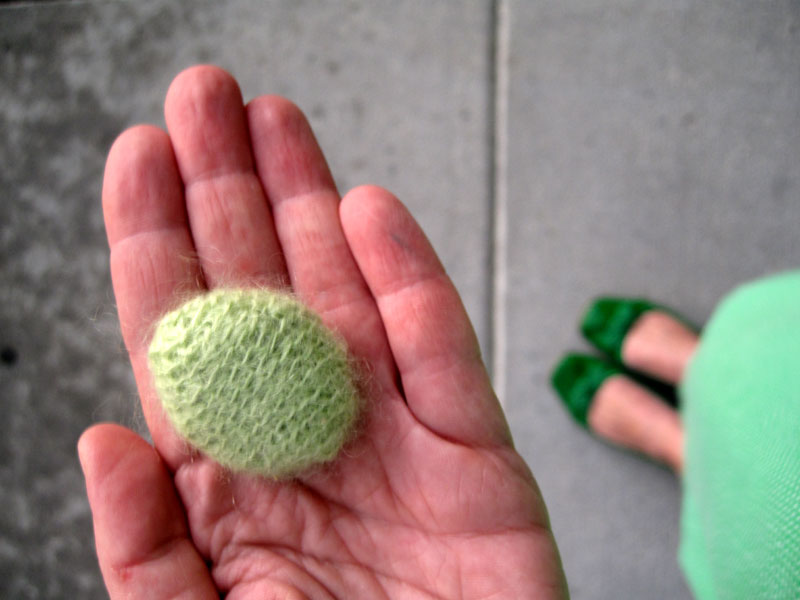
green crochet rock

enjoy
your rock.
enjoy autumn.