Showing posts with label by fpea. Show all posts

September 30, 2010

natural stress relievers

Love Party coop 8
chicken-watching: a very natural stress-reliever

The last few weeks have been kind of stressful.

Job craziness, car troubles, all sorts of unexpected household repairs costing too much money, and lots of sickness in our house: it has all added up to way too much stress.

So I'm taking advantage of the fact that it's my turn to write a Sew Green post to give some thought to natural & sustainable ways to relieve stress. Perhaps it will help me chill out a bit.

When I'm stressed out, I am much more likely to do things that are awfully bad for the environment, like eating junk food and buying stuff I don't need. Driving instead of taking the time to bike where I'm going. Stuff like that. Just noticing that sometimes helps me to avoid doing those things. So what are the really positive things I can do to relieve stress? I'm going to make a list. And I really want to see what you all have to add to the list!

yoga
I love yoga. If I don't get to class every week, I really miss it. Yoga works out the kinks in my body and my mind. When I'm crazy busy, I don't make time for yoga at home. But if I can force myself to make a quiet space for a few minutes for a bit of practice, it helps so much. When I can hardly make myself do it (which is often), I like to use these short (15-20 minutes) streaming yoga videos from YogaJournal.com to guide me through a nice little practice.

cooking a meal
Cooking healthy food is one of the first things out the window when I'm feeling stressed and busy. But I also find that it's a great way to break the cycle, force myself to stop and do something wonderful that takes a little time and is good for me. Plus, if you're craving comfort food, making it yourself can be doubly relaxing.

reading
Nothing transports me to my happy place like a good novel. I sometimes find myself desperately racking our bookshelves for a new book to read when things get tough. I love to lose myself in another reality. And I find that reading before bed really helps me to fall asleep quickly and to sleep peacefully (if I can put my book down). Which brings me to...

sleep
Oh my gosh, what could be better than sleep?? I am an 8-hours-a-night kind of gal, but unfortunately my life is more like 7-hours-if-I'm-lucky. Nothing compounds my stress like sleep deprivation. The best thing I can do for myself is to go to bed early (preferably with a good book to help me off to dreamland).

exercise
Like most people, I need a little exercise every day to help me relax and sleep well. Whenever I start to feel really anxious and full of nervous energy that won't let me rest, it's a sure symptom of not-enough-exercise. The best thing I can do for myself in that situation is to drop everything and go for a long bike ride or a sweaty yoga practice.

time with friends
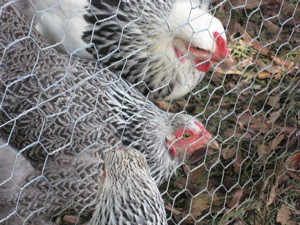
Today I attended a really frustrating and stressful conference. Luckily I had carpooled with a friend, and just venting together on the ride home helped so much. It helped even more that afterwards I went by her house and had a beer with her family in the backyard. We laughed and watched their chickens scratch around and generally chilled out for a little while. It wasn't a long time, but it sure was therapeutic.

So that's my list. I'd love to hear what some of your strategies are for letting go of stress! Now I think I'll go practice a few downward-dogs.

July 8, 2010

turn old bibs into new wipes

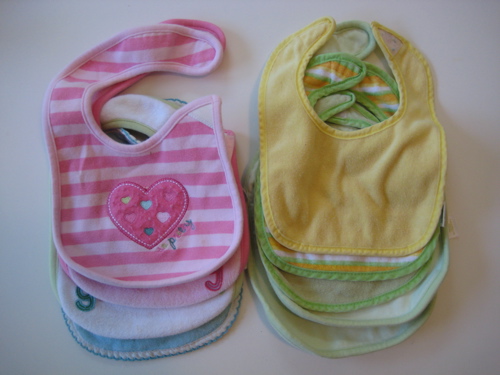
bibs to wipes 1

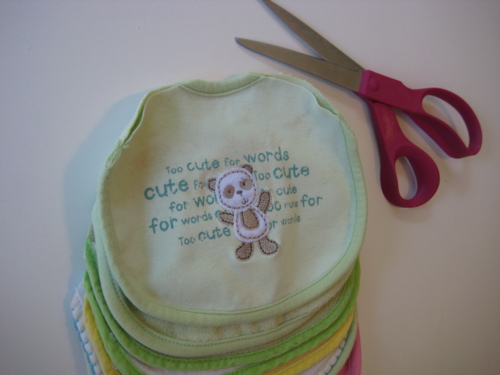
We have a large basket of well-used bibs at our house. Many of them were hand-me-downs and have kept many a baby and toddler from besmirching their finery over the years. Quite a few of them have been plain old worn out, with velcro that somehow lost its stick, and years' worth of baby food stains that will never wash out.

I hate throwing away useful things, especially baby things which seem to cost so much and function for so short a time. I debated a while about simply sewing new velcro onto these bibs, but the stains on many are so icky (and we have a mountain of bibs that do work), that I decided to make them into wipes instead. You can never have enough wipes, and I feel guilty every time I use a disposable one.

This is a ridiculously easy project. Here's how I made mine:

bibs to wipes 2

1. Cut the tabs off the bibs. I trimmed mine into a pleasing symmetrical shape (symmetry is optional).

bibs to wipes 3

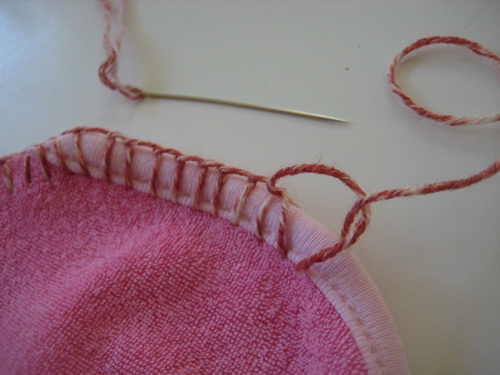
2. Use a decorative stitch around the outside edge to finish the raw edges and make the whole thing look nice. I used mattress stitch. Be sure to use a sharp embroidery needle and a lightweight cotton yarn or crochet thread (mine was leftover cotton sock yarn).

bibs to wipes 4

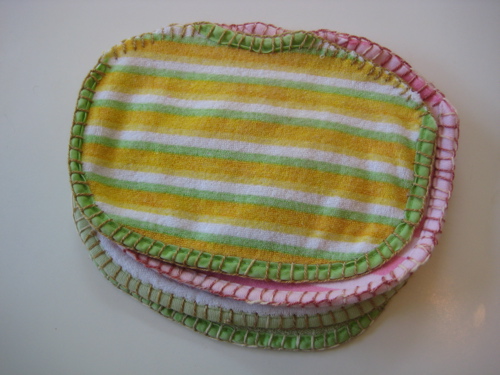
Voila! Two steps and you've got a tidy pile of re-usable baby wipes, kitchen rags, burp cloths, or washcloths - already pre-stained so you don't need to feel bad about getting them good and dirty.

p.s. Those more adept at sewing than I am could remove the original piping from the discarded part of the bib and trim out the raw edges with that, eliminating the need for the fancy hand-stitching. Totally up to you!

April 15, 2010

baby epicure

tastybanana
scarfing down a dessert of bananas

There's nothing as much fun for someone who likes to cook as an appreciative eater. The Little Pea is a loud, lip-smacking, spoon-waving, groaning and mmm'ing appreciative eater - I've never cooked for someone so enthusiastic about their three squares a day. She makes it easy to be adventurous in the kitchen.

I've really enjoyed making baby food for her, and thought I'd share a little of the fun with you all. First, a couple of books that we love:

Simply Natural Baby Food, by Cathe Olson
Feeding Baby Green, by Dr. Alan Greene (love love love Dr. Greene!)

The first book is a great little cookbook for babies and toddlers. We were pleased to realize that you can feed a little baby just about anything (natural), as long as you prepare it properly for her. This book taught us how to cook all sorts of veggies and grains to make them safe and appealing for babies who are just starting solids, and well into toddlerhood.

Dr. Greene's book is one of those big advice books written by a pediatrician, but he is very down-to-earth (and all about saving the earth), and we were inspired by his adventurous approach to feeding little ones.

Since babies can't have salt, and since we don't tend to like our vegetables smooshy, the little one isn't eating much of our table food yet. But boy, is she eating diversely. We found that it's fun, easy and cheap to steam up a big pot of vegetables, puree them (when she was tiny) or cube them (so that she can practice feeding herself) and then use ice cube trays to freeze them in individual portion sizes. That makes it really easy to give her a very well-rounded meal full of interesting foods, with very little work.

I have to say that making your own baby food is also far cheaper than buying it at the store, and you get a lot more variety too (not to mention the ability to serve everything organic). We found that depending on the particular ingredients, home-made baby food is anywhere from one-third to one-tenth of the price of store-bought. And of course there's the environmental benefit of less consumption, packaging, transport, production energy, etc.

My partner was particularly inspired by Dr. Greene's book to try to feed our little one something from all 21 plant families before she turned one. The ones in italics are plant families she hasn't tried yet:

1. Mushrooms
2. Amaranths - spinach, chard, beets, quinoa
3. Umbrellifers - carrot, fennel
4. Cruciferous vegetables - broccoli, cauliflower
5. Bromeliads
6. Composites - lettuce (swiped from the garden beds)
7. Bindweeds - sweet potato - the all-time favorite!
8. Gourds - butternut squash
9. Heath plants
10. Legumes - peas and all sorts of beans
11. Lilies - onion
12. Woody trees - banana
13. Sesames
14. True grasses - oats, brown rice
15. Rosy plants - apple, peach, pear, plum
16. Citrus - lemon
17. Nightshades - peppers
18. Grapes
19. Laurels - avocado (best lunch on-the-go)
20. Myrtles
21. Loosestrifes

Hm, seven plant families to go. Perhaps we'll be having mushrooms, pineapple and tahini for lunch tomorrow. Yum!

February 8, 2010

make a sock monster draft-blocker

{cross posted from f.pea}

Many days on end of cold, wet, icy weather have led to short bursts of creativity around here with the materials we have on hand.

dyrrwurm

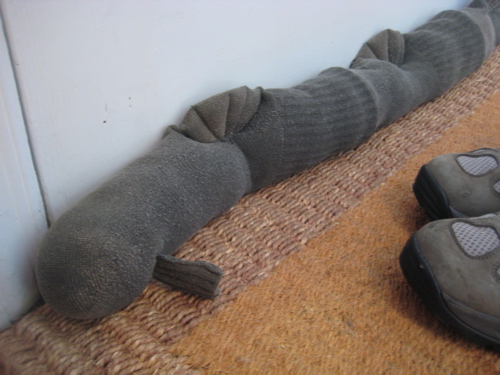
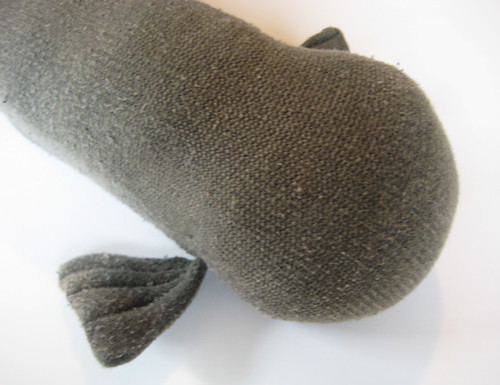
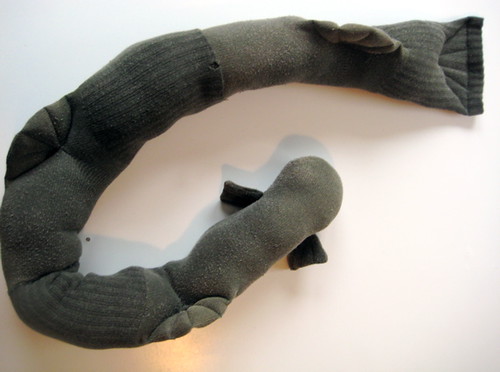
Dyrrwurm is now guarding our back door, keeping out the nasty, cold draft that was coming in under our vintage 1952 door (which really ought to be replaced with a more insulated model). He was made from two pairs of identical socks that HWWLLB gave me recently for the purposes of sock monster making. Before his reincarnation as two pairs of men's socks, Dyrrwurm lived at the back door of the land of the giants, in the far, far north, where his hobbies included writing epic poetry, collecting pictures of his idol, the Earth Serpent, keeping out the cold draft, and doing pedicures for his dragon friends.

You can make your own door dragon - it's quite easy, even for sloppy, inexpert sewers like me. This project was done in two bursts - it took me one naptime, and one visit from the Little Pea's favorite Auntie to complete. You will need:

- 2 pairs of heavy socks in a dragoney color
- matching thread
- sewing machine
- a few pins
- polyester fiberfill or some other stuffing (rags are fine too)
- something heavy for inside - I used sand, but you could use dry beans, rice or pebbles
- four or five repurposed plastic bags to hold the heavy stuff

My door dragon is only three socks long, since my door is narrow. But for a standard-width door, you will need to make the dragon four socks long.

door monster tutorial 2

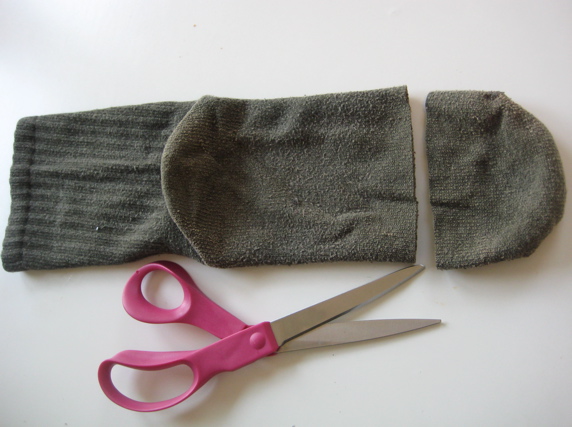
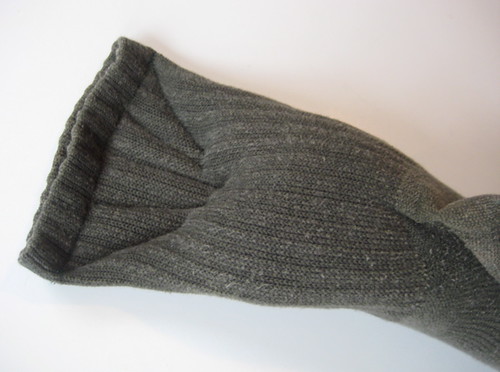
Cut the toes off all the socks except one - this will be the head. Sew the socks together cuff-to-toe, right sides together. Try to keep them lined up so that all the heels are basically running in one line down the dragon's back. Turn right-side out and admire your long, wiggly new friend.

door monster tutorial 7

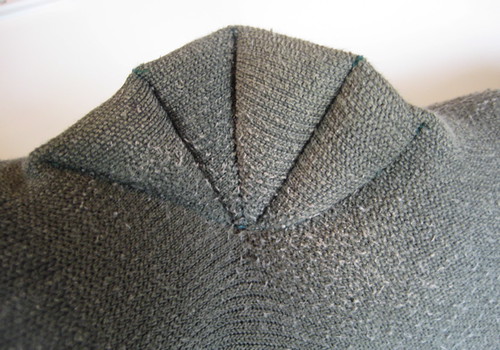
Starting at the head end, put a small amount of stuffing inside each heel, flatten and pin down. Then sew the heel shut to make a fin. You can add some decorative stitching as I did to make it more fin-like. Repeat for each heel.

door monster tutorial 1

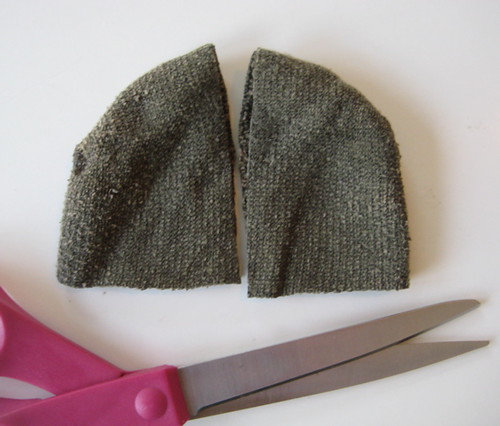
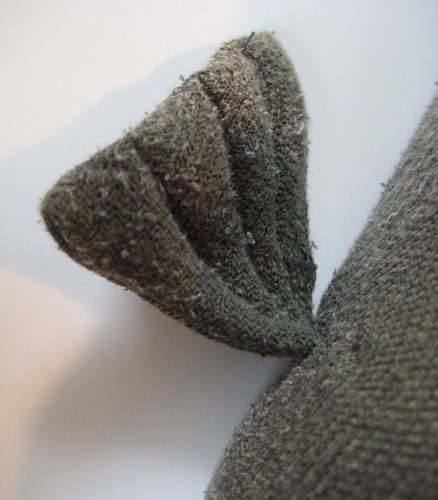
Use one of your cut-off toes to make front flippers if you like. Lay the toe flat and cut it in half up the middle. Turn inside-out and sew it into a triangle, leaving an open gap for stuffing. Turn the flipper right-side-out and stuff with a small amount of stuffing. Smoosh flat and sew shut. Add some decorative stitching to flatten the flipper and make it fancier.


Turn the dragon inside-out again. Cut a hole on each side of the foremost sock. Stick the flipper through so that the flipper is now "inside" the dragon and the sewn-shut edge is facing towards you. Sew the flipper into place. Once you have the flippers in place, turn right-side-out again.

door monster tutorial 8

Stuff the head firmly with stuffing, but leave the body un-stuffed. Isn't he cute?

Get out your heavy stuff - sand, dry beans or rice, pebbles, whatever you have on hand - and put a bit inside four plastic bags (repurposed bread bags worked nicely for me). Tie them each tightly. Pull one into your dragon, all the way up to the head, and secure in place (you can sew it or be lazy like me and use a safety pin). Use your stuffing to lightly stuff and shape the dragon around that heavy bit. Repeat with each bag of heavy stuff until your dragon is fully stuffed (and heavy). Leave the heavy stuff out of the very end of the tail if you can. Now your dragon will lay heavily in place on the floor.

door monster tutorial 5

Stuff the tail end very lightly with stuffing. Sew the tail shut across the final sock cuff. Add some fancy stitching to make the tail flatter and more tail-like. Embroider on a face if you like. Enjoy the new absence of a draft under your back door!

door monster tutorial 4
honey, you need a pedicure!

January 28, 2010

welcome new contributors!

Time for an exciting announcement: we have five new bloggers joining Sew Green!

This call for contributors has been a wonderful experience for me, and for the other Sew Greenies as well. It wasn't easy to choose from among all the fabulous people who threw their hats into the ring, but it was a great opportunity to get to read a whole bunch of blogs and emails from people that I really admire and appreciate. Although we couldn't sign up all of the wonderful green crafty people who contacted us, we absolutely loved the chance to get to know some of our lovely readers a bit better.

However, after a highly scientific analysis, we selected five diverse and inspiring writers to join the Sew Green cohort. I think that these five bloggers will bring some different perspectives and topics to the blog, and I for one am delighted that four of the five are from outside the U.S. In no particular order, here they are:

Julie
is a parent of 2 college-aged kids, works full-time, and is in graduate school full-time, and attempts to live as sustainably as possible. She lives in Rochester, New York, has an urban garden and backyard chickens, cooks mostly from scratch, does some knitting and sewing, and is a big proponent of bike commuting. Julie also writes for rocbike.com, and she'll be sharing her ideas about biking, commuting and transportation here on Sew Green.

Maimy
is a 21-year-old designer-maker based in north-east England. She sews, knits, crochets, embroiders and batiks. She does ceramics, primarily pinch potting, and also has experience in metal and, to a lesser extent, woodwork. Maimy plans to write about environmental issues in terms of crafts, sustainable and repurposed materials, as well as the simple, everyday things like "what to do with awkward scraps of fabric that you don't want to throw away."

Catherine
is a gardener since age 2, who, at age 39 is finally making it official by taking the Master Gardener course through University of Saskatchewan's Horticulture Department. She's a prairie girl, which means her garden is currently under 3 feet of snow. And she has a soap box which she's not afraid to use. Catherine lives in Manitoba, Canada.

Jennifer
is a writer in Ottawa, Canada whose blog emphasizes local, seasonal produce and lots of stories about her own adventures in gardening. She is also really passionate about sewing and about living sustainably. Jennifer is interested in writing about gardening techniques, local food, recipes, community involvement, and pet ownership for Sew Green.

Di
is a creative crafter type in Australia who is keen to learn about (and attempting to) lead a more sustainable life. She is an architect, and is particularly interested in sustainable building design, backyard veggie gardening, waste minimisation (using everything that you have to it's fullest, and making use of things that others might consider waste), and sustainable crafting.

A very warm welcome to all five! Stay tuned for their posts on Thursdays as the year unfolds.

December 3, 2009

leftover soup

thanksgiving2

This time of year, the leftovers abound. Around the holidays, I tend to stuff myself silly, but the overabundance is so great that even with overeaters everywhere, lots of food still gets thrown away. My partner and I are trying to get smarter about our budget these days - particularly our food budget - which has meant getting smarter about leftovers, and hopefully a little less waste.

Last week was Thanksgiving, and I decided to take responsibility for the leftovers this year, since I wasn't cooking much. By the time we left on Saturday there was a freezer full of turkey stock and big containers of turkey noodle soup for everyone to take home.

Being a vegetarian, I don't know much about what to do with meat, but I do know that you're not supposed to throw away that big old fatty, meaty turkey carcass after the meal. What a waste! Instead, we made turkey stock.

I had my partner's father pick off all the good-looking meat, and then I stuck the detritus (skin, bones, fatty stuff, neck and jiblets) into a huge big stock pot with a cut-up onion and a few bay leaves, and then filled up the pot with water. I brought the pot to a boil and then simmered the whole thing for the rest of the evening, about 3 hours. Then we pulled out the now-clean bones and all the other solid stuff and tossed it, let the stock cool, skimmed off the fat and then strained out everything else and put the stock into repurposed quart yogurt containers in the freezer. Turkey stock is a good replacement for chicken stock (except richer and tastier, I'm told), and will keep in the freezer for at least six months.

That's how we used about half the stock. The other half we used to make turkey-noodle soup. All we did was par-boil a bag of whole wheat egg noodles, drain them and then put them into the big soup pot with the turkey stock. Since this family likes to eat turkey sandwiches with the leftovers, I left the big slices of breast meat for that purpose, but took all the little funny bits, cut them up smaller, and threw them into the pot. Finally, we dumped in the leftover peas and carrots from the Thanksgiving meal and added some salt and pepper - voila! Turkey-noodle soup.

As I've said, I'm a vegetarian, so the soup was not really on my menu. But I did have a tiny cupful just to try, and now I see why they say that chicken noodle soup cures a cold. I think that soup could have cured much worse - it was about as warm, wholesome and comforting as anything I've ever eaten. Maybe next year I'll have two cupfuls.

There are also lots of opportunities for vegetarian soup from your holiday leftovers. You can make a big pot of veggie stock and then make delicious soup with pureed pumpkin, squash or carrot, or toss in lots of noodles, beans and leftover veggies for a scrumptious vegetable soup with dumplings on top. Just the thing for a simple supper when you've been overdoing it at the holiday parties.

October 8, 2009

keeping the harvest

sweetpotatoes

Fall harvest time is just about here! The nip in the morning air, and the new crop of greens, lettuces, sweet potatoes and cruciferous vegetables at the farmer's market and in our garden get me thinking about all the good things I want to cook this fall. I'm also getting a bit wistful already thinking about how much I will miss the fresh veggies this winter, and scheming about how to put some veggies up for those thin months.

Last week we got an inspiring email from the wonderful farmer who runs our CSA, Wild Onion Farms, about easy ways to save some of the harvest for winter. Here's what she said:

"Here's a few tips on how to easily put away some real fall food for later, without any special equipment or a lot of long sweaty hours in the kitchen:
  • I've cured the sweet potatoes and butternut squash for storage already. If you want to stock up on these, the squash will last another 1-2 months, the potatoes will last 'til spring. Store them in a cool, dry, dark place (50-60 degrees is ideal). A chilly basement or garage is good. If you want to extend the butternut squash, go ahead and bake up a huge batch, put it in freezer bags, and stash it away in your freezer.
  • Basil can easily be frozen: chop it up in a food processor and throw in little bags in the freezer, or go ahead and make a big batch of pesto and freeze that in individual portions (omit the cheese, it doesn't freeze well).
  • Peppers, hot or sweet, can be chopped up, tossed in freezer bags, and chucked in the freezer. Nothing more. They won't retain their texture, but it won't matter if you're adding them to winter soups, stews, or sauces.
  • Okra can be stashed away by cutting it up into slices, dip it into boiling water for a minute, drain, pat dry, and pack into freezer bags or containers.
  • Cooking greens of any sort are really easy to freeze as well. Wash, chop, blanch in boiling water for a minute. Drain them, squeeze any excess water out, and pack away into the freezer.
  • You can also cook up large batches of any of your favorite dishes, from garlicky greens to grilled eggplant, and tuck extra portions away in the deep freeze to enjoy months from now.
  • Most root vegetables (beets, carrots, radishes, turnips), once you've removed the tops and placed them in plastic bags in the fridge, will last for months."
- Elizabeth Haarer, Wild Onion Farm (shared with permission)

I've been working on some of these easy harvest-extenders, and thought I'd share some of my favorite recipes, too.

Last week I made up a batch of Vietnamese-style hot chili sauce with the hot peppers in our garden, using this recipe. I had plenty to make a jar for us and share a big jar with my sister. This would make a great gift for someone who likes to cook and loves hot food.

Here's a link to my method for making big batches of savory vegetable stock - it's a great way to use up your veggie odds and ends, and makes a delicious, hearty, nutritious broth for winter recipes.

Elizabeth mentioned garlicky greens in her email, and it got me thinking about this wonderful recipe from my dear friend Anne, who loves to have cooking (and eating) parties with friends. If you're not from the Southern U.S., you might not know how wonderful collards can be -- and even if you are from the south, you might have only had them cooked to death with a hamhock. This is a great way to find a new (and vegetarian) appreciation for a humble green leaf:

Sauteed Collards (or any other hearty green you like)

Ingredients: 1 bunch of collards for 2-3 people
4-6 garlic cloves
1/4 cup olive oil

Rinse collards and remove the ribs from the middle of the leaves. Then stack the leaves in a pile and roll them up like a cigar. Then thinly slice them.

Peel the garlic and slice each clove in half long-ways unless really large, then slice into thirds.

Heat the oil over medium heat. When hot, add the garlic and cook until just getting golden, and remove. Do not let them get brown or they will make the oil a bad (burnt) flavor. Now turn up the heat to medium high and add the collards with whatever liquid clings to the leaves. Stir them with a wooden spoon or tongs, being sure to bring up the ones from the bottom so everything gets cooked. I like them crunchy, but you can cook them to your liking. Just before serving, add the garlic back in and stir them up.

I like to serve these with plenty of freshly ground black pepper, and some apple cider vinegar on the side for purists. Have fun cooking up your harvest this fall!

August 13, 2009

adventures in green babyhood

bootie2

Being a professional environmentalist as my day job, I always figured that when our baby came along, I'd just naturally be the greenest parent in town. No stress - I'd just know which products to buy or avoid, how to find them, and I'd have boundless energy to explore the greenest ways to raise our Little Pea. Ha, ha. I do know some wonderful parents who fit that description, but despite my best intentions, and my own expectations, I am sadly not one of them.

But I do really, really care about sustainability, the environment, and in particular how pollution affects children's health. So I am struggling to make this green parenting thing work. For those like me, here are a few things I've been able to make work. And for those who fit the green parent profile better than I, please please share some of your suggestions in the comments!

breastfeeding
Breastfeeding is absolutely the most affordable and sustainable way to feed a baby, not to mention the healthiest. The decision to breastfeed is probably the most important step we've taken in terms of sustainable babyhood. I realize that there are many reasons that some families are not able to breastfeed, and nobody should feel guilty if they can't, but I am very grateful to be able to feed the Little Pea this way.

Baby formula is a multi-billion dollar industry in the United States, is typically made from soy or cow's milk. Soy and dairy are both huge agricultural industries with all the associated pollution and energy problems that you already know about, not to mention all the packaging, shipping and waste that buying such a product entail. How wonderful that our bodies almost always make this product unnecessary!

gifts
People always want to give you baby gifts, no matter how much you protest or try to avoid it (at least, I tried to). I didn't want people to buy things we didn't need or want, or that contained toxic plastics, etc. But I also found it very hard to say to people, "Don't get anything, but if you do, you have to do a lot of research and spend a bunch of money to get us something that meets our values."

Thankfully, I have an awesome sister, who organized a green baby shower. She asked people to give us hand-me-down or hand-made gifts, or if they bought something, to please consider organic and non-toxic products. It worked beautifully. Many of our friends and family gave us copies of their favorite books from their childhood, something wonderful that they made, a big box of hand-me-down clothes from their kids, or something great they found at the thrift store. We also got lots of organic blankets, burp cloths, etc. I could never have asked for this (there's something too Puritanical about me), but my sister did a wonderful job with it.

stuff
Before the Little Pea was born, we got some great advice from a friend: to never, ever turn down an offer of hand-me-down baby stuff from friends or family. As a result, we have more baby clothes than one baby could ever wear, and we've had to buy almost nothing. Friends have given us a crib, co-sleeper, stroller, high chair, tub, baby seats, toys, books, blankets, towels... it's amazing how many times these things can be used, by so many babies, before they ever begin to even show any wear. We are lucky to have a big community of friends with little ones. Even if you don't, because your family is small or you're new in town, you can get much of what you need from thrift and consignment stores, saving oodles of money and reducing a lot of waste.

diapers: We've covered this area a lot already on Sew Green -- check out earlier posts on diapering here and here.

I am really interested in other folks' strategies for green babyhood. And I'm particularly looking forward to learning more about stuff like making baby food, toys, and how to communicate your values to kids' friends and grandparents. No parents are born knowing how to do all this stuff, and supporting each other has been critical for me - thanks to all of you for sharing what you've learned, too!

August 1, 2009

more diaper talk

wrapper disposable
cloth v. disposable - the discussion goes on...

I never thought I'd engage in so much talk about diapers. Back when I was single and when the new little one in my house wasn't even a twinkle in my eye yet, I used to get really aggravated at all the diaper talk that would take place among the mamas in my book club. Discussions about plot and character were routinely subverted by diaper chat. Who knew these yucky little waste landing-pads could be such a rich topic of discussion? And yet, here we are. How things do change.

So there's a sweet new baby in my life, which means my partner and I had to figure out what to do about diapers, and Lisa's recent post on the subject prompted me to write this follow-up. Like Lisa, I leaned towards cloth from the first, because the mountain of trash from disposables blows my mind, and because cloth just feels better and more natural to me (hey, it's what my mom used). But I also wanted to make a really responsible environmental choice, and diapers - whichever kind you choose - carry a huge environmental impact. As I came to find out, cloth and disposable are pretty much equally bad for the planet. So you get to make your choice based on what's best for your family, and then you just have to do penance in some other way for what you're doing to the earth. Like not have any more kids. Ha ha!

Before the Little Pea was born, I signed up for a local diaper service - two working parents just weren't going to be able to swing washing our own diapers, and our rather aged washing machine would waste so much water in the process that it seemed doubly crazy to wash our own. I'd heard all the talk that cloth is just as bad as disposable for the environment because of water use and detergent, but I'd always pooh-poohed it. I once even accused a friend of perpetuating diaper industry propaganda (all in good fun). Cloth had to be the way to go for us.

The Little Pea came two weeks late, which gave me some time for all sorts of distraction, including finally reading about diapers and their environmental impact. My favorite eco-advice guru, Umbra Fisk, has a great video blog post on this subject, and in another column points out a life-cycle analysis conducted by the Environment Agency UK, which (like every other decent study I've ever heard of) found that basically, it's a wash. One the one hand you have paper and plastic manufacturing and waste disposal, and on the other you've got lots of water and energy use. Pick your poison.

If you live some place where there is a terrible water shortage, then I'd say disposables are the more eco-friendly choice, and just be sure to use the greenest ones that work for you. But if you live someplace with abundant water and a terrible shortage of landfill space, cloth would be the eco-friendlier choice (especially if you use good detergent and dry them in the sun). But all things being equal - just pick the one you like better. Or pick Elimination Communication, if you are that kind of amazing person. I am humbled by you folk.

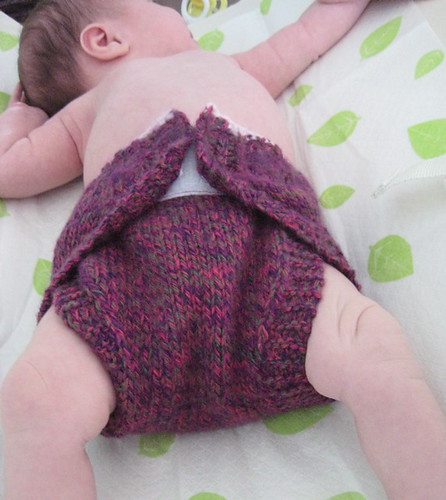
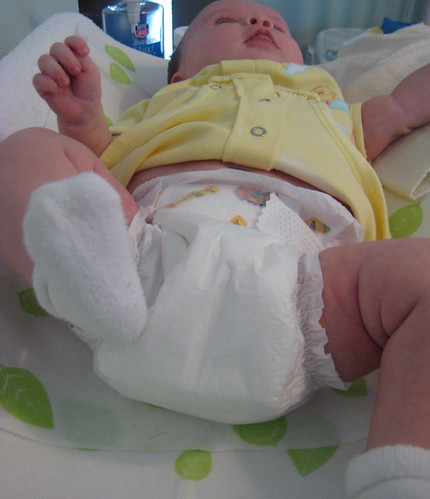
At our house so far we've found that cloth diapers are nice and cushy on our baby's delicate skin, and they really are no big hassle, as long as you have good reliable diaper covers to prevent any leakage (the adorable wrap-style diaper covers that I knitted sadly do not fall into the reliable category - we are using Bummis and Thirsties now). However, we've also found that disposables are great for overnight, and for travel to Grandma's and such (as my partner says, this way we get to diversify our impact - ha ha!). I am conducting my own experimentation with the various brands of eco-friendlier disposables, but check out this great review on Grist. I've found that cloth diapers necessitate far fewer baby wipes, and (like Lisa and Hayley) that they are great for wiping up all kinds of messes, baby-related and otherwise. Especially since someone else washes them for me.

So the bad news is, all diapers are bad for the planet. The good news is - you can make this choice based on whatever is right for your family, and not worry about the environmental impact. Isn't that a relief once in a while?

June 18, 2009

we're back! did you miss us?

weekly bunch

We missed us!

How did it happen? Somehow the Sew Greeney goodness kind of petered out last year, and I think I can speak for all the contributors when I say this, but um, well, I was kind of busy and sort of let it slide.

But that's all in the past! We've regrouped and reorganized, and we are planning some fun new stuff for the summer. The Sew Green contributors list will finally include a dude (dude!), and we're hoping to have old friends come back and visit with guest posts from time to time as well.

If you don't already know us, the Sew Green contributors are a group of artists, crafters and designers. Some of us are also scientists, parents, gardeners, musicians, and a great number of other things, in our daily lives. We're trying do all that we do in ways that are more sustainable, and that's what we write about here (especially the art, craft and design part). It's important to all of us to not just make our own daily lives and work better, but to change the larger systems we live in to be more sustainable as well - though we all do it differently, from art to activism.

Be looking for weekly posts this summer, and let us know what else you want to see here. You can also follow our regular tidbits on Twitter. Thanks for sticking with us, or for coming by to check us out!

December 22, 2008

last-minute ornaments

(posted today at f.pea)

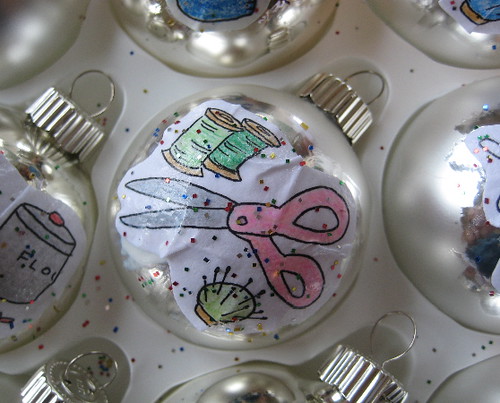
Scissor ornament

Last year I first tried my hand at making some dƩcoupage ornaments.

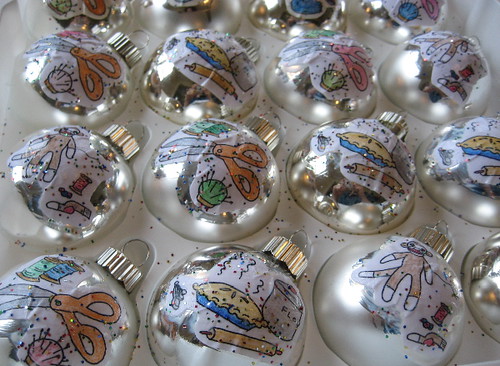
This is a fancy French way of saying that I glued some stuff on glass balls from the store. Sadly, the balls weren't hand-felted from locally-raised sheeps' fleece or anything like that, they were just on sale after Christmas. Glass (or glass-like) ornaments also turn up in the thrift stores right after Christmas, which is a good way to both be more green, and to stock up if you're one to plan holiday projects 11 months in advance.

Anyhow, last year I really had a great time with it, and decided to do it again this year. This is a fun project for one evening at home with some hot chocolate and a new album of holiday songs. It's a very kid-friendly project, as well. I'd love to see versions made from kids' drawings!
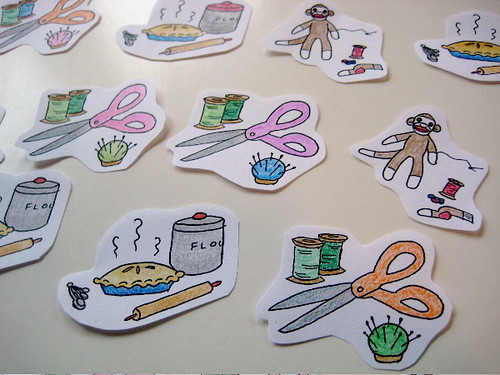
Last year I made a set of Darth Vader ornaments for a friend, made with dark purple glass balls, and Vader pictures from a comic book. This year I decided to use drawings I'd done myself of little crafty scenes, and a couple of boxes of silver balls, to make ornaments as little gifts for my friends.

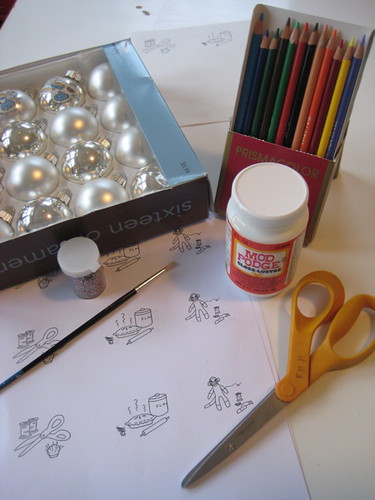
Here's everything you need for this project:

IMG_2740

1. A box of ornaments; 2. A set of small drawings (small enough to fit on your ornaments, which is pretty small); 3. Mod Podge glue and a paintbrush for applying it; 4. Colored pencils or crayons; 5. Scissors; 6. Glitter (optional, but why would anyone skip the glitter??).
Just color the little pictures and cut them out carefully. Don't use markers to color them - the glue could make the colors run. Crayons or colored pencils work best. When trimming the pictures, I like to cut away as much white space as I can - this eliminates paper wrinkles when you glue them onto the ornaments.

Little drawings, colored

Paint the back of a picture with Mod Podge, and then carefully place it on the ornament. Don't worry if it doesn't lie flat at first. Paint over the top of the picture, smoothing it down as you go. There will probably be some minor wrinkles - just try to keep them in the blank spaces rather than in the drawing itself. Flatten them down with the handle of your paintbrush, and make sure that everything is lightly and smoothly painted over with glue.

Sprinkle lightly with glitter. Really, a light touch is plenty here. The ones I did when I was generous with the glitter don't look half as good.

That's it! You can do a whole box of ornaments on one mug of hot chocolate if you're quick.

Crafty ornaments

====
Okay Sew Greeners, I know you can come up with some ways to make this project even greener. I've been thinking about greener sources for the ornaments themselves (the thrift store, your attic...). What else could I do to make this a more eco-friendly project in the future??

March 17, 2008

swap style

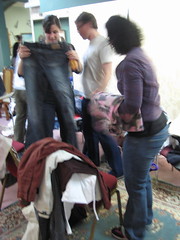
Ever since college, a group of our friends has been getting together a few times a year for a clothes swap. I love the clothes swap, particularly now that I'm not buying anything new (thank you, Wardrobe Refashion!). This time I came home with a great haul: several tops to wear to work, a great skirt, some short pants for spring, an orange vintage crocheted blouse, and some great socks for making sock monsters. And nothing beats the price: free!

If you've never been to a clothes swap and you'd like to try cooking one up with some friends, here's what you'll need to do it:

swap1

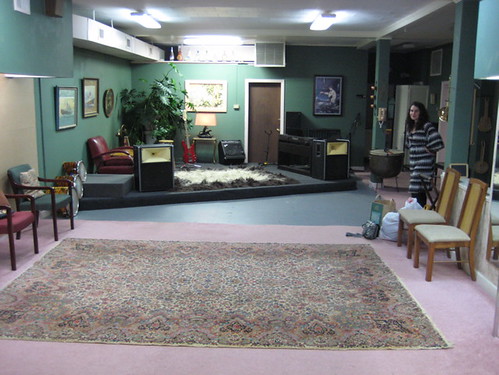
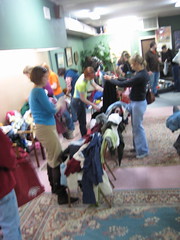
Space. We've always had the clothes swap at someone's house, though lately it's gotten quite large and we had to move it to a bigger venue (in this case the performance space at a wonderful music shop in downtown Raleigh). As long as you've got a main area for laying out clothes, and two spaces for dressing rooms (one for fellas, one for ladies), you'll be all set.

swap4

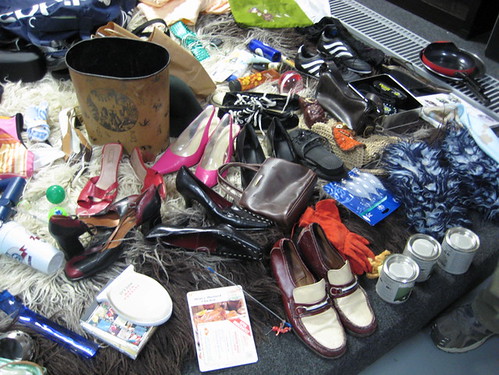
Clothes. The price of admission is at least one clean garment in good condition. I usually have a shopping bag or two; some folks come with just one item and some come with huge bags full. At a clothing swap last fall, I scored a beautiful black crepe suit made for a friend's great-aunt in Paris in the 1950's.

swap6 swap5

A cooperative spirit. This is not a competition, it's a free fashion night. The most successful swappers hunt in teams. If you dig up the perfect skirt for your friend, toss it to her. She'll do the same for you.

swap3
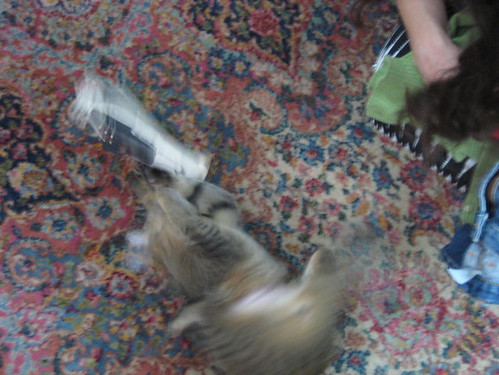
cats and catnip are optional at most clothes swaps

Basic rules. This is the least fun part, so I prefer to minimize rules, but suit yourself. The way we do it is, start at 7PM. Lay out the clothes by type (pants, skirts, jackets together, etc). We never used to segregate clothing by gender, but as this thing has grown quite huge, it's starting to seem like a good idea. Don't start swapping until it's time... time is around 7:30. Keep swapping until your appointed time, say 9 PM. No limits on how much you can take - just as long as you actually plan to use/wear it. Then everyone helps bag up what's leftover to take to the thrift shop.

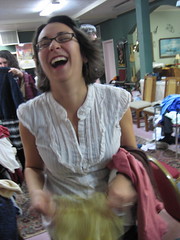
Snacks. Not required, but highly recommended. We do it potluck-style, and the fare ususally consists of chips, salsa and some beers. The quantity of beer usually correlates directly to the zaniness of outfits that people start modeling as the evening goes on.

swap7 swap8

Clothes swapping is a lot of fun and very economical. It's also a delight to see your old favorite clothes getting a second (or third, or fourth) time around on your favorite people.

February 28, 2008

a little political refashioning

Since this is a non-partisan blog (as far as I know), I won't get into any electioneering here. But I wanted to share a little project with you that some of you Sew Greenies might be interested in: an online t-shirt making rally for your favorite candidate!

I signed up recently for the current round of Wardrobe Refashion because I've decided not to buy any new clothes this year. But that meant I couldn't buy a campaign T-shirt, and I have to say that I'm one of the more head-over-heels supporters of this particular Democratic candidate for the US presidency... (I'll let you draw your own conclusions about who that might be). So anyway, I decided to make my own T-shirt.

Then I thought about it and realized that some more folks might want to make their own shirts too, so I'm starting a rally! If you're curious, come check it out! We're designing and making our own shirts... repurposed, thrifted, recycled and/or hand-made shirts only, with your own designs!

Sign ups are going on now through the March 11 primary, and rally participants will share their creations on Flickr... winners will be chosen on the same date as the NC primary (my home state) on May 6th. There will be exciting crafty prizes for the winners!

If you want to do this but support a different candidate [or live in another country or something ; ) ], feel free to take this idea and run with it. There's plenty of craftiness to go around!

December 21, 2007

give, give, give!

Do you have a few last minute gifts to pick up, or to make?

I do. But I'm going to forget about them. Instead, I'm going to the mall.

I'm serious. At the local mall, there is a big Christmas tree with lots of names still on it, of kids who have real needs - like warm coats and clothes for school - and who could really use a Christmas present from a friend like me (and you).

I'm going to go pick a name off the tree for each person left on my gift list. I'll take note of the child's name, age, and any other information there is about her or him. I'll buy her or him a new coat, a pair of sneakers, socks, mittens and hats, art supplies, or whatever they've asked for. Then I'm going to wrap the gifts right there at the mall, drop them back at the gift tree, and then go home.

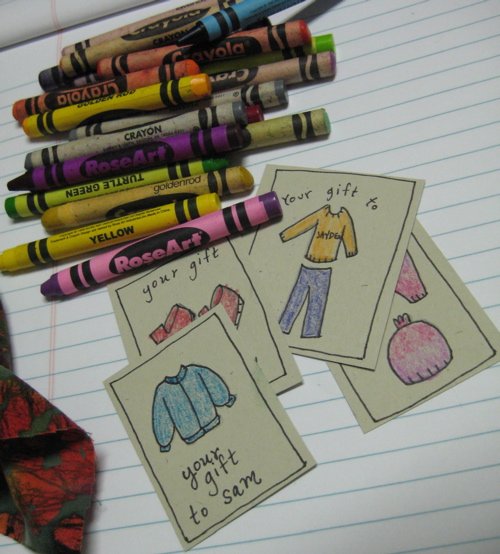
tokens

Once I get home, I'll make another little gift out of each of those big gifts. It will go something like this: I'll grab a Christmas card (or make one) and write something like:
This year, your gift is a winter coat for Sam. Sam is seven years old and lives at Haven House, a home for children of incarcerated mothers. Thanks for helping Sam get something he really needed!
I think I'll make a little token to represent the item and then put the card and the token into a box and wrap it up in nice paper with a fancy bow. Voila! Double gift, and it was something that somebody really needed.

This might seem like something that your family members (or whoever you have left to get gifts for) wouldn't like, or might think is weird. But you might be surprised at how much they appreciate it. So... maybe we can meet in the Food Court for a latte?

December 3, 2007

toys without the tox

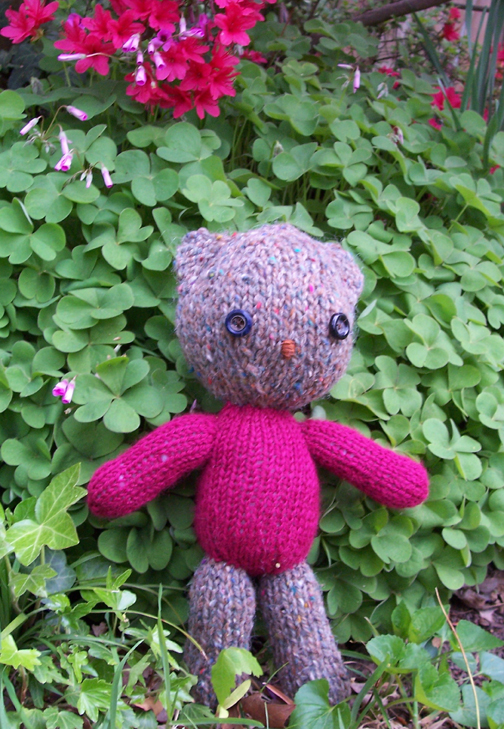
nameless_bear

Has anyone else been bothered by all the horrible news about toys lately? With the holidays upon us, all the news about lead, phthalates and asbestos in children's toys seems particularly ominous to me. I've never liked the part of Christmas where kids are overwhelmed in beeping, spinning plastic toys and the city trash collectors have to do double-duty to haul away all the packaging and wrapping. But the pollution that's in our kids' toys is far worse. It's not that I ever thought that plastic doo-dads made in China were particularly good for kids, but lead, for crying out loud?

First, everyone should take action to let Congress know we need decent safety standards to protect kids from nasty chemicals. And after we've been responsible citizens, we can turn to being responsible consumers, and the toys we buy for the kids we love.

My suggestion? Let's make our own toys this year!

I love making toys, and Christmas is a great excuse for me to get Santa's workshop going on my kitchen table and make a whole bunch of them. So I thought I'd share some of my favorite resources on toy-making, and ask y'all to share yours, too.

kitties3
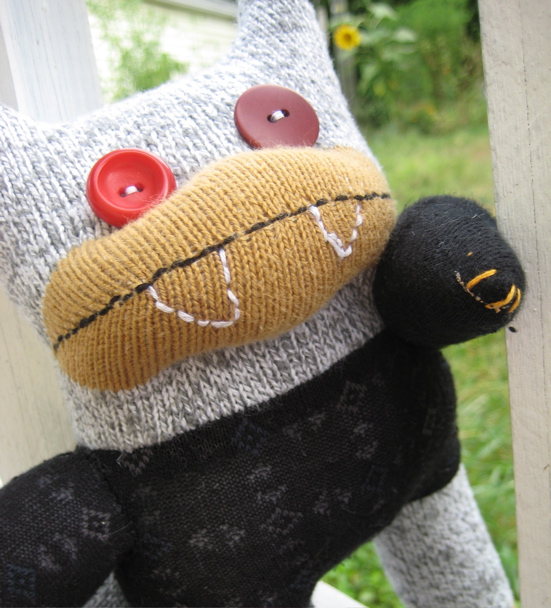
bad kitty, a wicked but cuddly sock monster

My all-time favorite toy to make is a sock monster. All you need is rudimentary sewing skills, some old socks, polyester fiberfill or other toy stuffing, and your basic needle, thread, pins, scissors, etc. Sock monsters can be incredibly simple little goblins, or complicated animals with long, curling tails and embroidered features - kids seem to love all of them, no matter how well (or poorly) you can sew. The best book I know for sock monster instruction is "Making Stupid Sock Creatures" by John Murphy (read my previous post about this great book here).

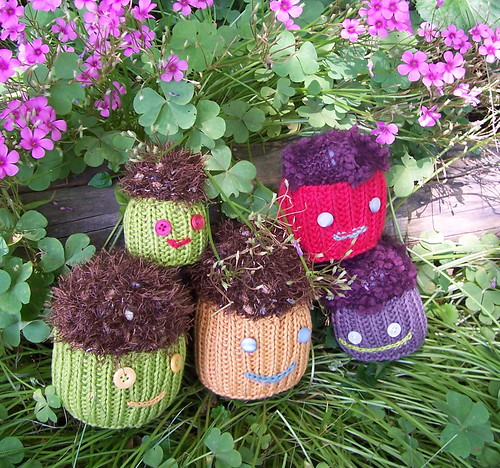
momerath_village1
knitted momerath village

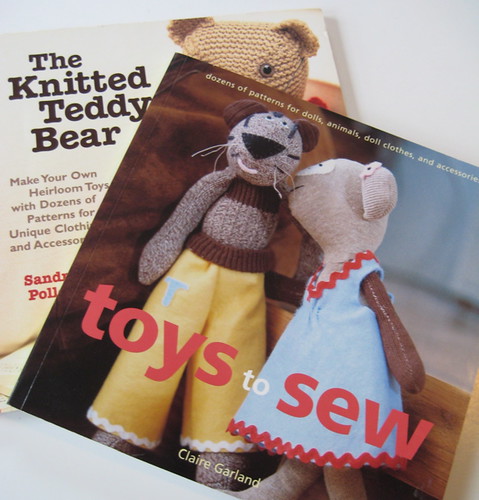
There are oodles of resources on the web and in the library for knitting toys. This blog is devoted to toy knitting, and includes an index with lots of free patterns. I love Jess Hutch's toys, and her book is a gem (if you can get your hands on one). Lots of knitting books with kid and baby patterns feature toy patterns in among the sweaters and hats, especially books by Zoƫ Mellor and Debbie Bliss. "The Knitted Teddy Bear" by Sandra Polley is a great resource for knitters of all skill levels who want to make old-fashioned, cuddly teddy bears. I also really like "New Knits on the Block" by Vickie Howell, which includes not just softies but all kinds of neat costumes and accessories. "Family Circle Easy Toys" is a classic with both knit and crochet patterns - the copy in my local library has been well-loved in its decades-long tenure there.

toy books

For stuffed animals, dolls and doll clothes, a wonderful book I picked up recently is "Toys to Sew" by Claire Garland. Her toys range from ridiculously easy to not-very-hard, and the patterns are way cute.

And finally, puppets! You can make a puppet out of just about anything, and while you could make a puppet and give it as a gift, making puppets together with kids is so much more fun. I just picked up a copy of a beautiful book called "Puppets Unlimited with Everyday Materials," by Anushka Ravishankar & Gita Wolf. The authors include detailed instructions for making stick puppets, string puppets and many others based on traditional Indian puppetry, with regular junk from around your house. Their focus is on making the puppets together with children. Then you can make your own stage and celebrate Christmas Eve with a puppet show - a great gift for kids and grown-ups alike.

Have fun making some toys for the kids on your list this year... and don't forget to take action!

November 16, 2007

a composted party

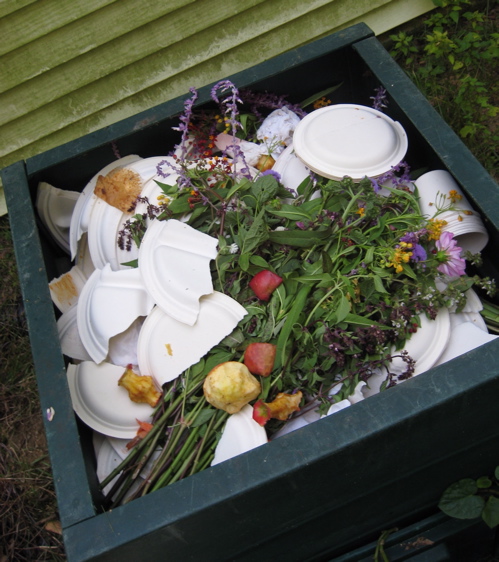
composter

As the holiday season approaches, you may be contemplating hosting a party at your house, and maybe you're even contemplating how to minimize the waste from such a party. We recently had a big party in our backyard, and experimented with composting the garbage. Some things we did right, and some things not as well, so I wanted to share some learnings with any of you party people out there who might be cooking up a fabulous low-waste event of your own in the next few weeks.

We don't have enough dishes and silverware for 60 people, so instead we ordered compostable plates, cups, napkins and flatware from Green Line Paper (there's probably a local supplier near you). On the day of the party, we set up the trash area with one garbage can, one recycling bin, and for the compost, we used a smaller trash can lined with a brown paper bag.

One thing we didn't do as well was to make clear signage to direct the composting, since it wasn't exactly intuitive for most folks. If I were to do this again, I'd make a big sign that says:
PLEASE COMPOST YOUR GARBAGE
1. Scrape the food from your plate into the garbage.
2. Tear your plates and cups into 4 pieces and throw them in the compost bin.
3. Throw your forks and spoons into the compost bin.
4. Thanks for feeding the worms!

We didn't actually have worms in our compost bin before, but a friend was nice enough to give us some from her kitchen worm bin to help speed up decomposition for such a large amount of stuff. If you had a well-running outdoor vermicomposting area, you could forego the plate-scraping and give the worms all the food waste (except for bones, if you had any). Even if you just have a kitchen worm bin, the torn up plates and cups make a great bedding medium for worms.

The party was great! And afterwards, we only threw one bag of garbage into the trash - and it wasn't quite full - so I'm considering the effort a success. Party on, worms.

October 11, 2007

felting in a drought

Lately I've been doing rather a lot of felting.

[For the non-knitters out there, felting, or fulling, is the process of beating knitted yarn into submission in the washing machine or using another technique to shrink the knitted item and turn it into a dense, durable mat of fiber].

I love felting, particularly for making toys. But one of the things that always bothers me about felting is using the washing machine. I feel so terrible running two whole wash cycles - all that energy and water! - just to turn a non-essential bit of knitting into a non-essential bit of felted knitting.

If you live in the mid-Atlantic or southeastern U.S., you are well aware that we're in a drought. Most of North Carolina (where I live) is now rated as "extreme" drought conditions. We've got mandatory watering restrictions, and I'm relying mainly on the bucket in my shower to get the flowerbeds through from week to week. So running two whole washing machines full of water (at something like 50 gallons per cycle - oh my god!) just to felt a toy salamander seems kind of... well, insane.

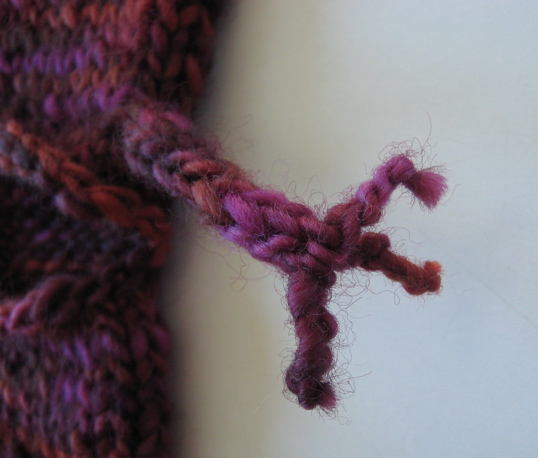
lewisi_prefelt 3
here is my knitted salamander's foot, before felting

So I am on the hunt for low-water felting methods. When I mentioned this at my local yarns store, one of the lovely ladies there suggested this method. While the energy input is still quite high, it definitely saved quite a lot of water.

1. Fill a 5-gallon bucket about halfway with very hot water and a tiny bit of mild soap. Submerge your item to be felted, and a towel, in the bucket, and get them both good and wet. Roll the item up in the towel and tie it shut with a piece of string.

2. Toss the roll-up into the dryer with a shoe or something else for agitation. Set your dryer to the lowest heat setting, and run it for about ten minutes.

3. Check your item to see how well it has felted. Repeat step 2 above until it has felted completely.

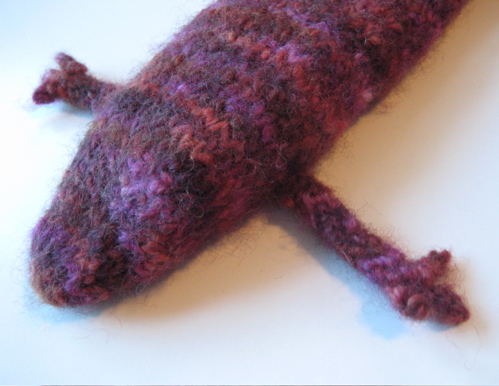
lewisi_postfelt
post-felting. someday he'll even get eyes and external gills.

I'm still looking for ways to cut the electricity, but this method definitely saved plenty of water, which I hope the real salamanders in my neighborhood creek will be happy about.

Some other things I'm thinking of trying, to eliminate the electricity:
- Needle-felting (done with unspun yarn)
- Sticking the item inside a container and dragging it behind my bike on a short ride
- Using one of those ice-cream makers where you stick the ingredients inside a ball and kick it around the yard.

Any other ideas out there?

April 30, 2007

cosmetics: it's what's on the inside that counts

Pop quiz: How do pollutants enter your body?

(a). We inhale them.
(b). We swallow them in food and water.
(c). They're absorbed through the skin.
(d). All of the above.

Did you pick (d)? You're a smarty. Although the skin is the body's largest organ of absorption, people often forget about it, or think of the skin as a barrier to the ills of the world outside. Not so. The things that get onto our skin can be readily absorbed into our bodies. Since that's the case, all the cosmetics that people - especially women - use must be stringently tested by federal agencies like the Food & Drug Administration, right?

Um... no. Sorry, you got that part of the quiz wrong. In fact, the FDA doesn't have the authority to require cosmetics companies to test their ingredients for safety. As a result, there are all sorts of nasty pollutants in our cosmetics - more than 10,000 different chemicals, the vast majority of which have never been evaluated for safety (you can read more dirty details at the Environmental Working Group's Skin Deep website).

Some of the nasties that are common ingredients in cosmetics like makeup, lotions, shampoos and hair coloring include:
  • Lead acetate - powerful developmental toxicant; used in hair coloring and facial cleansers.
  • Formaldehyde - a known human carcinogen (causes cancer); used in nail treatments.
  • BHA - a possible human carcinogen; BHA can disrupt normal development by acting like a hormone in the human body. Used in hundreds of products, from makeup to moisturizers.
  • Tolulene - a reproductive toxicant used in nail polish.
  • Coal tar - a known human carcinogen banned from cosmetics in the European Union; in the US it's used in shampoos, especially for dandruff treatment.
  • Phthalates - Hormone mimickers that cause many types of health problems; dibutyl phthalates have been blamed for feminizing young boys. Phthalates are used in nail polish, skin care, lip gloss, facial cleanser, hair color and many other products.
  • Progesterone - may cause cancer and reproductive toxicity; mimics hormones in the human body and disrupts development. Used in around-eye creams, hair loss treatments, and men's hormone creams.
Popular brands of cosmetics frequently contain these types of nasty pollutants. They're cheap ingredients that are used for all sorts of purposes, from intensifying color to making cosmetics penetrate the skin better. It's particularly troubling that so many of these products containing developmental toxicants and hormone mimickers are marketed to young girls and teens, who are still developing, and therefore highly sensitive to them. As an adult, I'm not much of a makeup and potion user, but as a teenager I obsessed over products that would make me look different - especially things that would make my frizzy, curly hair straight and glamorous, or hide all my crazy freckles. Marketers of cosmetics play heavily on women's insecurities about the way they look, from changing your eye color to lightening your skin (let's not even get into deconstructing that one).

Recently I saw Jane Houlihan of Environmental Working Group speak on a women's environmental health panel. Pressed to name the worst-offending cosmetics, these are the products she named: hair coloring, skin lighteners, and nail polish. These products in particular are not only bad for you, the consumer, but also quite dangerous for the salon workers who apply them (and inhale them) all day long.

Many companies have signed on to the Compact for Safer Cosmetics, a pledge to eliminate toxics from cosmetic products. You can use the website to look up the companies you buy from and decide whether they really deserve unfettered access to the inside of your body. You can also use simpler solutions and home-made remedies to cut your exposure to dangerous pollutants in cosmetics.

:::

One of my favorite home remedies is a simple facial scrub (I think I must have learned it from not martha). Just use the soap of your choice (a pure one, of course), get a good lather going, and sprinkle about a tablespoon of baking soda into the lather, then wash your face. The baking soda gives a good gentle exfoliation to your skin and leaves it feeling very smooth.

Here are a few more sources for making your own natural beauty products:
Atomic Teen: Natural Beauty
not martha: Home Spa-erific
a mind-bogglingly complete list at makeyourcosmetics.com

Home safety hint: When making your own cosmetics, be sure to use safe ingredients to which you are not allergic. Essential oils in particular may irritate your skin, even though they are "natural." It's always smart to test a dab of the stuff in an inconspicuous place to find out whether it will irritate you. I recently learned the hard way that I'm allergic to tea tree oil. Itchy!

March 28, 2007

how to start a car/truck share

Last year a friend of mine came up with a great idea: sharing a pickup truck. He had been fantasizing about buying a little truck to haul mulch, lumber, furniture, whatever. A few other friends had recently bought fixer-upper houses or started some big home/garden renovation projects, so owning our own pickup truck seemed to many of us like both a good idea also a far-fetched one at the same time, financially speaking.

Enter the truck co-op.

Here's how we did it: five households (all within 2 miles of each other) agreed to buy a beat-up old work truck together. Price tag: $1,000. We split the cost 4 ways ($250 each), with the fifth $250 share going into the maintenance fund. One person volunteered to add the truck to his car insurance and to manage the maintenance fund. In repayment, he does not have to pay into the annual maintenance fund ($150/year).

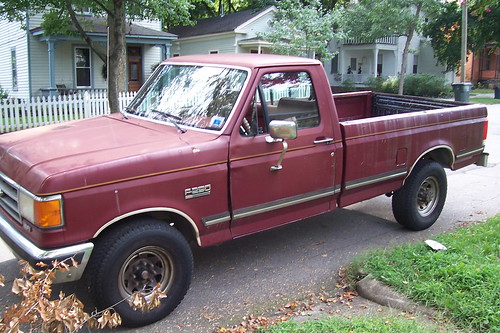
red_betty1
this is what a $1,000 truck looks like

The truck, whose name is 'Red Betty' for her lovely coloration, is reserved by co-op members for 1/2 day blocks using a Google calendar. We each have a set of keys. Folks outside the co-op can rent her for $50 for one day, no more than 2 days in advance (so that co-op members get first dibs). The small number of rentals we've had so far have done well to keep our maintenance fund in good shape.

Our other 'rules' are, don't take Red Betty outside our 3-county region, and do bring her back full of gas. That's about it.

Red Betty lives at one co-op member's house, since she has a big driveway and plenty of parking. Since we're all close by, this is a really convenient arrangement. So far, my partner and I have used Red Betty to haul a huge load of mulch that we got for $12 from the city, a desk I bought (saving us a $25 delivery fee), some lumber, all the stuff from our shed when we moved in December, and a few other odds and ends. Red Betty also does regular duty at the Boys Club, where another co-op member volunters by running the kids' community garden there.

Some tips to make a car share successful (based on my experience):
  • Agree on all the rules/guidelines as a group and maintain them someplace, like on a website.
  • Make sure everyone has ample opportunity to use the car-share. Too many families sharing one vehicle can make it less useful for members. Five households means that our truck is always free when we need her - and that she gets relatively light use, an important consideration for an elderly truck!
  • Use a Google calendar or another easily-accessible scheduling tool to manage reservations.
  • Put one person in charge of vehicle maintenance, preferably someone with some skills in that area. Being able to change the oil and do minor repairs yourself will save the co-op a lot of maintenance money, but make sure that the maintenance coordinator gets some kind of stipend (as in our case, where he doesn't pay maintenance fees).
  • Go co-op with people you respect and trust, and be sure to treat them with that respect and trust in all interactions. If problems come up, work them out politely and in a full group setting.
Friends can go co-op on all sorts of useful items, like power tools, lawnmowers, yard-work, child-care, art supplies/equipment, community gardens, and all kinds of other things. Think of large purchases that you'd like to have but don't have the space, or may not use all that often - it may be perfect for a co-op arrangement. In our group's case, this co-owning has made other big investments (like do-it-yourself home renovation) possible where they might otherwise have been out of reach.

Of course, you don't have to manage something like a car-share yourself. There are plenty of memberships you can buy into that include the cost of management, like Zipcar. Here are a few resources to consult if you're in the market to share a car, truck or other significant item:

Car-sharing Library
Zipcar
City CarShare (SF Bay, USA)
LiftShare (UK)
Freewheelers (international ride-sharing - UK)
National Cooperative Business Association (USA)
Co-operative Child-Care (UK)
Stelle Community Cooperatives: Tool co-op

So the basic idea behind sharing instead of buying is to save money and natural resources by buying less stuff, particularly in the area of large, expensive, high-resource items like cars. But one of the best side-benefits of sharing stuff is the community-building. Taking on a large project like this with other people builds trust, caring and a shared sense of responsibility for our own greater well-being. Our co-op beater truck has generated quite a few group projects, including a notoriously fun afternoon of ripping apart an old porch at one co-op member's house (it was so much fun that the video made it to YouTube).