Showing posts with label around the house. Show all posts

August 26, 2010

Green Housing: Getting the most out of what you have

 before (currently)

In my architectural day job I work on large projects, mostly University buildings. It might seem like a far cry from designing homes, but I realised recently that a lot of the issues that come up in my work are also relevant to how people might address their housing needs in a more sustainable way- using their (undoubtedly) limited resources in the most effective way to meet their needs. In Australia continually rising housing prices have led many people (ourselves included) to rethink how they use their existing home, instead of buying a different larger one.

Making the best possible use of existing physical resources and materials (Reusing and Recycling) is often better environmentally (and in other ways too) than building new, even if the new building incorporates the latest ‘environmentally friendly’ materials, technology and ‘green building’ design research. I find many of the homes I’ve seen on World’s Greenest Homes appalling, with regards to their consumption of resources and pursuit of brand spanking new, cavernous, luxury, even if they are using some environmentally good materials in a clever way.

I’d like to highlight 5 green building design principles about making the most of what you have already have, and explain how we have been applying them over the last couple of years, as we’ve been renovating and expanding our own home and garden. I'm not claiming that our home is one of the world's greenest, but it is certainly greener than many alternatives.

after (hopefully)

1. Think long term. Our needs always change over time, but it doesn’t make sense to address short term needs in a way that compromises long term needs, or creates a whole lot of wastage or redundant renovations.Think about the big picture master plan, not just the problem that is bugging you today. You may have a toddler now, but will you still be living in this home when they are 10? 20? 30?? (Hmmmm, scary thought...)
With a child entering into our life, we realized we needed a new craft/study room, more living space, and a dining space that could seat more than two people without rearranging the furniture. Fortunately, we had an outside space that was completely underutilized, where we could build two new rooms.

2. How else can you use it? Flexible and adaptable spaces are more useful in the long term than highly specialised spaces. Some rooms have to be single function- the kitchen and bathroom aren’t going make very good bedrooms- but can other rooms be changed around (bed/craft/lounge/dining room) as needs change? Perhaps small changes, like changing doors or windows, removing a wall, adding power points, removing fixed storage, or changing lighting will change how you can use the spaces you already have.
Our rooms aren’t big, but they’re generous enough, with doors in sensible locations, so that they can be used in different ways, with different furniture layouts. We can use our new craft/study room as a bedroom if we need to, as can a future owner.

3. Inside and Outside. Depending on your climate, at different times of the year the spaces outside your home can really expand your living space, and the kinds of things you do. Are you invited out by being able to see and hear what’s happening outside? Is the door in the right spot? Is the space outside at the same level as inside? Is it shady or sunny, sheltered from wind or rain, appropriately paved or decked?
We hardly used our back garden because you had to go through the laundry (which included a toilet) to get there, and immediately down a couple of ugly concrete steps. Not ideal, especially when you have visitors. By building a deck area and installing a new (fully glazed) back door into our kitchen, we now have much more light in our kitchen, can see how lovely the garden is, and spend a lot more time in out there.

4. Collecting water. Where we live, the price of tap water is cheap, so until the government brought in restrictions on how we use it, investing in large rainwater tanks didn’t seem worthwhile. However it’s now our legal option for watering the garden, washing the car or letting our toddler play under the sprinkler. You can also collect rainwater for toilet flushing or laundry, depending on how you set the system up. Rain and grey water collection options vary, depending on local regulations, budget, space and water needs.
We now have two water tanks- one in the front yard and one in the back, to help our efforts to set up a food producing garden and shade trees. We also have a basic grey water system set up so that we can collect bathwater to hand water our small lawn when it needs it.

5. Sun and Shade. The key to keeping a building warm (or cool), without spending money on energy, is letting the sun in (or keeping it out), along with insulating the walls, floors and roof. The potential benefits vary depending on your climate and time of year. There is also energy saving benefit if the daylight means you don’t need to turn the lights on all the time. The location and size of windows, type of glass, and any fixed, movable or growing shade (inside or outside) will all make a difference.
We packed our extension with insulation (the existing house has virtually none, so we do rely on air conditioning to keep us cool upstairs in summer) and installed large windows with special coated glass on the sunny side of the house. A sheer blind reduces glare on sunny winter days. In hotter months, we have a removable fabric sunshade that shades the window and the outside deck. All our shade trees are fast growing and deciduous (sadly not native) which means the garden gets sun in winter, but our lawn is beautifully shaded and cool in summer.

I’ve tried to keep this as a simple outline- something to perhaps get you thinking, and inspire you to investigate further. There are many resources out there for more detailed information on green building design and many of the things I’ve mentioned- too many to pick just a few. I encourage you to Google, or if you’re in Australia on 12th September, it happens to be Sustainable House Day, with many homes, all over the country, open to visitors and all their questions.

July 8, 2010

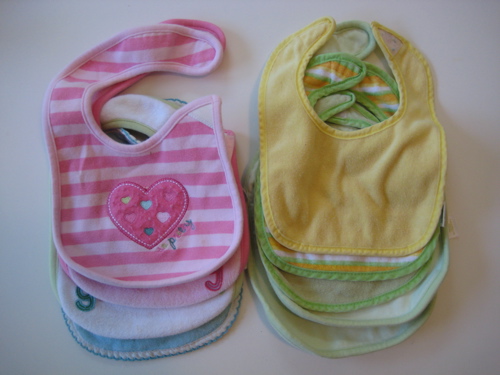
turn old bibs into new wipes

bibs to wipes 1

We have a large basket of well-used bibs at our house. Many of them were hand-me-downs and have kept many a baby and toddler from besmirching their finery over the years. Quite a few of them have been plain old worn out, with velcro that somehow lost its stick, and years' worth of baby food stains that will never wash out.

I hate throwing away useful things, especially baby things which seem to cost so much and function for so short a time. I debated a while about simply sewing new velcro onto these bibs, but the stains on many are so icky (and we have a mountain of bibs that do work), that I decided to make them into wipes instead. You can never have enough wipes, and I feel guilty every time I use a disposable one.

This is a ridiculously easy project. Here's how I made mine:

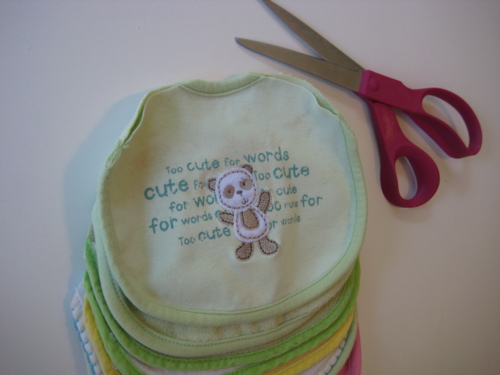
bibs to wipes 2

1. Cut the tabs off the bibs. I trimmed mine into a pleasing symmetrical shape (symmetry is optional).

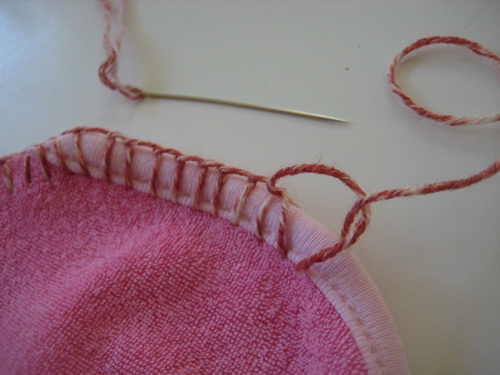
bibs to wipes 3

2. Use a decorative stitch around the outside edge to finish the raw edges and make the whole thing look nice. I used mattress stitch. Be sure to use a sharp embroidery needle and a lightweight cotton yarn or crochet thread (mine was leftover cotton sock yarn).

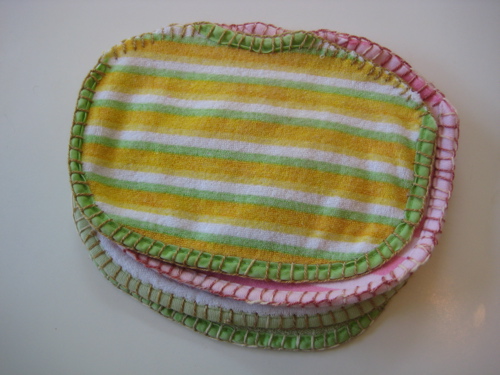
bibs to wipes 4

Voila! Two steps and you've got a tidy pile of re-usable baby wipes, kitchen rags, burp cloths, or washcloths - already pre-stained so you don't need to feel bad about getting them good and dirty.

p.s. Those more adept at sewing than I am could remove the original piping from the discarded part of the bib and trim out the raw edges with that, eliminating the need for the fancy hand-stitching. Totally up to you!

May 13, 2010

rechargeable batteries


having a baby monitor finally got me on the path to re-chargeable batteries. i KNOW. what took me so long? honestly it was the initial cost and then all the bad reviews of rechargeables that i read oh so long ago. but battery technology has changed by leaps and bounds - even in the last couple of years.

i broke down and bought an energizer recharger to charge batteries for the baby monitor. i was in line at walgreens - realized the three AAA's in it were about to die soon and i WAS NOT going to just buy more cheap batteries to keep throwing them away [ahem i mean recycle them. luckily where i live it's easy - you just put them in a plastic bag on top of your garbage can and the city recycles them. you can use this site to find a recycling spot for your batteries in the states].

i bought the sort of lame energizer re-charger that i spied amongst all the normal akaline batteries. i say sort of lame because it DOES work - i always have charged AAA batteries when i need them [1.5 weeks is about how long they last with how i use the monitor daily]. the lame part is that plugged in the charger has constant green lights. not green when they are finished charging, or green for a little bit, but green all the time. i leave the charger in the kitchen and since i need the batteries so often i have to admit i pretty much always leave it plugged in [because if i didn't i would forget to charge the batteries. i know this for a fact].

i tell myself that it is functioning as a night light - but i do feel guilty about the vampire drain and wish it shut off when the batteries were charged. but that's too complicated a task for my less than $10 charger. you get what you pay for... but i am happy that i have spared almost year and a half's worth of AAA batteries every 1.5 weeks. [that's 156 batteries if my math is right].


it's definitely time, though, to invest in a whole SET of batteries and a charger. the energizer will do AA's too, but i do have things around the house that need C's and sometimes even D's.... [flashlights, portable radio, the all important bubble making machine that my daughter loves]. i know that we'll probably have toys in our future that will need batteries too.

in my quest for better rechargeables i read this article . and am thus really contemplating the eneloop batteries pictured above. you can find a set of 8 AA's, 2 AAA's, 4 C's and 4 D's for under $40 with shipping. here's a list on amazon . that pays for itself after what only 8 packs of $5 batteries. not bad i think.

apparently this new generation of rechargeables holds their charge longer [even away from the charger] and the charger is smart and won't over charge the batteries. two problems i read over and over in complaints about older NiMH rechargeables. my only complaint is that there isn't a 9Volt option. we have a remote that uses a 9Volt and so i'll have to find an alternative for that.

if you want to read all about different kinds of batteries, how they work, and how long they last - i found this very technical [and yet readable] article.

anyone out there have any great rechargeable experience that they want to share??? i'm all ears. i think i'm going to make my final purchase decision by the end of the month. if anyone cares i'll try and post a post script to this post with my choice[s] and how i feel about them.

March 11, 2010

Shopping baggage


Late last year I read about a study that made me start to think a lot more about our use of shopping bags. We’ve been using the ubiquitous (in Australia, at any rate) green polypropylene shopping bags for our grocery shopping for years now, but the Woolworths Shopping Bag study, by RMIT’s Centre for Design, made me start thinking about all the bags we consume when we buy or receive goods.  The study looked at the whole life cycle environmental cost of a number of different types of retail shopping bags (paper and several different plastics), taking into account the production of the raw materials and manufacturing of bags from those raw materials, transport, use and ultimate disposal of the bags.

The study concluded that reusable bags had lower impacts than single use bags, but these benefits were highly sensitive to the number of times a bag was re-used. Not a surprising discovery, but more surprising was the fact that despite having the lowest impact on litter, and being made of renewable resources, paper bags had the highest environmental impact due to the energy embodied in their production. You can read more about the study and conclusions here and here. Since reading that, I’ve been carefully hoarding any bags (especially paper) we receive for re-use, and giving a bit more thought to the kind of bags we do use, or perhaps could use.

The shopping bags we use are polypropylene, which is recyclable when they reach the end of their useful life. In theory that is. In practice, I was surprised to learn here that because the thread used to make them isn’t recyclable they have to be unpicked by hand, they need to be shipped from Australia to China, where labor is cheaper, to make recycling economically viable. This is a great example of the fact that even though something may be recyclable, the process of recycling (if and when it is disposed of in a way that enables recycling) is not without environmental cost (and may well have some ethical issues too).

Perhaps I’m a tad cynical, but I do feel that recyclability is increasingly becoming an easy green-washing feature for advertisers, with a whole heap of ifs and maybes being swept under the carpet, out of the consumer’s sight. I guess it’s up to each one of us to consider why we choose the purchases we choose, and to be satisfied in our own minds that they are worthy justifications based on the best information we could access.


But back to bags- there are certainly some opportunities in the shopping bag arena for some environmentally beneficial creativity. First up, if you are lacking reusable shopping bags, make yourself some shopping totes that suit your needs- perhaps something that folds up nice and compact, a big roomy bag, a retro crochet bag (link to .pdf), or whichever size and shape you might need, perhaps re-purposing materials you have on hand (ideally natural materials such as cotton that will decompose at the end of their useful life). Second up, make sure you have them on hand when you go shopping, and use and re-use them for as long as possible.


Our household already has a useful stash of shopping bags, and are in the routine of using them, but I realized we could do with some reusable produce bags. Although we re-use them a lot of the time, I found that we were always coming home with a few more plastic produce bags every time we bought our fruit and veg. Inspired by some handmade mesh produce bags I saw on flickr, and this tutorial from Wisdom of the Moon, I hit our local second hand shops and found a sheer mesh curtain to re-purpose. One evening with my overlocker (aka serger) later I had a set of 10 mesh bags.

I sized them to minimize wastage from the materials I had, and to keep them similar to the plastic produce bags I’m used to, using some cotton yarn for drawstrings. I’ve been trialling them for a couple of weeks now and am really pleased. Responses from cashiers has varied, from the ditzy supermarket checkout chick who wondered if I wanted her to take the produce out to weigh it (Umm, no- that’s fine, they weigh next to nothing), to the ladies at our regular market vendor who remarked how nice they were (Oh thank you!). The only drawback is that we are now dependant on plastic containers to keep our veggies fresh in the fridge. At least they're re-usable, but I do wonder if there is a bag I could make for this purpose... Any suggestions?

February 8, 2010

make a sock monster draft-blocker

{cross posted from f.pea}

Many days on end of cold, wet, icy weather have led to short bursts of creativity around here with the materials we have on hand.

dyrrwurm

Dyrrwurm is now guarding our back door, keeping out the nasty, cold draft that was coming in under our vintage 1952 door (which really ought to be replaced with a more insulated model). He was made from two pairs of identical socks that HWWLLB gave me recently for the purposes of sock monster making. Before his reincarnation as two pairs of men's socks, Dyrrwurm lived at the back door of the land of the giants, in the far, far north, where his hobbies included writing epic poetry, collecting pictures of his idol, the Earth Serpent, keeping out the cold draft, and doing pedicures for his dragon friends.

You can make your own door dragon - it's quite easy, even for sloppy, inexpert sewers like me. This project was done in two bursts - it took me one naptime, and one visit from the Little Pea's favorite Auntie to complete. You will need:

- 2 pairs of heavy socks in a dragoney color
- matching thread
- sewing machine
- a few pins
- polyester fiberfill or some other stuffing (rags are fine too)
- something heavy for inside - I used sand, but you could use dry beans, rice or pebbles
- four or five repurposed plastic bags to hold the heavy stuff

My door dragon is only three socks long, since my door is narrow. But for a standard-width door, you will need to make the dragon four socks long.

door monster tutorial 2

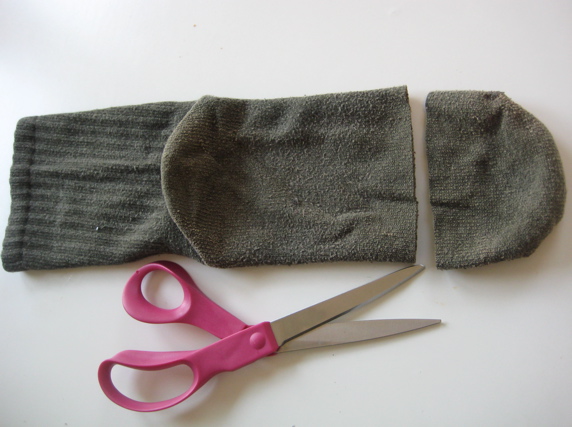
Cut the toes off all the socks except one - this will be the head. Sew the socks together cuff-to-toe, right sides together. Try to keep them lined up so that all the heels are basically running in one line down the dragon's back. Turn right-side out and admire your long, wiggly new friend.

door monster tutorial 7

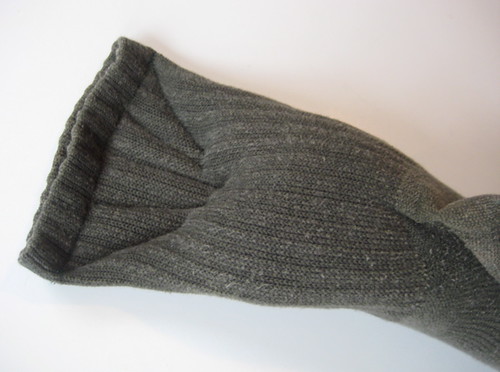
Starting at the head end, put a small amount of stuffing inside each heel, flatten and pin down. Then sew the heel shut to make a fin. You can add some decorative stitching as I did to make it more fin-like. Repeat for each heel.

door monster tutorial 1

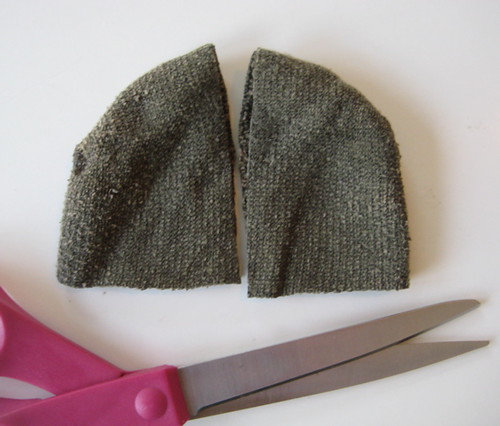
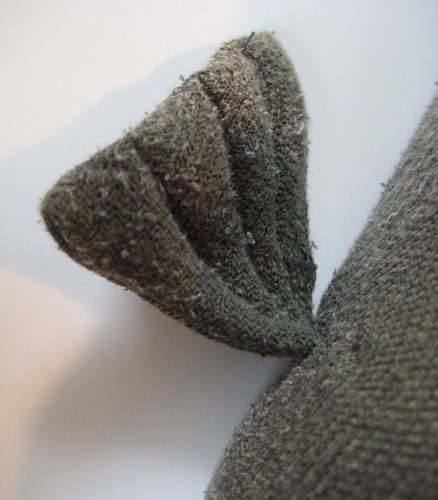
Use one of your cut-off toes to make front flippers if you like. Lay the toe flat and cut it in half up the middle. Turn inside-out and sew it into a triangle, leaving an open gap for stuffing. Turn the flipper right-side-out and stuff with a small amount of stuffing. Smoosh flat and sew shut. Add some decorative stitching to flatten the flipper and make it fancier.


Turn the dragon inside-out again. Cut a hole on each side of the foremost sock. Stick the flipper through so that the flipper is now "inside" the dragon and the sewn-shut edge is facing towards you. Sew the flipper into place. Once you have the flippers in place, turn right-side-out again.

door monster tutorial 8

Stuff the head firmly with stuffing, but leave the body un-stuffed. Isn't he cute?

Get out your heavy stuff - sand, dry beans or rice, pebbles, whatever you have on hand - and put a bit inside four plastic bags (repurposed bread bags worked nicely for me). Tie them each tightly. Pull one into your dragon, all the way up to the head, and secure in place (you can sew it or be lazy like me and use a safety pin). Use your stuffing to lightly stuff and shape the dragon around that heavy bit. Repeat with each bag of heavy stuff until your dragon is fully stuffed (and heavy). Leave the heavy stuff out of the very end of the tail if you can. Now your dragon will lay heavily in place on the floor.

door monster tutorial 5

Stuff the tail end very lightly with stuffing. Sew the tail shut across the final sock cuff. Add some fancy stitching to make the tail flatter and more tail-like. Embroider on a face if you like. Enjoy the new absence of a draft under your back door!

door monster tutorial 4
honey, you need a pedicure!

November 19, 2009

compost-fever

Last year I took a fabulous organic gardening class with John Lyons of The Woven Garden. Each monthly class held a different theme, and out of the four, two really resonated with me - the Gardening with Children session - and the Composting class.

I do love composting. (We have even considered a composting toilet for our cottage.) I love the idea that our waste is being turned into something more. I love the way our chickens go nuts when they are allowed near the pile. I even love the way it smells, clean and dirty at the same time (farm girl in me perhaps), and the way it feels as I shovel and mix it into our raised garden beds. I love how it has become commonplace - and how routine it has become for our kids to dump scrap into the small container under our kitchen sink, then trudge it out to the bin at the end of the day. (Though any advice on how to get a composting program into our public school would be most appreciated! This is one place where it isn't. And should be.) I love that we return our scraps to the earth to feed the food we are growing.

garden
garden

We have always kept a traditional compost bin in our yard for all of our green and brown waste. It was a bin that the City gave for free, in exchange for attending a Composting class, provided by the City's Department of Public Works. (Class schedule can be found here. It looks like you now pay for a bin, but at a very fair price.) Sitting in the farthest corner - near our pool we regularly dumped garden debris and kitchen waste into it. It is extremely dry where we live, and with our dry garden (not a lot of green - and lots of brown waste)we had to make sure it stayed moist. We added water - and D even added, um, urine. (Urine has long been considered a great compost activator.) It works pretty well. In landscaping our yard, we moved the bin closer to the house, and are in the process of reestablishing our pile. I think two bins may be the answer to better productivity. We will see.

The premise of composting is simple: the rotting green matter (lawn trimmings, kitchen scraps, chicken poop, etc.) you might have just thrown in the trash is piled up, together with dry material (dry leaves, newspaper - preferably not the glossy pages, and only if soy based inks have been used, unfinished cardboard, twigs, straw etc). The rotting material(about 1/3 of the mix) produces nitrogen and the dry (2/3), provides carbon. Magically it turns into food and soil for your plants. (Well, not really magically - "the course of decomposition of organic matter is affected by the presence of carbon and nitrogen. The C:N ratio represents the relative proportion of the two elements...Actually, the ratio of available carbon to available nitrogen is the important relationship because there may be some carbon present so resistant to biological attack that its presence is not significant." --from Compost Fundamentals) There are many things you can compost. And many you shouldn't. And of course some overlap of the two. (In the class I took, the final destination of the compost was considered. For example, laundry lint composted may be ok for your flower bed, but the treatments and detergents that may be present in the lint would not be desirable for our organic veggie bed.)

We are taking our home composting to the next level with vermicomposting. D built a worm-bin for my birthday (a gift that keeps on giving!) after I dropped many a hint. I sent him a link to this website, and he built a bin out of the scrap in his woodshop. (Though frankly the website prices are so reasonable if we had had to purchase the wood it might have been cheaper just to order it.) It is a little small. But we are excited by the possibilities. I have a friend who is gathering up some worms for us, and we are ready to get started!

vermicomposter
vermicomposter

The premise with vermicomposting is the same really - the C:N ratio though is a little less important as the worms do much of the work that would be done by the chemical reaction. In the end, you get a rich material to enhance your soil, as well as the possibility of making vermicompost tea - which some tout as a miracle worker for plant growth and protection against disease.


Resources:

Favourite books on my shelf with sections on Home Composting include:
Ann Lovejoy's Organic Garden Design School

A Slice of Organic Life by Sheherasade Goldsmith

Garden Anywhere by Alys Fowler

Really if you "google" composting / vermicomposting you will be overwhelmed by available material. There is lots out there to guide you.

A few on-line highlights:
Design Sponge did a wonderful recent post on composting

Groovy Green has straight-forward instructions on building a simple worm bin.

The Gaiam site has lots of information on choosing the composter that is right for you, and how to get started.

I love this idea: Host a community Build a Worm Bin Day!

Say no more. Composting 101


If you are interested in taking a class from John Lyons - and I highly recommend any class he is giving - his schedule can be found here.


Oh, and one last thing; with Thanksgiving around the corner, don't forget to re-read FPea's great post here on composting your holiday party!

Happy Holidays!

September 23, 2009

(sub)urban chicken keeping. part II

(part I found here.)

modern chooks

So the chickens have been with us for over a year now. We love them. A friend recently compared them to having three poodles - and they weren't really far off. They follow me around the yard, stand by the backdoor begging for a treat, or to be let in, (they aren't - at least not often) and one of them in particular loves to be held. Our pullets have grown into hens, and two are currently experiencing their first molt. (Which involves the loss of feathers and decrease in egg production while all their energy goes into a glossy new coat.) It is wonderful!

So what do you need to know? This is by no means comprehensive, and I strongly encourage further reading of any / all of the resources listed at the end.

Is permission from your city required to have them?
More and more cities are allowing homeowners to keep backyard chickens. In Los Angeles, we are lucky to live in an area zoned for agriculture (not all neighborhoods are) and we are allowed to have a flock, with the only caveat being a "distance requirement". Hens are to live 20 feet from our residence and 35 feet from our neighbors residence (not the property line) and if we had a rooster, that would change to 100 feet from our closest neighbor. (To learn more about local codes, there is a good starting point over at The City Chicken - but do make sure to find out what your city, or neighbourhood, allows before buying your chicks.) **Yesterday Los Angeles passed a new law limiting the number of roosters kept in the City to one, without a permit.**

Don't you need a rooster to get eggs?
No! You only need a rooster if you want chicks.

How long do hens live? and how long do they lay?
My reading tells me that they can lay consistently for up to five years. They live (and will lay sporadically) for eight or more.

What are the costs?
Our chicks were under $3 each to purchase. The coop was more of an investment - but we are lucky that D is a carpenter and could build it in-house. Their feed is an on-going expense (and like everything, more expensive if you go organic). You should also consider veterinary pills, should a chickens become ill, or injured.

132:342

How much space do chickens need?
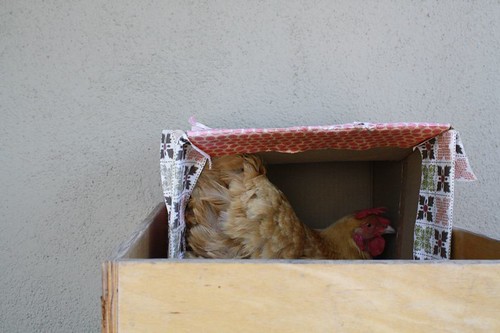
In my research, a rule of thumb seemed to be that each chicken should have at least 10 square feet of yard to run around in, and 4 square feet of hen house. They also need a nesting box (our three share a 4 ft sq box within the hen house), seem to like a place to perch (not too high, and wide enough to comfortably support their feet), and a spot for a dustbath. (I'll add that I don't think the nesting box is necessary - but makes it easy for us to know where to look for eggs. They like a private spot, and have also been known to lay in cardboard boxes left in the yard, as well as on one particularly hot and uncomfortable day, right at my feet.)

How do you keep them safe?
In designing and constructing our coop, raccoons and possums (to which we have lost all our koi) were forefront in our thoughts. D made sure that the run of the coop was made from heavy cage wire (not "chicken wire" which isn't very strong) and that the hen house had secure doors and window. Raccoons are very good with their hands, so we have locks (simple carabiners) on all entries that go on every night. We are fortunate that I work from home, so the hens are usually found wandering the backyard through the day. I am always listening, and they have alerted me to intruders such as neighbourhood cats and ducks (who like our pool)with lots of clucking and wing flapping.
It is also important to protect them from plants that may be poisonous to them, as they like to nibble on most things green. Oh, and chickens can't swim. So if you have a pool or pond, keep this in mind.

Will D share his coop plans?
I'll ask him... He developed his plan from a lot of research on-line, and in the books listed below.

How do you protect them from the heat?
We live in a very hot area of Los Angeles (high of 103 today!) so this has been a major concern. (We have a close friend who tragically lost a hen to heat stroke this summer.) We can easily see the girls discomfort as the temperature rises and they begin to lift their wings and pant to stay cool. We hose down their area (and the one of them that likes to be sprayed) regularly on hot days - as well as keeping a supply of ice packs at the ready to cool the nesting box and under some of our trees where they will lie, and get some relief. It is also very important to have cool water available for them to drink. I have found that while cute, our hens aren't the brightest bulbs in the box and will often not go to drink when they are thirsty, but when I bring them water they are quick to take a sip.

What do they eat?
Our girls eat "laying pellets". It is recommended that a fully grown, laying chicken needs 5 oz of food / day. They forage instinctively (good-bye backyard bugs!) and also love treats from the kitchen (pasta, rice, fuits and veggies are good, but avoid anything salty, sugary, fatty, citrus or meat.) One of ours has even eaten a mouse. Because chickens don't have teeth, they rely on grit to digest their food. If they can't find small stones in their surroundings, grit must be supplied.

Do they eat everything in your garden?
Yes. And no. We are in an ongoing experiment to see what is "chicken friendly" in our yard. (ie. It is safe for the chickens to eat, but they aren't interested in eating it.) It has been hit and miss. They do seem do love crabgrass (good!), but also loooove my succulents (bad!). We had to put a fence around our vegetable garden to ensure the produce ended up on our table. (Though they don't seem to like tomatoes.)

Are they clean?
Like any pet, that depends a lot on your input. The birds themselves are very clean. They love to have a dustbath, and will take up in one of the flowerpots if not provided a spot. (Ok, to be honest, they may take up in a flowerpot anyway. I have lost a lot of plants to this.) They spend a lot of time grooming themselves, and unless you are showing them, do not need to be bathed. They void half of their poop in the night, so their coop does need to be cleaned regularly. (Aside from the daily cleaning we wash it out thorough with a teatree oil soap monthly, and we have dusted with foodgrade diatomaceous earth every six months as part of our pest-control management.) We also keep our food supply locked in a metal garbage bin at night to dissuade any rodents looking for an easy meal. The design of our coop allows us to move it around the yard, so one area does not become inundated with all things chicken. Their food and water receptacles also need to be cleaned regularly.

heads or tails

Ok, but what about the poop?
Yes, chickens poop. And sometimes it seems like a lot. We clean our coop and run every day, and the smell isn't evident. We line our hen house with shredded newspaper (only the non-glossy pages, printed with soy ink) and toss it, poop and all, into our composter. Chicken poop is rich in nitrogen, and makes for lovely compost. We haven't found a marked increase in flies - though I have heard others complain of this.

chick-a-dee

If you had to do it all over again would you?
Yes. No hesitation. I have been converted. While certainly not for everybody, they have been a wonderful addition to our family. And their eggs are yummy too!

Further reading / resources (again, by no means comprehensive):
On-line:
BackYardChickens
Green Frieda (I love their coop - which was featured last winter in the LA Times.)
Homegrown Evolution
One Block Diet (Sunset Magazine's blog)
The City Chicken
Urban Chickens

On the bookshelf:
Keep Chickens!
Keeping Chickens
Keeping Pet Chickens (great for my kids, ages 5 and 8. Lots of simply presented, important information.)
The Fairest Fowl(No info on keeping, but gorgeous photographs and information on various breeds - as well as an essay by Ira Glass.)
The Urban Homestead (you can get an autographed copy via their website: www.homegrownevolution.com)

In the neighborhood:
Los Angeles Urban Chicken Group (I'm excited about this and hope to make it to their next meeting!)

Happy Clucking!

September 7, 2009

summer souvenirs

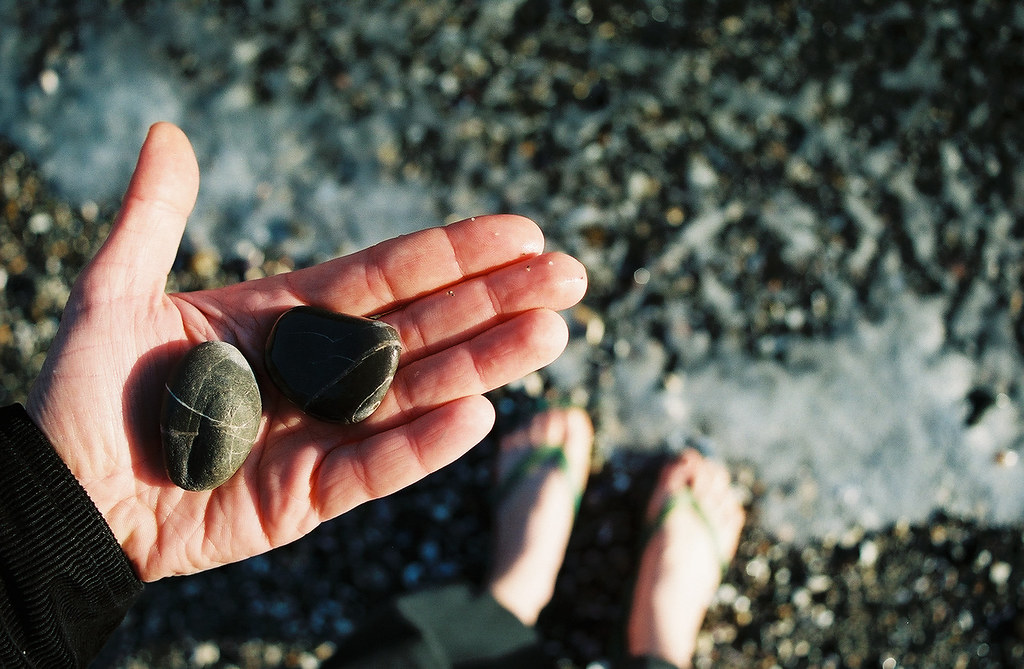
sea ranch: rock 2

as summer
melts into autumn,
it's time for change.
i start putting away
my tank tops and sandals
and thinking of
corduroys and cardigans.
there's always something
a little sad about
summer ending.
like the last few days
of vacation before
you head home and back to work
(even though many of us
work right through summer).
perhaps it is a reminant of
our school days
years ago.

i remember
as september
would near
i would collect
rocks,
sand dollars,
and
sea urchin shells
at the water's edge.
my souvenirs
for another
summer gone by.
to hold those
relics in my hand
as the weather
cooled and
dusk came
fast
and
earlier
each evening.

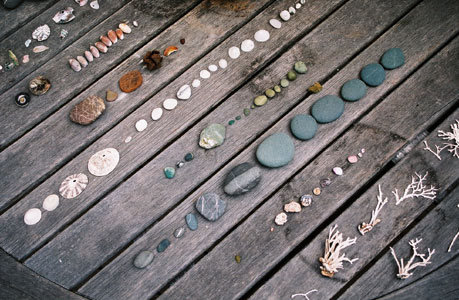
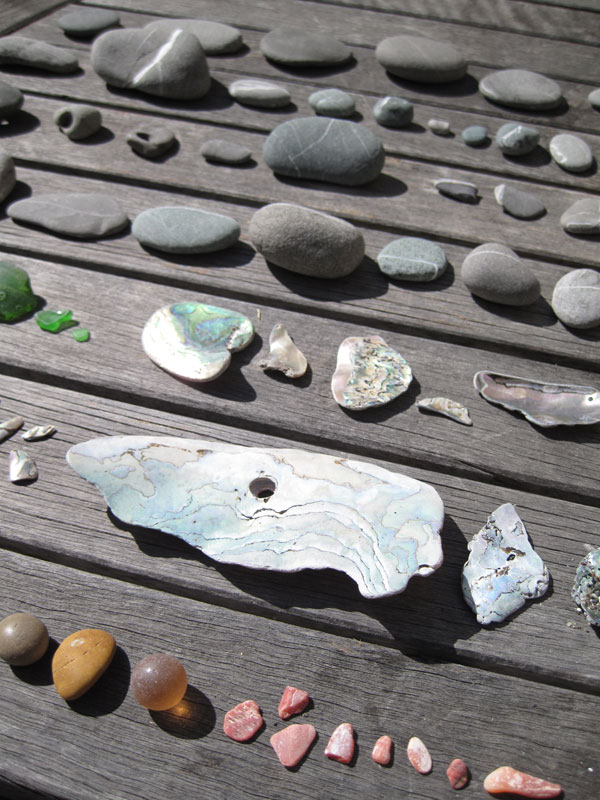
sea ranch: my collections

as autumn nears
i like
to rearrange
and redecorate
my apartment.
put away flower vases.
arrange acorns
and
rocks
on the windowsill

or
in piles
in the garden.


searanch: collection

there are many
creative
and beautiful ways
that artists
(and you too)
can use rocks
as decoration
in your own home.

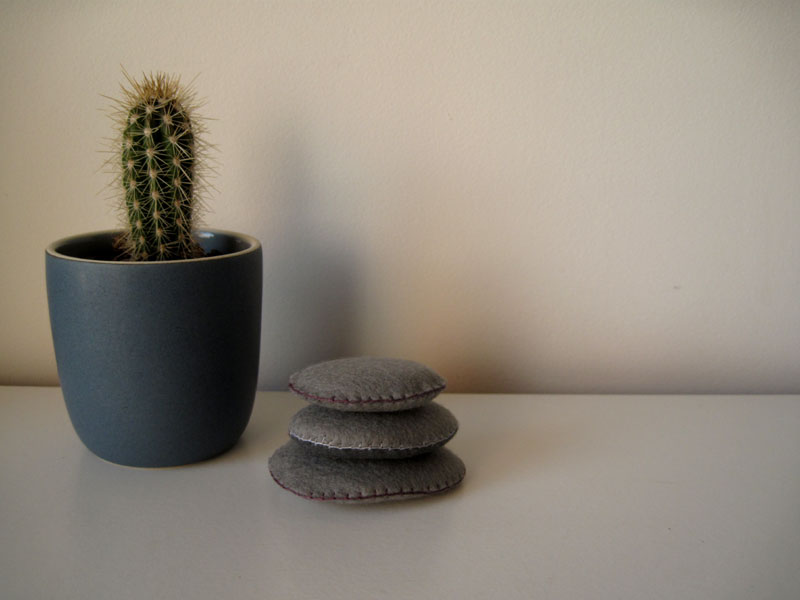
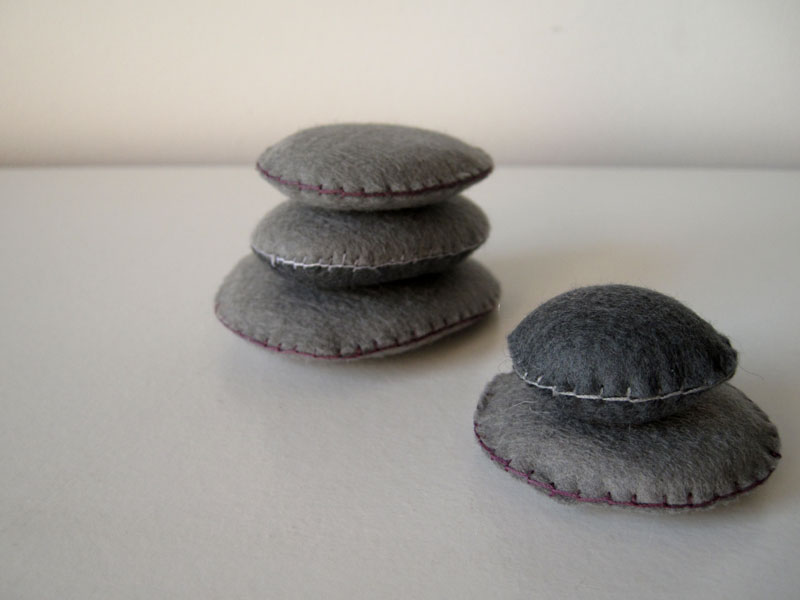
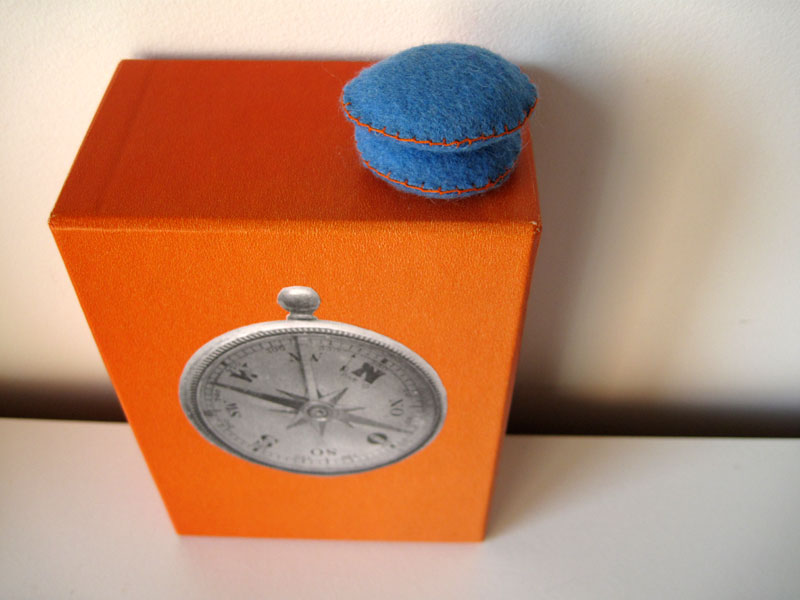
rocks with felt covers

Beautiful art rocks to buy:
* woven rocks by white forest pottery
* porcelain pebbles by Manos/Karin Eriksson
* pet rocks by stephanie congdon barnes.

rocks with felt covers

rocks with felt covers

Make your own felted rocks:
* Craftzine: How to make felted rocks
* DIY felted rock on DesignSponge
* Martha Stewart: felted rock paperweight
* see some here.

you can also
sew,
knit,
or crochet
your own covers.

i knitted covers
by knitting in the round
with simple
increases
and decreases...
knitted rocks

i covered
all sizes of rocks.
knitted rocks

then i put them
in the washing machine
in a delicates laundry bag
and washed them a few times
while doing my
weekly laundry.
knitted and felted rocks

you can mix
felted
and unfelted
rocks.
felted and crochet rocks

for more
inspiration,
check out
one of my favorite
blogs:
everyone needs
a rock
.

green crochet rock

enjoy
your rock.
enjoy autumn.

August 1, 2009

more diaper talk

wrapper disposable
cloth v. disposable - the discussion goes on...

I never thought I'd engage in so much talk about diapers. Back when I was single and when the new little one in my house wasn't even a twinkle in my eye yet, I used to get really aggravated at all the diaper talk that would take place among the mamas in my book club. Discussions about plot and character were routinely subverted by diaper chat. Who knew these yucky little waste landing-pads could be such a rich topic of discussion? And yet, here we are. How things do change.

So there's a sweet new baby in my life, which means my partner and I had to figure out what to do about diapers, and Lisa's recent post on the subject prompted me to write this follow-up. Like Lisa, I leaned towards cloth from the first, because the mountain of trash from disposables blows my mind, and because cloth just feels better and more natural to me (hey, it's what my mom used). But I also wanted to make a really responsible environmental choice, and diapers - whichever kind you choose - carry a huge environmental impact. As I came to find out, cloth and disposable are pretty much equally bad for the planet. So you get to make your choice based on what's best for your family, and then you just have to do penance in some other way for what you're doing to the earth. Like not have any more kids. Ha ha!

Before the Little Pea was born, I signed up for a local diaper service - two working parents just weren't going to be able to swing washing our own diapers, and our rather aged washing machine would waste so much water in the process that it seemed doubly crazy to wash our own. I'd heard all the talk that cloth is just as bad as disposable for the environment because of water use and detergent, but I'd always pooh-poohed it. I once even accused a friend of perpetuating diaper industry propaganda (all in good fun). Cloth had to be the way to go for us.

The Little Pea came two weeks late, which gave me some time for all sorts of distraction, including finally reading about diapers and their environmental impact. My favorite eco-advice guru, Umbra Fisk, has a great video blog post on this subject, and in another column points out a life-cycle analysis conducted by the Environment Agency UK, which (like every other decent study I've ever heard of) found that basically, it's a wash. One the one hand you have paper and plastic manufacturing and waste disposal, and on the other you've got lots of water and energy use. Pick your poison.

If you live some place where there is a terrible water shortage, then I'd say disposables are the more eco-friendly choice, and just be sure to use the greenest ones that work for you. But if you live someplace with abundant water and a terrible shortage of landfill space, cloth would be the eco-friendlier choice (especially if you use good detergent and dry them in the sun). But all things being equal - just pick the one you like better. Or pick Elimination Communication, if you are that kind of amazing person. I am humbled by you folk.

At our house so far we've found that cloth diapers are nice and cushy on our baby's delicate skin, and they really are no big hassle, as long as you have good reliable diaper covers to prevent any leakage (the adorable wrap-style diaper covers that I knitted sadly do not fall into the reliable category - we are using Bummis and Thirsties now). However, we've also found that disposables are great for overnight, and for travel to Grandma's and such (as my partner says, this way we get to diversify our impact - ha ha!). I am conducting my own experimentation with the various brands of eco-friendlier disposables, but check out this great review on Grist. I've found that cloth diapers necessitate far fewer baby wipes, and (like Lisa and Hayley) that they are great for wiping up all kinds of messes, baby-related and otherwise. Especially since someone else washes them for me.

So the bad news is, all diapers are bad for the planet. The good news is - you can make this choice based on whatever is right for your family, and not worry about the environmental impact. Isn't that a relief once in a while?

July 30, 2009

(sub)urban chicken keeping. part I

a little over a year ago, and after much consideration and research, we brought home three young chicks and started on a new journey as backyard chicken keepers.

peep

i must admit, i didn't quite know what we were getting into. i had a romantic notion of backyard chicken keeping - of gathering fresh eggs in the morning, and having my girls scatter feed in the yard while the chickens played at their feet. i also had an overwhelming desire to to revolt against the (sub)urban lifestyle so prevalent in los angeles. to balance out the media blitz my girls see everyday (even without television viewing) with some "livestock". finally, with the girls on summer break, and myself newly relocated to a home office - i thought the time was right.

we thought about it carefully, and decided to purchase the chicks from our local feed store, instead of through one of the many mail-order chick and pullet distributors. our neighbourhood. is hot. very hot. i was very concerned that chicks arriving to us in july from the east / mid-west would be shocked by the temperatures they were confronted with. our feed store gets their chicks locally. and did not pass on the young peepers easily. they were also concerned that we knew what we were doing and not simply acting on a whim induced by the cute fluffiness before us. i was impressed by their concern - their knowledge and support - and their offer of taking back a rooster, if one of the young'uns proved to be so inclined.

following procedure outlined in the many books in our chicken library, my husband built a "brooder box" in advance and we set-up in a corner of our dining room. we used an old floorlamp for heat and carefully monitored the chicks water and mash intake. it was thrilling for my girls to wake to these little peeps. and a little frightening watching how they would simply flop over and fall asleep!

1 - 2 - 3

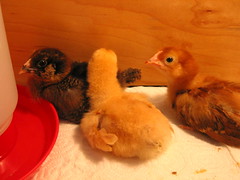
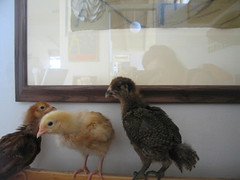
of course we named them: little red (a rhode island red) - the curious one; chick-a-dee (a buff wyandotte) - the little sister, always trying to get someone to play with her; and annie (an aracauna, we think) - as in oakley - (or fluff, depending on who you ask) who is very brave, a great performer, but also very cautious.

the chicks grew quickly, their feathers started to come in, and little combs started to appear on top of their heads. they were soon trying out their wings in flights from the box to the nearby table, or on occasion to an unsuspecting visitor's shoulder. their personalities started to shine, and they quickly won our hearts.

3 amigas

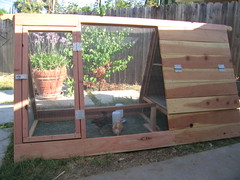
it was soon time for their move outdoors. after much research, we decided against a permanent coop, and opted for a "tractor" instead. the thought behind this being that we can move it around the yard, fertilizing as we go. we looked at what was available commercially (and were tempted by this), but felt that d could build one that answered all our criteria and was budget-minded as well. we needed a safe place for the chickens to sleep, with good ventilation (the henhouse) and a safe area for them to play and eat in during the day, with extra shade for our hot summers (the run). we also wanted to take advantage of the byproduct of all the food the chickens consume (and they do like to eat!). we settled on a variation of the many "ark" images we found. the droppings in the henhouse fall into bedding of shredded newspaper and all that can go straight into our composter, and the droppings in the run go right on our "lawn". the henhouse contains a perch for them to sleep on, as well as a nesting box, for laying. the run serves and protects them when we aren't home, thought they spend most of their time roaming the yard.

cooped up

for the most part, the romance is there. but it is so much more - and better - than i imagined. they started laying at about 7 months of age, and yes, we get, on average three fresh eggs every day. (chickens lay on a cycle of approximately every 28 hours - if conditions are right.)

three for three

but the best part i think has been seeing how my girls have taken to them - and vice versa. the chickens are very social, have a lot of personality, and are highly domesticated. i am never surprised to see a 5 year old tramping around the yard with a hen under each arm, or an 8 year old quietly telling a chook all her secrets.

Up next: The logistics of it all, the pros and cons to our urban "farm", backyard chicken resources, and answers to any questions you may have! (Please leave questions in the comments - thanks!)

July 2, 2009

spin green

spin green

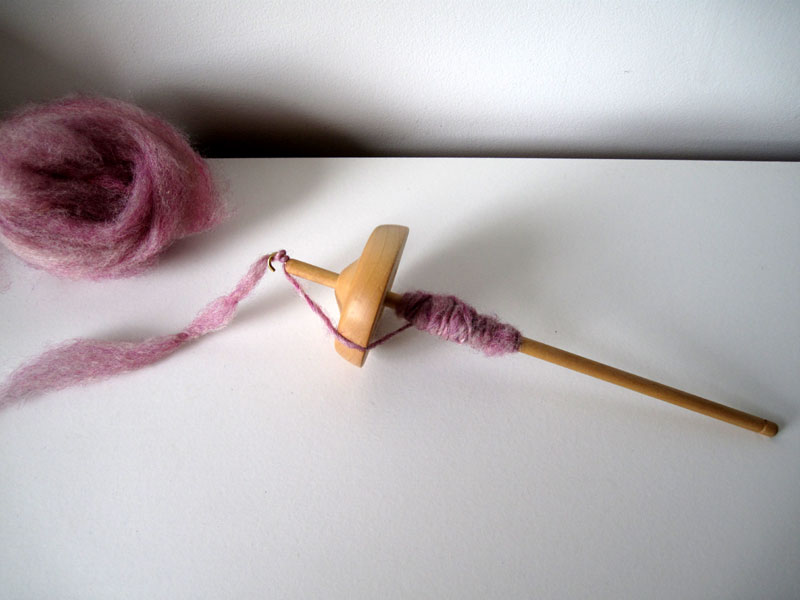
at first, spinning yarn may seem like an esoteric art. even as a knitter and crocheter, i can't say that i gravitated towards learning how to spin. it seemed very hippie-earth-mother to me. over the years i have become more interested in learning the fundamentals of the most basic materials. this is similar to a baker wanting to grind his/her own grain. to truly understand a material you must go back to the source. since i probably cannot get away with raising my own sheep on my patio in the middle of washington dc (don't think i haven't thought about it), the closest that i can get to the basics of fiber arts is spinning yarn.

recently i took a drop spindle class with a friend at my local yarn store. i wanted to share with you a few things i learned...

first, spinning yarn is harder than it looks.
it is easy to learn because it is a simple concept- spinning animals fibers to add strength to it, but is by no means easy to make perfect yarn. roving, or any fiber drawn out to prepare for spinning, is easy to pull apart, like a cotton ball. amazingly, when you add a little twist to it, it gives it strength. the softer (and usually more expensive) the roving, the shorter the fiber the strands. short fiber strands break easily and are damn hard for a beginner to spin. so no merino, silk, or cashmere for me. boo hoo.

spin green: solitude farms roving
roving from solitude yarns

spin green: rovingfrom c.eye.ber.fiber
roving from c.eye.ber.fiber

second, spinning teaches you an awful lot about plants and animals.
where the fibers come from is integral to how it spins. so spinners are usually very knowledgeable about sheep breeds and the origins of fibers. BFL is a favorite. BFL is bluefaced leicester, a sheep breed known for soft but easy to spin fiber.

third, spinning is old.
yarn was first made by rolling fibers between ones fingers and then wrapping it around a stick- that was the first spinning. drop spindles have been around not hundreds, but thousands of years. there are spindle whorls made from wood, bone, clay, glass, and just about anything. there are whorls from Roman ruins that date to circa 200 ad, as well as whorls found in Teotihuacan Valley in Mexico that date to 200-800 ad. all fabric prior to the 1500s was made using some kind of drop spindle.

spin green: artisan pinkblue yarn

fourth, you can spin anything.
i mean anything. spinning artists have spun everything and anything you can think of- from recycled newspaper to old cassette tape.

spin green: newspaper yarn
photo from greenupgrader.com

fifth, spinning is green.
it requires very little. you don't even need to go out and buy an expensive artisan spindle (although it's awfully tempting)- you can even make your own spindle out of a dowel and an old CD (see directions here).

spin green: a spindlefrom a cd

you can use any fiber that's available to you. try something local, i bought some roving at the farmers market from my local farm, solitude yarns, or you can use recycled fiber, like newspaper or old cloth torn into strips (see here). i suggest that you start with some local roving and then move onto any fiber that strikes your fancy. it's a great thing to teach kids. it is easy and it teaches them to appreciate the work that goes into the clothes they wear.

spin green: folktale yarn
yarn from folktale yarns

in a society where clothes are often temporary- purchased when fashionable and discarded shortly after, spinning reminds you of the history, evolution, and value of a single strand of fiber.

spin green: artisan blue yarn