
August 26, 2010
Green Housing: Getting the most out of what you have

April 8, 2010
Calling All Amateur Gardeners

My friend Shawn has been a gardener as long as I've known him. He comes from a family that planted, no joke, one hundred tomato plants every summer. And even when we were both in our early twenties, when all my other friends were more interested in booze and rock 'n roll, Shawn and his partner Katie were thinking about, talking about, and growing their own food.
For the past decade I've had sporadic container gardens. When my living situation allowed for it, I'd have some basil, lettuce, and tomato plants on the back deck. I always wanted to grow as much of my own food as possible, being very aware of the positive effects it would have on both the environment and my health. I liked those little container gardens just fine, but I dreamed of something bigger. Then I moved into a home with a vast yard and my lovely partner built a fence to keep the dogs out of the sunniest part of it. I finally had my chance. Last year was my first year as a full fledged, in-the-ground, gardener. I was terrified.
As anyone who has ever started a garden knows, it can be completely overwhelming. I didn’t know what to grow where, let alone which specific variety of organic tomato to order from which fancy seed catalogue. So, I played it safe and bought plants from a local nursery, not trying anything from seed. I found the thought of seeding my own plants wildly intimidating. With the plants from the nursery, I reasoned, all I had to do was keep them alive. Someone else had the daunting task of growing them from seed.
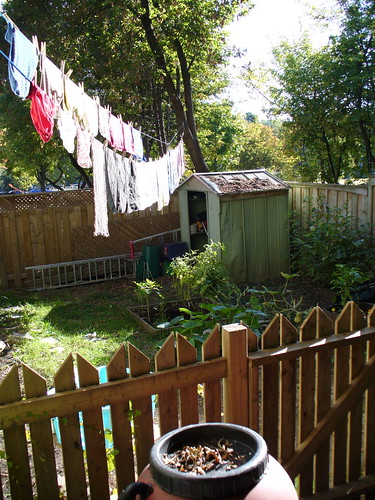
Truthfully, the selection of vegetable plants at the local nurseries and markets wasn't that great. And the food I grew was nice, but not as amazing as the heirloom vegetables I got at the neighbourhood farmer's market. It was enough to make me want to conquer my fears of seed starting as I moved into my second year of small-scale urban farming. I started reading up on how to seed my own plants.
One of the problems that a novice gardener faces is how to navigate a whole internet’s worth of contradictory gardening advice. Sites discussing seed starting were no exception. You need grow lights! You don't need grown lights! Start your seeds in paper towels! Just shove your seeds in the ground! Seed them in toilet paper rolls! Seed them in the largest pots possible! It was enough to make me put my head down on the table and weep.
Which is when I turned to Shawn. I figured with the years of gardening experience he had under his belt, he'd probably give me reasonable advice on the delicate art of seed starting.
He did. He told me one thing in particular that has been echoing in my head since I read it in the text of his advice-filled e-mail. The most important piece of advice anyone has given me since I began my gardening adventures.
He said, "Plants grow through f@#*ing cement."
In other words, relax. Plants know what they're doing.
Besides that priceless piece of advice, Shawn told me that for seed starting, a south facing window was going to be my best friend. Check! The window in our kitchen faces south and has a nice wide sill. He told me to get whatever potting soil mix I liked, then add my own compost (which, for our vegetarian household, is rich and plentiful), fill up some trays, cover them with one of those clear plastic domes, add water, and wait.
I nervously hovered over my seedlings for a few days, wondering if anything at all would pop out of all that soil. Then I forgot to check one day and by the time I remembered, about a dozen skinny green seedlings were poking their way up out of the dirt towards the light.

And that's where we are right now in this long and lovely gardening process. I removed the dome as soon as I saw green (also Shawn's suggestion) and I've been using a spray bottle full of water to gently dampen the trays of seedlings every day (again, Shawn). This weekend I planted another tray, this one full of basil seeds. I can't wait to see them start to poke up out of the soil. Finally, I'm confident that I can do this whole seed starting thing. I may be an amateur, but at least the plants know what they're doing.
-Jennifer
December 3, 2009
leftover soup

This time of year, the leftovers abound. Around the holidays, I tend to stuff myself silly, but the overabundance is so great that even with overeaters everywhere, lots of food still gets thrown away. My partner and I are trying to get smarter about our budget these days - particularly our food budget - which has meant getting smarter about leftovers, and hopefully a little less waste.
Last week was Thanksgiving, and I decided to take responsibility for the leftovers this year, since I wasn't cooking much. By the time we left on Saturday there was a freezer full of turkey stock and big containers of turkey noodle soup for everyone to take home.
Being a vegetarian, I don't know much about what to do with meat, but I do know that you're not supposed to throw away that big old fatty, meaty turkey carcass after the meal. What a waste! Instead, we made turkey stock.
I had my partner's father pick off all the good-looking meat, and then I stuck the detritus (skin, bones, fatty stuff, neck and jiblets) into a huge big stock pot with a cut-up onion and a few bay leaves, and then filled up the pot with water. I brought the pot to a boil and then simmered the whole thing for the rest of the evening, about 3 hours. Then we pulled out the now-clean bones and all the other solid stuff and tossed it, let the stock cool, skimmed off the fat and then strained out everything else and put the stock into repurposed quart yogurt containers in the freezer. Turkey stock is a good replacement for chicken stock (except richer and tastier, I'm told), and will keep in the freezer for at least six months.
That's how we used about half the stock. The other half we used to make turkey-noodle soup. All we did was par-boil a bag of whole wheat egg noodles, drain them and then put them into the big soup pot with the turkey stock. Since this family likes to eat turkey sandwiches with the leftovers, I left the big slices of breast meat for that purpose, but took all the little funny bits, cut them up smaller, and threw them into the pot. Finally, we dumped in the leftover peas and carrots from the Thanksgiving meal and added some salt and pepper - voila! Turkey-noodle soup.
As I've said, I'm a vegetarian, so the soup was not really on my menu. But I did have a tiny cupful just to try, and now I see why they say that chicken noodle soup cures a cold. I think that soup could have cured much worse - it was about as warm, wholesome and comforting as anything I've ever eaten. Maybe next year I'll have two cupfuls.
There are also lots of opportunities for vegetarian soup from your holiday leftovers. You can make a big pot of veggie stock and then make delicious soup with pureed pumpkin, squash or carrot, or toss in lots of noodles, beans and leftover veggies for a scrumptious vegetable soup with dumplings on top. Just the thing for a simple supper when you've been overdoing it at the holiday parties.
October 8, 2009
keeping the harvest

Fall harvest time is just about here! The nip in the morning air, and the new crop of greens, lettuces, sweet potatoes and cruciferous vegetables at the farmer's market and in our garden get me thinking about all the good things I want to cook this fall. I'm also getting a bit wistful already thinking about how much I will miss the fresh veggies this winter, and scheming about how to put some veggies up for those thin months.
Last week we got an inspiring email from the wonderful farmer who runs our CSA, Wild Onion Farms, about easy ways to save some of the harvest for winter. Here's what she said:
"Here's a few tips on how to easily put away some real fall food for later, without any special equipment or a lot of long sweaty hours in the kitchen:
- I've cured the sweet potatoes and butternut squash for storage already. If you want to stock up on these, the squash will last another 1-2 months, the potatoes will last 'til spring. Store them in a cool, dry, dark place (50-60 degrees is ideal). A chilly basement or garage is good. If you want to extend the butternut squash, go ahead and bake up a huge batch, put it in freezer bags, and stash it away in your freezer.
- Basil can easily be frozen: chop it up in a food processor and throw in little bags in the freezer, or go ahead and make a big batch of pesto and freeze that in individual portions (omit the cheese, it doesn't freeze well).
- Peppers, hot or sweet, can be chopped up, tossed in freezer bags, and chucked in the freezer. Nothing more. They won't retain their texture, but it won't matter if you're adding them to winter soups, stews, or sauces.
- Okra can be stashed away by cutting it up into slices, dip it into boiling water for a minute, drain, pat dry, and pack into freezer bags or containers.
- Cooking greens of any sort are really easy to freeze as well. Wash, chop, blanch in boiling water for a minute. Drain them, squeeze any excess water out, and pack away into the freezer.
- You can also cook up large batches of any of your favorite dishes, from garlicky greens to grilled eggplant, and tuck extra portions away in the deep freeze to enjoy months from now.
- Most root vegetables (beets, carrots, radishes, turnips), once you've removed the tops and placed them in plastic bags in the fridge, will last for months."
I've been working on some of these easy harvest-extenders, and thought I'd share some of my favorite recipes, too.
Last week I made up a batch of Vietnamese-style hot chili sauce with the hot peppers in our garden, using this recipe. I had plenty to make a jar for us and share a big jar with my sister. This would make a great gift for someone who likes to cook and loves hot food.
Here's a link to my method for making big batches of savory vegetable stock - it's a great way to use up your veggie odds and ends, and makes a delicious, hearty, nutritious broth for winter recipes.
Elizabeth mentioned garlicky greens in her email, and it got me thinking about this wonderful recipe from my dear friend Anne, who loves to have cooking (and eating) parties with friends. If you're not from the Southern U.S., you might not know how wonderful collards can be -- and even if you are from the south, you might have only had them cooked to death with a hamhock. This is a great way to find a new (and vegetarian) appreciation for a humble green leaf:
Sauteed Collards (or any other hearty green you like)
Ingredients: 1 bunch of collards for 2-3 people
4-6 garlic cloves
1/4 cup olive oil
Rinse collards and remove the ribs from the middle of the leaves. Then stack the leaves in a pile and roll them up like a cigar. Then thinly slice them.
Peel the garlic and slice each clove in half long-ways unless really large, then slice into thirds.
Heat the oil over medium heat. When hot, add the garlic and cook until just getting golden, and remove. Do not let them get brown or they will make the oil a bad (burnt) flavor. Now turn up the heat to medium high and add the collards with whatever liquid clings to the leaves. Stir them with a wooden spoon or tongs, being sure to bring up the ones from the bottom so everything gets cooked. I like them crunchy, but you can cook them to your liking. Just before serving, add the garlic back in and stir them up.
I like to serve these with plenty of freshly ground black pepper, and some apple cider vinegar on the side for purists. Have fun cooking up your harvest this fall!
September 7, 2009
summer souvenirs
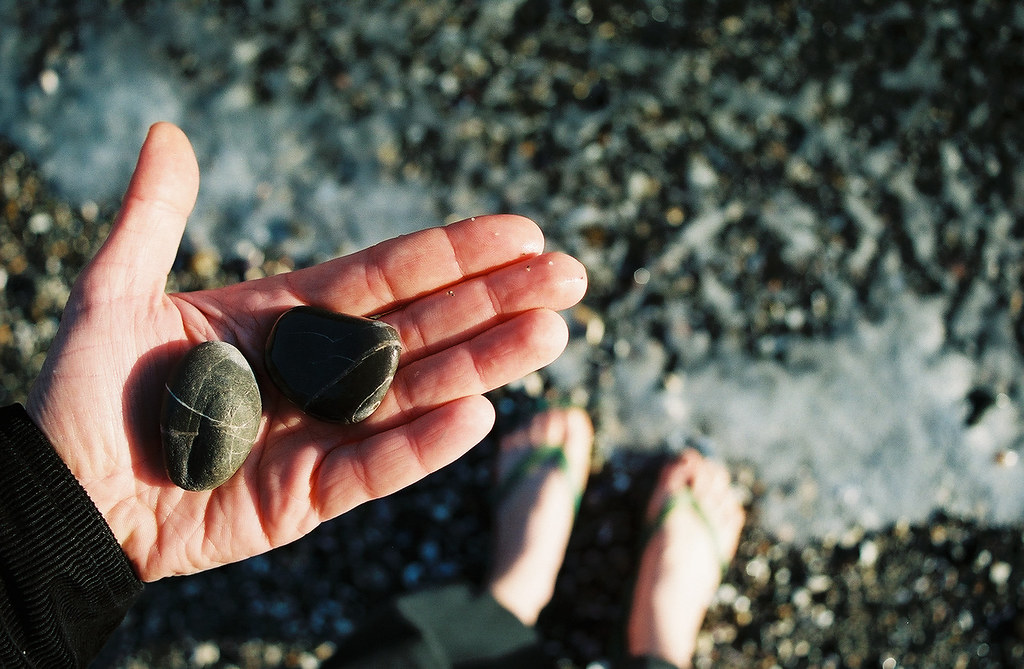
as summer
melts into autumn,
it's time for change.
i start putting away
my tank tops and sandals
and thinking of
corduroys and cardigans.
there's always something
a little sad about
summer ending.
like the last few days
of vacation before
you head home and back to work
(even though many of us
work right through summer).
perhaps it is a reminant of
our school days
years ago.
i remember
as september
would near
i would collect
rocks,
sand dollars,
and
sea urchin shells
at the water's edge.
my souvenirs
for another
summer gone by.
to hold those
relics in my hand
as the weather
cooled and
dusk came
fast
and
earlier
each evening.
as autumn nears
i like
to rearrange
and redecorate
my apartment.
put away flower vases.
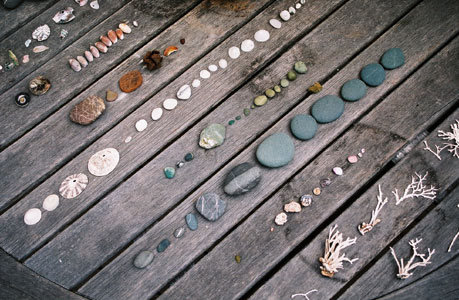
arrange acorns
and
rocks
on the windowsill
or
in piles
in the garden.
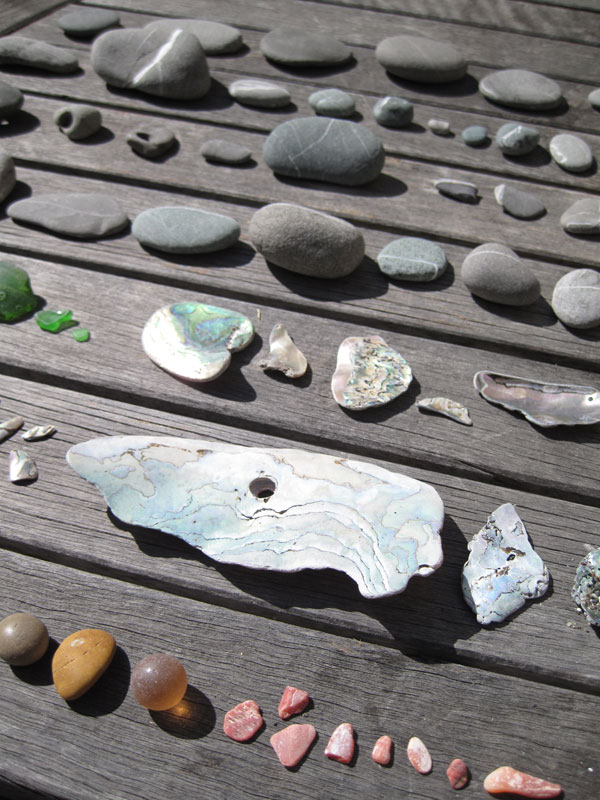
there are many
creative
and beautiful ways
that artists
(and you too)
can use rocks
as decoration
in your own home.
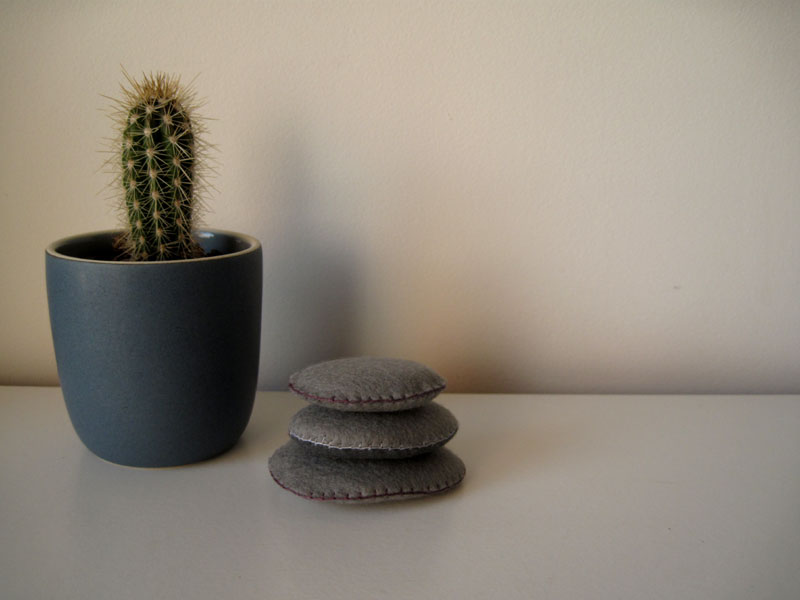
Beautiful art rocks to buy:
* woven rocks by white forest pottery
* porcelain pebbles by Manos/Karin Eriksson
* pet rocks by stephanie congdon barnes.
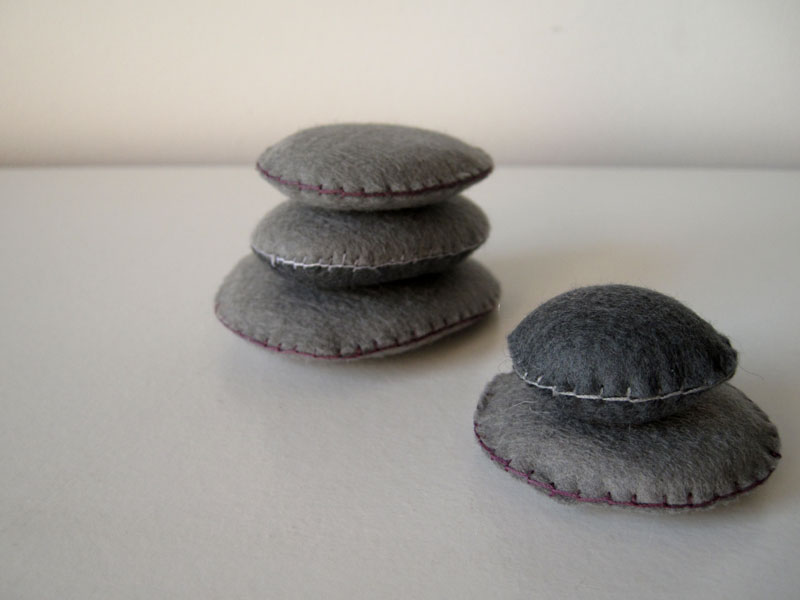

Make your own felted rocks:
* Craftzine: How to make felted rocks
* DIY felted rock on DesignSponge
* Martha Stewart: felted rock paperweight
* see some here.
you can also
sew,
knit,
or crochet
your own covers.
i knitted covers
by knitting in the round
with simple
increases
and decreases...

i covered
all sizes of rocks.

then i put them
in the washing machine
in a delicates laundry bag
and washed them a few times
while doing my
weekly laundry.

you can mix
felted
and unfelted
rocks.

for more
inspiration,
check out
one of my favorite
blogs:
everyone needs
a rock.

enjoy
your rock.
enjoy autumn.
August 28, 2007
green home projects

i'd like to welcome another guest poster to sew green!
kyra . she commented on a post a while back and we began chatting - once i found out what she did for a living i asked if she'd want to write a guest post for us. and lucky for us she said YES. she's also an amazing photographer - as her flickr stream will attest. with out further ado - here's kyra's post ::
With the long weekend coming up and summer swimming by ever so quickly, the time is ripe to tackle a few of those household projects. While you’re making plans, here are a few ways to ensure a healthy and conscious home.
o Visit an architectural salvage yard. Not only are you reducing demand on the myriad resources required for harvesting, manufacturing, packaging and transportation, these treasures are often a huge bargain and offer unique character to your space. *Don’t forget your tape measure and a thorough list of needs, or you will likely be so overwhelmed with the assortment of pretty elements that you will forget what you came for {like me}.
o Think local. For all the same reasons that you try to eat locally grown food, you should look for locally harvested and manufactured materials. Consider what types of resources have a local industry and make sure that your products actually come from there. Great candidates to look for include concrete, brick, stone, wood, tile, and even carpet if you’re in the Southeast United States. This does get tricky with a few materials known particularly for their sustainability, such as bamboo and cork. While bamboo has a great green reputation, remember that it is traveling a very long distance to arrive in the US.
o Ask yourself how long it will take for a product to regenerate. This is partially where the aforementioned bamboo and cork get their fine reputations. They can grow a new product in ten years or less. Other great examples are sisal, wool, cotton, and agriboards. Agriboard are composite wood-like products made form agricultural byproducts such as wheatboard, sunflower board, Dakota burl and Kirei {so lovely}! In addition to their rapid renewability, these each add a soft natural elegance to any atmosphere.
o Seek products containing recycled materials . Do you sort your recyclables at home? Take advantage of the next link in the chain! Decking, cotton and cellulose insulation, ‘pop-bottle’ carpet, and glass tile are common products, and don’t forget about structural steel, concrete, brick, roofing and even drywall that likely utilize post-consumer waste as well.
o Don’t forget to insulate. Among the many, many measures to take for conserving energy {see the tip of the iceberg below}, proper insulation is key. Any opportunity you get to stuff some extra buffer in any wall space, take it. Look for cracks around windows and doors and pay attention to drafts and seal them with caulking to reduce air leakage. Cotton and cellulose insulation are two great non-toxic, sustainable insulations that won’t leave you itchy, coughing, and are made of rapidly renewable and recycled materials. If you are adding new exterior walls, structurally insulated panels (SIPS) and insulated concrete forms (ICFs) offer a preferable alternative to wood studs and insulation. SIPS are a core of foam insulation sandwiched between two layers of oriented strand board and ICFs are a combination of polystyrene foam and concrete. Both offer more uniform coverage and go up in a jiffy (pick your pro wisely).
o High Performance in a nutshell. Essentially this means utilizing efficiency to the max. It’s important to incorporate these concepts early in your design. If you truly are starting fresh from the ground, orient your home to take advantage of the sun’s energy (also known as passive solar). Use high performance windows, solar panels, energy efficient lighting (fixtures and bulbs), appliances, and choose low-flow faucets and toilets . Opt for light colors when replacing a roof, walkway, driveway, or other solid groundcover to lessen heat absorption.
o Clean air inside and out: did you know that despite strict air quality regulations for the outside atmosphere, there are none for interior air quality?! Adhesives, sealants, paints, plastics, and composite materials among others can off-gas at room temperature, releasing harmful toxins into the air. These off gases are commonly referred to as volatile organic compounds (VOCs). Thanks to industry improvements, a plethora of alternatives exist which are considerably healthier. Some labels volunteer the VOC content of their products right on the packaging but many do not. For complete information, ask for a Material Safety Data Sheet (MSDS) or research the product online. The lower the VOC content the better; solvent-free, water-based and formaldehyde free are good catch phrases indicating some reduction in chemical content (but always read the rest of the label!). If a manufacturer will not disclose the information, there is probably a reason. , Greenseal is a great website listing many products who have earned their approval for acceptable components. Watch closely for urea-formaldehyde in composite wood and other agriboard products. Phenol formaldehyde is less likely to off-gas at room temperature but if you can avoid it, do.
Overall, it’s about making decisions that work well with your project. Planning is essential, and it’s good to know that some products may not be readily available at your local hardware store and they may need to order it for you (and you should hound them until they do). Two favorite reference books of mine are Prescriptions for a Healthy House by Paula Baker Laporte , Erica Elliott, and John Banta and Green Remodeling by David Johnston and Kim Master. Now sit back and enjoy your new space with a smile!
-- Kyra is a sustainability consultant living and working in the beautiful Front Range of Colorado. When not assisting design teams with creating environmentally sound structures, she is either making things or playing outside.
thanks kyra!!
June 12, 2007
Water World! And I'm not talking Kevin Costner...
So one of the many of the things that we have been doing over here at SG is trying to create a framework around what it is that we are doing. Now this frame will sometimes compliment what is going on inside and sometimes it will just be a little thing that you, the Sew Green reader, should take an extra second to ponder for the month. This month we are starting (albeit it a little late) on the topic of:
Water
It’s everywhere. We need it to survive. We get headaches if we don’t drink enough of it a day. Our food needs it to grow and our planet needs it to be in balance. It is the life force from which all things come. So it’s pretty damn big isn’t it?
We are hoping that this month you can take a second and observe your own water usage. Be conscious of what you’re doing. Maybe you’ll change it, maybe you won’t. We aren’t asking for anything but for you to just be open to consciousness. For our part we are going to bring you some articles that talk about virtual water consumption, perma culture pools and me? I’m going to give you 10 things that if you start them right now, not only will you be more conscious of the water you use, you will save money and water. Two things you can never have enough of in this big bad capitalist world we live within.
10. Carry your own water bottle. There is much talk about the benefits of drinking water. So do it in your own bottle and save money and the environment! Not only that but try to drink out of something that isn’t a Nalgene or a plastic bottles. Though Nalgene bottles are better than most they still off gas like any other plastic – just slower. Try a Sigg or like me, a mason jar with a lid. A little heavier but safe as can be!
9. Repair dripping faucets by replacing washers. If your faucet is dripping at the rate of one drop per second, you can expect to waste 2,700 gallons per year which will add to the cost of water and sewer utilities, or strain your septic system! It’s simple – check it out here, here or here. Just tightening the faucet isn't helping your problem so take the hour and save your planet!
8. If it’s yellow… you remember the adage don’t you? It’s valid all the time not just in drought conditions. Is it a little gross? Yeah sure it is… but the amount of water you save is amazing. Tally it for a week. Many old toilets flushing use about 7 gallons of water! Some of the newer toilets (80s and 90s) use 3.5 gallons to flush. If your landlord is super diligent then maybe, just maybe you own a toilet that uses only 1.5 to flush. On the average though a household can go through 147 Gallons of water just in toilet flushing alone! That’s almost 1800 Gallons a year! Don’t have a landlord who wants to replace the toilet? Can’t afford a new one? Easy – drop a brick in the tank and that cuts out about a gallon. Two bricks knock out two! Put the bricks in a ziploc bag or other durable holder. Bricks break down and need to be contained in order to avoid plumbing problems. Look for displacement containers at your local hardware store.
7. Don’t shave your legs/face/arms/whatever while you shower. It took me a LOOOOONG time for this one. If you can only do it while you are in the shower then turn off the water while you do it. Those five minutes of water (about 300 gallons a month) that you saved you can indulge in somewhere else.
6. Take a bath instead of a shower. Fill the tub 1/3 full and then scrub a dub dub! Use the final burst of showerhead time to rinse off. Done and done!
5. Use your gray water on plants! Fill a basin full of water for your dishes instead of keeping the water running. When done, take basin outside and water plants. No plants outside! Hang a planter box off one of your windows and plant bee loving flowers! The bees need the help right now!
4. Water your plants deeply and not frequently. This sort of thing promotes drought tolerance and creates deep roots. Also get a soaker hose for larger yards. This cuts down on over-watering and helps get water quickly to the area that needs it the most.
3. Never pour water down the drain. Ever. Where can you use it? There is another place for it. In your toilet, in your yard, in your houseplants… you get the idea.
2. Wash your hands in a basin. Fill up a small bowl and later your hands in that instead of running water.
1. (And since I’m a fashion diva) Wash your clothes in cold water and hang dry. Yes, even those cashmere sweaters! Turns out they don’t need dry-cleaning at ALL! Nope. Cashmere is just like the hair on your head. Washing it in cold with some Johnson’s baby shampoo and laying flat to dry is the best way to care for your cashmere (or any wool) sweaters. There are hand washing instructions here, here and here (use cold not hot water, color safe bleaches or environmentally safe detergents.)
I hope that this inspires you just a bit to look around your water. If you find that it is all too much – then just tell someone else to read this article. Maybe they will try one of these items out and save just a dash more water than was saved the month before. After all, every drop counts.
May 15, 2007
Laundry Soap DIY
 Grate 1 bar of pure soap into a pan and cover with enough water to dissolve. Dissolve gently stirring continuously.
 Fill the bucket with hot tap water, stir in the melted soap and a cup full of washing soda.
I found that the melted soap and washing soda didn't quite mix well so i returned it all to a large pan and stirred on a low heat until it was. Leave it to cool and it looks like this:
 Gloopy and blue!
I've been using it for a few weeks now and it works, my clothes come out clean and they smell fresh unlike with the Eco friendly laundry liquid that gave my laundry a funky smell.
From one box of soap and a packet of washing soda i will get 4 buckets full of homemade laundry soap, each giving around 25 washes giving me an average total of 100 washes. Needless to say, i won't be buying laundry soap anymore. It's probably best to add this laundry soap in the drum with the clothes if you have a front loader like i do, i found that there was some left in the drawer of my machine.
I'm also using the washing soda to wash my dishes, reducing my packaging further. 1 tbsp is enough for a sink full of water. I'm having a hard time convincing my husband that he doesn't need bubbles to get the dishes clean though. To try to combat this i have poured some of the washing soda into an old jar and put in a spoon with a label saying '1TBSP ONLY', i wonder if it will work?

