Showing posts with label simplicity. Show all posts

December 16, 2010

Five Easy Ways to Reduce Waste This Holiday Season

Hello Sew Greeners! I'm sure you're all in the midst of your busy holiday preparations. I know I am.

We all know this season can be stressful in a whole slew of different ways. One of the things about the season that stresses me out is trying not to lose touch with my sustainable living goals as the madness of the holiday season ramps up. My husband always reminds me to go easy on myself because the world doesn't necessarily make it easy for us all to do the right thing. Nevertheless, here's my list of five easy ways I've reduced the amount of waste my festive season generates. Please feel free to post your own tips in the comments!

1. Give the Gift of Nothing.


Nothing tangible, that is. One of the best gifts my best friend Kat ever gave to me was agreeing to read one book of my choosing. She put no other limits on it, saying I could choose fiction or non-fiction, heavy or light, trashy or deep. Whatever I chose, she promised to read from cover to cover. After much thought I asked her to read Animal, Vegetable, Miracle by Barbara Kingsolver. That book changed the way I felt about food and inspired me to make small changes in how I ate every day, and I thought it might do the same for her. It did! Seeing her start to patronize local farmers' markets and even can her own spaghetti sauce and apple sauce in the fall, was amazing and exciting for me. The gift lasted for months! And if you choose a book that's available through the local library system, no one needs to buy anything!

2. Give To Someone Who Really Needs It.


This year my brother, sister-in-law, husband and I all agreed to give to charity instead of giving each other gifts. I'd initially suggested that we all donate to one charity, but my brother had the genius idea of choosing a different charity for each person, so we could have the fun of picking something uniquely suited to each of us. And it keeps up the all-important surprise factor.

One word of advice about this kind of gift giving. If you're going to pitch this to family members or friends, I'd encourage you to do it as early in the season as possible. Some people buy gifts early, and nothing breeds resentment like you swooping in with your awesome non-gift gift ideas when they have something wrapped up and stowed away for yo already.

3. If You Do Give a Gift, Use Reusable Wrappings.


I've been an enemy of wrapping paper for years, and this has led to me sewing my own fabric gift bags. These are the easiest things to sew, and a great beginner project. All you need is a rectangle of fabric. Hem one side and then fold the wrong sides together and sew up the other three sides. Turn it right side out and pop your gift in there. You can tie it closed with reusable ribbon or twine and attach a gift card to the ribbon. It takes almost no time and the bags can be used over and over again. I always buy Christmassy fabric when I see it in the fabric section at second hand stores, regardless of the time of year (you'd be surprised what shows up in July!) I take it home and wash it and stash it away for gift giving season. I also try to keep some of my bags every year so I don't have to make all new ones the following year. but people seem to like to keep them to give their own gifts in, which is fine too!

(My aforementioned friend Kat posted my more detailed fabric gift bag tutorial on her blog if you need a bit more coaching!)


4. Buy Local Everything.


Most people have to buy holiday specific things this time of year, whether they're giving piles of gifts or not. As tempting as it is to order everything off the internet, buying from a local store or local craft sales or local artists or local farmers, means that you control how much packaging your gift comes wrapped in. You can also ask questions about how things are made and shipped, and as a bonus you're supporting your local economy and the people in your community who depend on it. One of our local farmers' markets has a special Christmas market every year where you can buy both gifts (soap, jewelry, quilts etc) and food. I came home this year with a big bag of locally grown carrots, beets, Jerusalem artichokes, honey, and cranberries.

5. Clean Out Your Pantry.


This one only really occurred to me the other day. I had done a hurried, frazzled grocery shopping trip and came home feeling overwhelmed by all the stuff I still need to do as the holidays approach. When I started putting my purchases in the fridge and pantry, I realized that not only did I have minimal space in the fridge and pantry, I also had no idea what was taking up all that space in the first place. I got so agitated my husband had to put everything away for me.

The following day I got up early and went to work a few hours before I normally begin my days. This, plus skipping my lunch, allowed me to come home three hours earlier than normal. I spent those three hours cleaning out the fridge and pantry cupboard. I dug deep and found that I had bulk items in the pantry that I'd forgotten about. Everything got organized and put into my collection of glass jars. Now I am completely aware of what's available to me as I start my holiday food prep. There will be no over-buying and wasting of food. Plus I know what I need to use up and I can do that before it goes stale. And it had the added bonus of making me feel so much calmer about my kitchen in general. Win, win.

J.

April 15, 2010

baby epicure

tastybanana
scarfing down a dessert of bananas

There's nothing as much fun for someone who likes to cook as an appreciative eater. The Little Pea is a loud, lip-smacking, spoon-waving, groaning and mmm'ing appreciative eater - I've never cooked for someone so enthusiastic about their three squares a day. She makes it easy to be adventurous in the kitchen.

I've really enjoyed making baby food for her, and thought I'd share a little of the fun with you all. First, a couple of books that we love:

Simply Natural Baby Food, by Cathe Olson
Feeding Baby Green, by Dr. Alan Greene (love love love Dr. Greene!)

The first book is a great little cookbook for babies and toddlers. We were pleased to realize that you can feed a little baby just about anything (natural), as long as you prepare it properly for her. This book taught us how to cook all sorts of veggies and grains to make them safe and appealing for babies who are just starting solids, and well into toddlerhood.

Dr. Greene's book is one of those big advice books written by a pediatrician, but he is very down-to-earth (and all about saving the earth), and we were inspired by his adventurous approach to feeding little ones.

Since babies can't have salt, and since we don't tend to like our vegetables smooshy, the little one isn't eating much of our table food yet. But boy, is she eating diversely. We found that it's fun, easy and cheap to steam up a big pot of vegetables, puree them (when she was tiny) or cube them (so that she can practice feeding herself) and then use ice cube trays to freeze them in individual portion sizes. That makes it really easy to give her a very well-rounded meal full of interesting foods, with very little work.

I have to say that making your own baby food is also far cheaper than buying it at the store, and you get a lot more variety too (not to mention the ability to serve everything organic). We found that depending on the particular ingredients, home-made baby food is anywhere from one-third to one-tenth of the price of store-bought. And of course there's the environmental benefit of less consumption, packaging, transport, production energy, etc.

My partner was particularly inspired by Dr. Greene's book to try to feed our little one something from all 21 plant families before she turned one. The ones in italics are plant families she hasn't tried yet:

1. Mushrooms
2. Amaranths - spinach, chard, beets, quinoa
3. Umbrellifers - carrot, fennel
4. Cruciferous vegetables - broccoli, cauliflower
5. Bromeliads
6. Composites - lettuce (swiped from the garden beds)
7. Bindweeds - sweet potato - the all-time favorite!
8. Gourds - butternut squash
9. Heath plants
10. Legumes - peas and all sorts of beans
11. Lilies - onion
12. Woody trees - banana
13. Sesames
14. True grasses - oats, brown rice
15. Rosy plants - apple, peach, pear, plum
16. Citrus - lemon
17. Nightshades - peppers
18. Grapes
19. Laurels - avocado (best lunch on-the-go)
20. Myrtles
21. Loosestrifes

Hm, seven plant families to go. Perhaps we'll be having mushrooms, pineapple and tahini for lunch tomorrow. Yum!

October 8, 2009

keeping the harvest

sweetpotatoes

Fall harvest time is just about here! The nip in the morning air, and the new crop of greens, lettuces, sweet potatoes and cruciferous vegetables at the farmer's market and in our garden get me thinking about all the good things I want to cook this fall. I'm also getting a bit wistful already thinking about how much I will miss the fresh veggies this winter, and scheming about how to put some veggies up for those thin months.

Last week we got an inspiring email from the wonderful farmer who runs our CSA, Wild Onion Farms, about easy ways to save some of the harvest for winter. Here's what she said:

"Here's a few tips on how to easily put away some real fall food for later, without any special equipment or a lot of long sweaty hours in the kitchen:
  • I've cured the sweet potatoes and butternut squash for storage already. If you want to stock up on these, the squash will last another 1-2 months, the potatoes will last 'til spring. Store them in a cool, dry, dark place (50-60 degrees is ideal). A chilly basement or garage is good. If you want to extend the butternut squash, go ahead and bake up a huge batch, put it in freezer bags, and stash it away in your freezer.
  • Basil can easily be frozen: chop it up in a food processor and throw in little bags in the freezer, or go ahead and make a big batch of pesto and freeze that in individual portions (omit the cheese, it doesn't freeze well).
  • Peppers, hot or sweet, can be chopped up, tossed in freezer bags, and chucked in the freezer. Nothing more. They won't retain their texture, but it won't matter if you're adding them to winter soups, stews, or sauces.
  • Okra can be stashed away by cutting it up into slices, dip it into boiling water for a minute, drain, pat dry, and pack into freezer bags or containers.
  • Cooking greens of any sort are really easy to freeze as well. Wash, chop, blanch in boiling water for a minute. Drain them, squeeze any excess water out, and pack away into the freezer.
  • You can also cook up large batches of any of your favorite dishes, from garlicky greens to grilled eggplant, and tuck extra portions away in the deep freeze to enjoy months from now.
  • Most root vegetables (beets, carrots, radishes, turnips), once you've removed the tops and placed them in plastic bags in the fridge, will last for months."
- Elizabeth Haarer, Wild Onion Farm (shared with permission)

I've been working on some of these easy harvest-extenders, and thought I'd share some of my favorite recipes, too.

Last week I made up a batch of Vietnamese-style hot chili sauce with the hot peppers in our garden, using this recipe. I had plenty to make a jar for us and share a big jar with my sister. This would make a great gift for someone who likes to cook and loves hot food.

Here's a link to my method for making big batches of savory vegetable stock - it's a great way to use up your veggie odds and ends, and makes a delicious, hearty, nutritious broth for winter recipes.

Elizabeth mentioned garlicky greens in her email, and it got me thinking about this wonderful recipe from my dear friend Anne, who loves to have cooking (and eating) parties with friends. If you're not from the Southern U.S., you might not know how wonderful collards can be -- and even if you are from the south, you might have only had them cooked to death with a hamhock. This is a great way to find a new (and vegetarian) appreciation for a humble green leaf:

Sauteed Collards (or any other hearty green you like)

Ingredients: 1 bunch of collards for 2-3 people
4-6 garlic cloves
1/4 cup olive oil

Rinse collards and remove the ribs from the middle of the leaves. Then stack the leaves in a pile and roll them up like a cigar. Then thinly slice them.

Peel the garlic and slice each clove in half long-ways unless really large, then slice into thirds.

Heat the oil over medium heat. When hot, add the garlic and cook until just getting golden, and remove. Do not let them get brown or they will make the oil a bad (burnt) flavor. Now turn up the heat to medium high and add the collards with whatever liquid clings to the leaves. Stir them with a wooden spoon or tongs, being sure to bring up the ones from the bottom so everything gets cooked. I like them crunchy, but you can cook them to your liking. Just before serving, add the garlic back in and stir them up.

I like to serve these with plenty of freshly ground black pepper, and some apple cider vinegar on the side for purists. Have fun cooking up your harvest this fall!

August 13, 2009

adventures in green babyhood

bootie2

Being a professional environmentalist as my day job, I always figured that when our baby came along, I'd just naturally be the greenest parent in town. No stress - I'd just know which products to buy or avoid, how to find them, and I'd have boundless energy to explore the greenest ways to raise our Little Pea. Ha, ha. I do know some wonderful parents who fit that description, but despite my best intentions, and my own expectations, I am sadly not one of them.

But I do really, really care about sustainability, the environment, and in particular how pollution affects children's health. So I am struggling to make this green parenting thing work. For those like me, here are a few things I've been able to make work. And for those who fit the green parent profile better than I, please please share some of your suggestions in the comments!

breastfeeding
Breastfeeding is absolutely the most affordable and sustainable way to feed a baby, not to mention the healthiest. The decision to breastfeed is probably the most important step we've taken in terms of sustainable babyhood. I realize that there are many reasons that some families are not able to breastfeed, and nobody should feel guilty if they can't, but I am very grateful to be able to feed the Little Pea this way.

Baby formula is a multi-billion dollar industry in the United States, is typically made from soy or cow's milk. Soy and dairy are both huge agricultural industries with all the associated pollution and energy problems that you already know about, not to mention all the packaging, shipping and waste that buying such a product entail. How wonderful that our bodies almost always make this product unnecessary!

gifts
People always want to give you baby gifts, no matter how much you protest or try to avoid it (at least, I tried to). I didn't want people to buy things we didn't need or want, or that contained toxic plastics, etc. But I also found it very hard to say to people, "Don't get anything, but if you do, you have to do a lot of research and spend a bunch of money to get us something that meets our values."

Thankfully, I have an awesome sister, who organized a green baby shower. She asked people to give us hand-me-down or hand-made gifts, or if they bought something, to please consider organic and non-toxic products. It worked beautifully. Many of our friends and family gave us copies of their favorite books from their childhood, something wonderful that they made, a big box of hand-me-down clothes from their kids, or something great they found at the thrift store. We also got lots of organic blankets, burp cloths, etc. I could never have asked for this (there's something too Puritanical about me), but my sister did a wonderful job with it.

stuff
Before the Little Pea was born, we got some great advice from a friend: to never, ever turn down an offer of hand-me-down baby stuff from friends or family. As a result, we have more baby clothes than one baby could ever wear, and we've had to buy almost nothing. Friends have given us a crib, co-sleeper, stroller, high chair, tub, baby seats, toys, books, blankets, towels... it's amazing how many times these things can be used, by so many babies, before they ever begin to even show any wear. We are lucky to have a big community of friends with little ones. Even if you don't, because your family is small or you're new in town, you can get much of what you need from thrift and consignment stores, saving oodles of money and reducing a lot of waste.

diapers: We've covered this area a lot already on Sew Green -- check out earlier posts on diapering here and here.

I am really interested in other folks' strategies for green babyhood. And I'm particularly looking forward to learning more about stuff like making baby food, toys, and how to communicate your values to kids' friends and grandparents. No parents are born knowing how to do all this stuff, and supporting each other has been critical for me - thanks to all of you for sharing what you've learned, too!

July 9, 2009

dish towels


I had always wanted to give up paper towels, but found convenient reasons to keep on buying them. My cloth dish towel collection was accumulating, and I was using them, but only for non-staining messes so not to dirty the towels. When I had a baby I was expected to enter the world of disposable everything. Troubled by the idea of creating excess trash, I made the controversial choice not to use disposable diapers, much to the surprising disgust of almost everyone. Who knew people would be so opinionated about me wanting to put cloth diapers into a bin, instead of disposable? I signed up for the service that dropped off 80 clothes a week, and picked up the dirty ones. Highly recommend to any new parent. Getting 80 cloths a week, that I didn't have to launder myself was one of the greatest things ever. I used them for everything, from spills, spit-ups, breast pads [not attractive but effective around the house], and of course, diapers. The best part was never worrying about running out, or having to go to the store to pick up a bulky case of diapers.

So then a funny thing happened, I ran out of paper towels and didn't notice. When I finally got myself out to the store, baby in tow, I cringed at the fact of lugging the groceries, baby, and towels up to my second floor apartment. It sounds petty, but as a single mom I have to carry everything myself, and when I have a large car load I feel like that farmer at the bank of the river, with the chicken, the bag of seed and the wolf. It's a balancing act that can't end with leaving the baby unattended on either end.

And now I use my cloth towels for everything. For staining messes like pitting cherries, or gross baby messes, or even just to eat an apple without dripping juices. And when they are dirty they get thrown in the wash along with our clothes. My towels may not be in pristine condition, they have stains and holes, the edges are getting raggedy, but I save money, time, armloads, landfills and hope I am setting a good example for my little plum. I am waiting for that day when she turns to me and says, "Can you believe they make towels out of paper and people just throw them away?"

A few tips:
  • Put a bin, basket or bag in the kitchen to put used rags- I use a bag that hangs over a metal storage rack.
  • If you have fancy towels, also buy a cheap set of plain one for the really messy stuff. I like the flour sack towels from Target- either white, or organic.
  • Old shirts and worn out clothes can be upcycled into towels. There are plenty of instructions out there, or just cut & hem.
  • If you do make your own- don't spend too much time on them or you will be less likely to use them. But don't stick with plain ones if that is not your style.
  • Store them in a convenient place where they are easy to grab. I keep a few hanging over a horizontal paper towel holder, and the rest folded in a kitchen rack, and some smaller ones in a pretty bowl.
Cheers!

*towels are a mix of Ikea, organic cotton from Target & vintage

September 5, 2007

camping, a little simpler

wayah bald 3
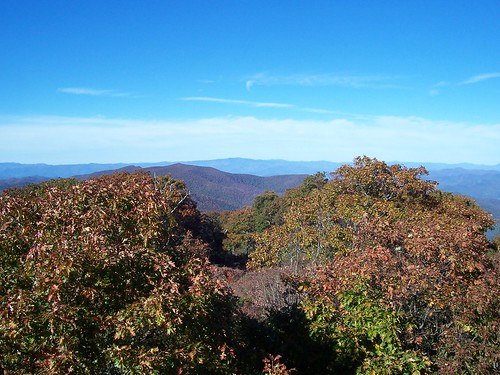
wayah bald, north carolina, october 06

One of my favorite ways to break out of the daily routine and really relax, is by going camping. Whether we trek into a wildnerness area or just hang out in a drive-in campsite, I love to cook outside, watch the stars and sleep to the sounds of owls, crickets and frogs. Most of all I love waking up to the sounds of the woods, and having breakfast to a loud chorus of morning birdsong.

We love to go backpacking, when you carry everything you need on your back, and hike for a few days from campsite to campsite, but as I've developed arthritis, I've been working hard to lighten my pack. The thing that's made the biggest weight difference for me has been food. It seems we always carried more than we needed, or packed things that would go bad or get mushy before we ate them, or just otherwise wasted weight and space in the packs. What I've learned about lightening the load has also made our regular camping a lot easier, too. I am always amazed at the huge loads of stuff - especially food-related stuff like huge gas grills - that we see people bring to campsites.

Two summers ago, I scoured the library for books on backpacking food, and found two in particular that taught me a lot: Backcountry Cooking, by Dorcas Miller (published by Backpacker magazine), and The Trailside Cookbook by Don & Pam Philpott. If you're a backpacker, I recommend both highly! Here's some of what I learned from these books:

tools

You don't need to bring lots of plates, cups, pans, etc. You need four tools for cooking and eating on the trail:
- a small, simple, lightweight stove (even if you camp in campsites, a stove saves tremendous amounts of wood that you'd otherwise need for cooking. Fires may be allowed, but they're terribly damaging to the landscape and to air quality).
- one set of nesting cooking pots (a set with two small pots, one lid and one multi-use handle works really well for us, but most times you probably just need one pot).
- a small- to medium-sized tupperware container with a tight-fitting lid (it's a storage vessel, a bowl and a plate all in one).
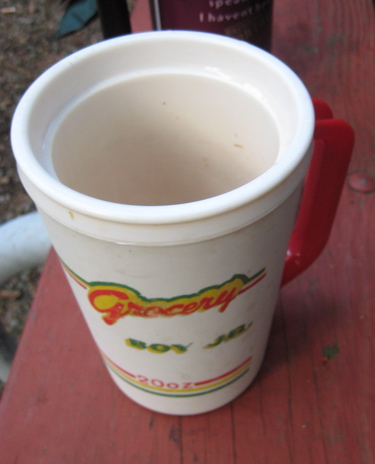
- a 20-oz insulated thermos mug. This is the most important tool of all!

If you have these items, you can cook just about anything on the trail - you can even bake bread. The thermos mug is your drinking cup, soup bowl, and food rehydrator. It keeps a frosty beer cold, and a cup of coffee hot. In the dead of winter, you can stick it inside your jacket while your dinner rehydrates, and it warms you up before you even have your soup.

There are lots of other tools you can get, but I think these are the most important - and they're widely available used in thrift shops. When you pack food for your camping trip, plan by meal, and pack one breakfast, one lunch and one dinner serving for each person for each day. Don't forget dessert! Besides these, you need enough water per person per day, and enough trail mix or granola bars for each person to keep you going on long hikes. Don't pack more than that, though - it's just extra weight to carry, and usually in the end, waste.

I also like to make up a spice kit, with small containers full of favorite spices for the trail (film canisters are very useful for this): basil, garlic, Chinese 5-spice, cayenne pepper, olive oil, fresh ginger, etc. Throw in some take-out packets of soy sauce, wasabi and salsa, and you're ready for anything.

rockyknob4
my most treasured possession

recipes

These are a few of my most favorite camping recipes. Many of these things (like instant grits) I'd never eat at home, but somehow after a long day of hiking, they taste divine. Especially when followed with cookies.

breakfast: powered-up oatmeal
(from Backcountry Cooking)

Before you go, mix up this oatmeal additive in the food processor at home. It makes a delicious bowl of oatmeal that gives you lots more energy for the trail. I even eat it at home sometimes:
- 24 small dried apricots, quartered
- 16 dates, quartered
- 1 cup wheat germ
- 3/4 cup sliced almonds
1 1/3 cups powdered milk
Blend in food processor until ingredients are finely chopped. Store in the fridge.

When you go camping, pack the oatmeal additive in individual servings of one heaping 1/2 cup. On the trail, add the mix to two packets of plain instant oatmeal, and about 1 1/3 cup boiling water. Make this in your big thermos cup!

lunch: tomato-almond salad
(from Backcountry Cooking)

1/4 cup couscous
3 Tbsp toasted almonds, chopped fine
3 Tbsp chopped sun-dried tomatoes
1/4 tsp dried basil
1/8 tsp garlic powder

Before you go, mix well and pack into 1/2 cup servings (per person - you can combine as many as you need for your group). On the trail, after breakfast, put all the ingredients into your secure tupperware container with one generous cup hot water to each 1/2 cup salad mix. At lunchtime, fluff it up with a fork and serve.

dinner: cheese grits and rat-tat-tooey
(if you are car-camping and can bring a cooler) - makes 2+ servings

- 1 small onion
- 3 cloves garlic
- 2 small hot peppers
Before you go, place these in your food processor and chop finely, or just chop by hand. Bring them along in a tightly-closed container in the cooler.

-1 Tbsp olive oil
- 1 cup chopped tomatoes
- 2 soy-sage (or real sausage) links
- 2 oz diced cheddar cheese
- 4 packets of instant grits

On the trail, saute the onions, garlic and peppers in the olive oil until tender. Add the tomatoes and whatever spices you like. I use Ozark spice and cayenne. Once the mixture is hot, cut up the fake (or real) sausage into small pieces and toss into the sauce to simmer for at least 10 minutes.

Place 2 packets of grits in each person's thermos mug. Add 1 cup boiling water to each. Stir well and let sit for about 5 minutes. Add cheese and stir well. Spoon some of the rat-tat-tooey on top and you're all set!

I think the secret to camping and backpacking more simply is to plan carefully, and eat well. Rain, stinky socks and hat-hair don't seem to matter as much when your belly is content.

100_1566
sunset on the little tennessee river, august 06

June 2, 2007

Links for your green fingers


Mount Iwakiyama was hard to say but the American badger knew he'd adjust. Collage on postcard, Gracia Haby, 2007.

A little over a month ago now, as I read the weekend papers several days after said weekend (are you perhaps sensing a pattern here?), I came across a reference to Sew Green in an article by Andrew Stephens and John Bailey, Back to the future (M, The Sunday Age, April 22, 2007). An article all about becoming a little more green. A three page spread on making your life a little simpler, and in short, a little more like your Nanna. All hail a return to the days when a "commitment to thrift, conserving resources and canny housekeeping" was the norm. Small ways in which you can make a difference today, from buying products with less packaging, making your own all purpose cleaning products, relying upon the virtues of vinegar and bi-carb soda in place of a chemical nasties, a different chemical concoction for each room and surface in the house. Vegetable patches, string bags, walking, and generally using less, yes, that's something we all can do. And should your green thumb have deserted you, leaving you with turnips and radishes fit only for a mouse, why there are always plenty of other green alternatives to living a cleaner, greener, simpler life.


He travelled for some time without incident. Collage on postcard, Gracia Haby, 2007.

So, here are some of the green links found in that article for you all to discover at your leisure -

Fresh Green Clean
Safer, healthier and cleaner indoor living spaces
"Learn how to clean effectively and efficiently with methods that don't cause harm to people or the planet".

Plump Organic Grocery (in Yarraville, Victoria)
"We stock quality organic and bio-dynamic produce including fresh fruit and vegetables, dairy products, wine, beer, bulk grains & cereals, soy products, meat, bread, eggs, juices, and much more."

Green Living Australia
All about living a "Green" life, starting in our homes.

Estring bags
Don't cost the earth.
(I've just ordered three long handled string bags in Ocean Blue, Pink Cherry Blossom and Fresh Green, and can't wait for them to arrive via snail mail.)

Sustainability Victoria
Find tips for the home and brush up on your facts while you're at it (Wind energy - myths and facts).

And what of Sew Green? Why, we're mentioned here: "Younger people tired of throwing away their money on poorly made mass-produced clothing and fabric products are discovering the rewards of handicrafts and clicking on to sites such as sew green.blogspot.com and Bee Green to learn how to make soft toys, darn socks and whip up a new blouse to wear to work".


We thought we knew a great deal, but really we knew nothing. Collage on postcard, Gracia Haby, 2007.

Now I'm off to get my hands on a copy of Cradle to Cradle: Remaking the Way We Make Things by chemist and process engineer Michael Braungart and architect William McDonough, to read about the big things that can be done, to discover how buildings can be built like trees, like nature...

"Imagine a world where human industry operates exactly like a blossoming cherry tree: Every factory, every building and every product is as giving as a cherry tree with its flowers.

Imagine a world where our buildings are like trees: They cover their energy needs by harvesting solar power, produce food and oxygen, create habitat for other species and change with the seasons.

Imagine a world without pollution and waste: Products are made from materials that are beneficial for humans and their surroundings."

Believing that it is not simply enough for our actions to be 'less bad', to be 'less harmful', to the environment, Braungart and McDonough advocate, and practice, that there should be no waste whatsoever... that all waste should equal food. That all waste should give back to the biosphere. Just like trees (There's room for a book review on that one, and indeed many books currently on the market. Any takers? Care to pen a little book review on a green text you are currently perusing, Shari, Louise, anyone?). Oh, dear. Must dash, I fear I've bitten off more than I can chew with this one! I'll leave you to dig around further here and here.


Coins in every fountain. Collage on postcard, Gracia Haby, 2007.

In lieu of any green photos, I have littered this post with several of my recent collages... collages of animals seeking new homes in a changing environment. I hope you like them.


They are discussing environmental policies. Collage on postcard, Gracia Haby, 2007.

May 15, 2007

Laundry Soap DIY

I've been buying Eco friendly laundry liquid for a while now but still wanted to look for an alternative as it's not cheap stuff and i want to reduce my packaging. So, i went out and bought a bucket, some pure soap and a bag of washing soda and came up with my own laundry soap!
Grate 1 bar of pure soap into a pan and cover with enough water to dissolve. Dissolve gently stirring continuously.
Fill the bucket with hot tap water, stir in the melted soap and a cup full of washing soda.


I found that the melted soap and washing soda didn't quite mix well so i returned it all to a large pan and stirred on a low heat until it was. Leave it to cool and it looks like this:Gloopy and blue!
I've been using it for a few weeks now and it works, my clothes come out clean and they smell fresh unlike with the Eco friendly laundry liquid that gave my laundry a funky smell.
From one box of soap and a packet of washing soda i will get 4 buckets full of homemade laundry soap, each giving around 25 washes giving me an average total of 100 washes. Needless to say, i won't be buying laundry soap anymore. It's probably best to add this laundry soap in the drum with the clothes if you have a front loader like i do, i found that there was some left in the drawer of my machine.
I'm also using the washing soda to wash my dishes, reducing my packaging further. 1 tbsp is enough for a sink full of water. I'm having a hard time convincing my husband that he doesn't need bubbles to get the dishes clean though. To try to combat this i have poured some of the washing soda into an old jar and put in a spoon with a label saying '1TBSP ONLY', i wonder if it will work?

March 22, 2007

what's in your wallet?

as i drove home yesterday, thinking about the article in the nyt -the year without toilet paper- that stephanie led to, and hearing more about how we are "consumed with consumption". i thought about cindy's post again. how can i simplify? and i was reminded of a little something i carry with me in my wallet. i found it late last year, while perusing a constant source of inspiration and encouragement - The Center for a New American Dream - some holiday inspiration in the column "Living Green Below Your Means".

"The Thrifty Wallet Buddy" was my stocking stuffer of choice this past holiday. and i really feel that it has made me a more conscientious consumer. not perfect by a long shot. i can't imagine life right now without {unbleached, recycled} toilet paper. but certainly more thoughtful! i want to share it with you too, if you don't know it already. you can download it here.

it wraps your card in "questions to ask before buying" including:
"Can I borrow one, find one used, or make one instead of buying new?"
"Will it serve more than one purpose?"
"Can I recycle or compost it when I'm done with it?"

{i do believe some of these questions will be looked at more closely in posts next week...)

happy friday!

March 19, 2007

the simple life...


when i think about what is the most beneficial action i can take to reduce my impact upon the earth, it would have to be to live simply.

i have been inspired by draft-dodgers, hippies, and back-to-the-landers, ever since i was young. growing up on vancouver island, on the extreme west coast, i bore witness to many of these people as they chose to live what was then considered an "alternative lifestyle." entire families living in handbuilt surfing shacks on sombrio beach, vietnam dodgers living in their cabins or on their boats in some of the many remote coves that are dotted up and down the island. they all shared a common goal, to live simply with nature.

we are trying to do this in our own little way, here in our home smack in the middle of downtown vancouver, the second most expensive city in north america. we made a conscious decision to live with walking distance of work, and most amenities. we have space and light within our home, and finally a teeny, tiny, yard that we can start a small herb and food garden in. the yard is concrete, and because we are renters, we can't really have anything permanant, so we are building containers that will hold the garden above the ground.

as with tracy's quest to have a natural californian landscape around her house, i'll keep you posted on how our garden grows in future posts.

here are some links to my favourite books and blogs on simple living. i treasure them. i hope you will too.

the good life
radical simplicity
the path to freedom
lichenology
handbuilt shelter
you grow girl